
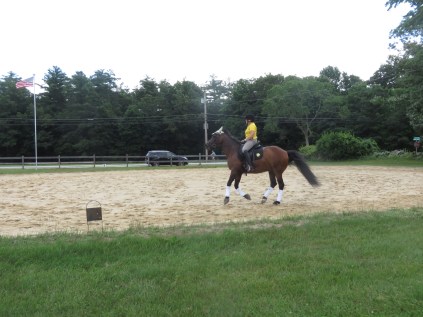
On what was possibly the hottest and most humid weekend of July, Anna and I visited the lovely Linden Woods Farm in Durham, N.H., to clinic with USEF High Performance rider and former Dressage Youth Coach Jeremy Steinberg.
I enjoy reading Steinberg’s column in The Chronicle of the Horse and have the impression that, although a successful competitor, he also truly enjoys training horses to become the best version of themselves. To me, this is an important distinction, because I have found that when you simply enjoy being around horses, taking the time to solve their riddles is handled with a great deal more compassion than when their resistance is perceived as an impediment to reaching a goal. It also challenges you to be more creative in finding solutions, rather than insisting that each horse conform to a set formula. Steinberg’s mentors, Dietrich von Hopffgarten and Paul Belasik, are both regarded as dressage philosophers and advocates for humane, classical dressage training. Finally, Steinberg’s first Grand Prix horse was an OTTB whom he developed himself. As someone who favors riding non-traditional breeds in the dressage arena, I was excited for the opportunity to work with him directly.

For me, the pandemic has been an important period of resetting, reassessing and simply improving the bond with my horses. I wasn’t sure that Anna and I were truly ready for a clinic, particularly with someone of Steinberg’s caliber, but I assumed that if he was as horse-friendly in practice as he seemed to be in his writing, we would get something positive out of the ride.

I wasn’t disappointed!
Steinberg spends a good chunk of his time on the road—his website says that he gives an average of 48 clinics per year—and he explained that the first thing he always considers while watching a horse warm up is their conformation, and how it will impact their work.
Anna is flat in the poll, making it easy for her to lock both there and in her lower jaw when asked to connect. Steinberg’s (simple but not so simple) solution? Transitions. So many transitions.

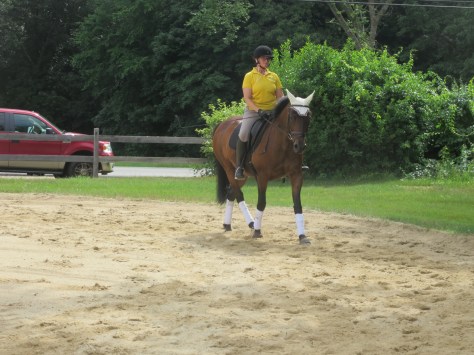
After a basic warm up (during which Steinberg encouraged me to use my fingers and wrists quite actively to massage the bit but to keep Anna’s neck completely still), we started riding trot-halt-trot transitions. Steinberg had me hold my elbows to my sides to stabilize the contact into and out of the transition, and to ride a bit of medium trot into the halt. This is not your show ring halt, but instead a training tool to help encourage the horse to start rounding their back, while yielding the poll and croup. These trot-halt-trot transitions are, intentionally, a bit abrupt.
“Resist the urge in the halt to supple her,” Steinberg coached. “Make the hand and elbow more fixed, so that the contact is less negotiable, and when she comes to the halt the contact is solid.”
Not shockingly, at first Anna braced in her poll and jaw, particularly into the downward transition. Overall, the transitions were somewhat…ugly.

“You are trying to get the horse’s lower back to tip in the hip and pelvis,” says Steinberg. “Think more like a sliding stop. You want the horse to tuck under a bit.”
It was important to not allow walk steps in or out of the transitions (as this will cause the horse to avoid tucking the hip), and for a horse such as Anna (who is not always the most prompt to the driving aids), you cannot be afraid to really pop the whip if she is not responsive.

“Let the horse make mistakes,” says Steinberg. “Let them learn that you are not going to carry them along, and if they make a mistake, be corrective.”
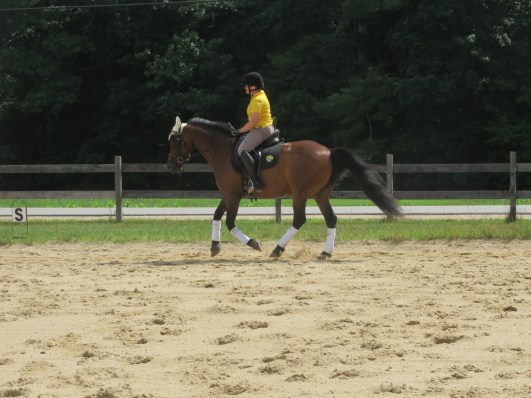
The more transitions I did, focusing on promptness and really rooting my elbows to my sides, the hotter Anna became to my leg and the softer and rounder she became in the connection. By staying steady and tolerating Anna’s tendency to brace (for now), I was increasing the pressure on her to become rounder. The idea is that you are giving the horse a choice—they can continue to resist, which is uncomfortable, or they can choose to become rounder in their back and relieve the pressure.

“Do fifteen of them,” says Steinberg of the transitions. “If the horse braces, do three more.”
This work is meant to be done in many short bursts; we worked trot-halt-trot transitions on each rein, and then moved on to canter-walk-canter. I applied the same concepts to these latter transitions, with the aim of taking no more than one or two steps of walk in between each stretch of canter.
“Almost as soon as you walk, you want to go back to the canter,” says Steinberg. “It is the difference between doing a sit up and a crunch.”
The canter-walk-canter transitions help the horse to lower the croup and lighten the forehand. Steinberg compared the horse to an imperfectly balanced teeter totter—one that has a boulder (the forehand) in front of its fulcrum (the withers), with a rider sitting behind them both.
“As soon as you get on, you can feel this weight,” says Steinberg. “If you can raise the front end, the boulder will roll back. But if the forehand goes down, you have to pull on the reins to stop the boulder from rolling forward more.”
All of these prompt transitions help to create greater activity in the hindquarters, by putting a certain degree of pressure on the horse’s body and not giving them much choice in how to respond to that pressure. In Anna’s case, she needed to hit the wall of the rider’s hand. The true origin of her bracing is not in her jaw, it is in her back– but because I feel the weight in my hands, I (like most riders on similar horses) try to manipulate her back by positioning her neck.

“I want to manipulate the back with transition work,” says Steinberg. “The bracing is [the horse] wanting to stay tight in the back. But if I give in to the brace or try to soften the brace, I never give the horse the opportunity to soften the back.”
What I found quite remarkable was that despite the heat, the humidity, and the pressure, Anna really stepped up to the exercise. The sets were short but intense; Steinberg counseled to ignore the things which were not perfect, and after one or two quality transitions, give the horse a break. Many times throughout the day, after a period of increased pressure for the horse, I heard Steinberg tell the rider to reassure the horse that “mom still loves them”. During a walk break in a later set, Steinberg had this to say about adding pressure for the horse:
“When you are fairly confident that the horse is capable of doing the work—they are a correct mover, appropriate conformation, etcetera—you can put the pressure on,” says Steinberg. “You will sometimes need to be intentional like this, to help the horse really understand how to use their body.”

As the horse begins to understand stepping into the downward transitions with roundness and softness, Steinberg will add a driving aid—perhaps just a tap of the whip—to teach the horse that the roundness comes from the hind end.
“You must take a leap of faith and know that you will have some of those bad transitions,” says Steinberg. “This is how you can offer a correction, and how they can learn. There is a consequence for making the mistake, and this consequence can be just the feeling of the horse hitting the rider’s aids.”
This was by far one of the most productive and positive clinics I have had with Anna, and I have incorporated this exercise into my regular routine with great success. I am so grateful to facility owner Karen Bishop and her daughter Leslie Ann McGowan for coordinating the clinic and opening their property to outside riders despite the pandemic, and to Steinberg for making the trip up from Aiken, S.C.! Thanks, too, to Fay Morrison for coming by to help me with Anna and taking such great pictures of our ride.


