
Lately, my interest in broadening my understanding of various kinds of ground and in hand work has been growing, and I am enjoying learning about ways in which this work could be beneficial to both my training process and developing the relationship with my horses.
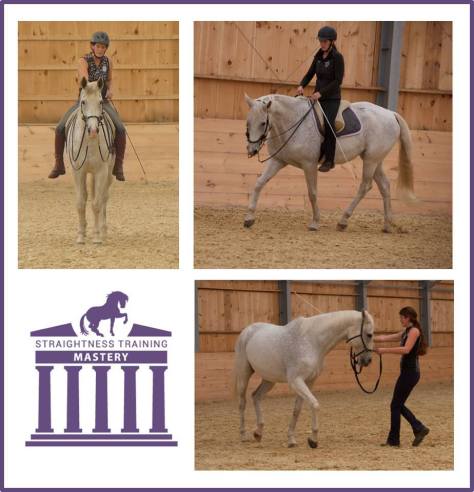
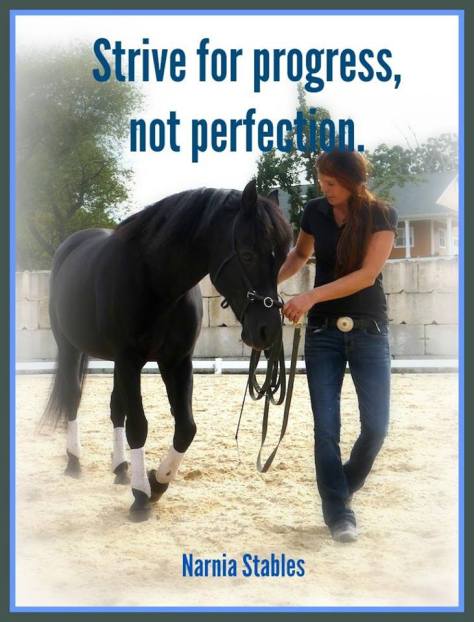
In mid February, I had the opportunity to visit Narnia Stables in Ashford, Conn., the home base for trainer Meg Brauch, who was offering a Straightness Training (ST) clinic with lecture and demo. The clinic’s title was “Using Work in Hand to Gymnastically Develop the Horse”, and photos promoting the event showed many happy horses in various stages of training. I was intrigued and roped my friend Sally into making the two and a half hour drive down for the afternoon start time.
Straightness Training is a system developed by Dutch equestrian Marijke de Jong. After one short afternoon session, I am far from qualified to fully discuss the system or its philosophies in any great length, but I did take away that it is inspired by the work of classical horsemen like Gueriniere, Baucher, and those of the Iberian peninsula, and that it is intended as a systematic and progressive system that focuses on developing a horse using humane methods.
Introduction to ST
Meg provided a basic overview of the ST system, where I recognized some clear areas of overlap with other, better-known-to me, training philosophies. First off, most of the unmounted work is done in a cavesson. I was quite impressed with the design of Meg’s cavesson. In my experience, finding correctly fitting cavessons is a real challenge; they usually do not conform well to the muzzle or sit evenly around the bones of the skull. The cavessons Meg uses are Baroque inspired and have a piece of padded chain over the nose; I am sure that some people will find this too harsh, and I am sure in the wrong hands it would be. But in truth, the shape of the noseband better conformed to the muzzle than most of the off the rack cavessons out there, and the weight of the noseband overall was much less than a regular cavesson. It had a greater degree of adjustability as well; one of the horses Meg used for demonstration later in the afternoon was an Anglo-Trakhener, heavy on the Thoroughbred blood, and his refined face seemed fit well in the cavesson. This style also has an option to fairly easily add a bit, which is a useful feature.
The ST system is based on its “five pillars”: groundwork, longeing, work in hand, riding and liberty work. The first two steps are done in a cavesson with a single line attached, and in these stages, the goal is to teach the horse how to carry themselves. The work in hand, which we were there to watch specifically, is done in a cavesson with a set of reins clipped to either side, as on a bridle. As horses become more advanced, a curb bit can be clipped to the cavesson along with a set of reins, and the horse is introduced to the concept of a double bridle.
Horses which are trained in the ST system will be introduced to many under saddle concepts prior to actually being backed; the exercises are meant to help develop the horse’s balance as well as to gymnastically work and develop the muscles. For a youngster, ST can help the horse to understand the rein aids and develop lightness. In the end, the horse should become confident, relaxed and supple in their work. Due to the mental and physical demands, ST should not be started before the horse’s third year. Lightness was a pervasive theme, both in the application of the aids and the weight of the horse in the hand.
For the handler, ST teaches a better feel for their mount’s natural asymmetry and body position in the lateral exercises, and also helps to improve their sense of timing. Meg promised that this improved “feel” transfers over to the ridden work.
Understanding Asymmetry
Now, to really understand the importance of lateral work, you have to also appreciate that horses are naturally asymmetrical. Horses are narrower in the shoulders than the hips, and like humans, are “sided”, meaning one set of limbs tends to be in charge. In our usual handling practices, horsemen do little to improve the situation (when was the last time you led/untacked/mounted from the right or “off” side?).
ST teaches about “eight dimensions of asymmetry”. For me, there was nothing new here, but I really liked the way the concepts were organized. Meg presented the dimensions of asymmetry as follows:
- Lateral bending (issues here are usually the easiest to correct)
- Horizontal imbalance (horse naturally carries more weight on forehand)
- Front legs (Handedness, as in, which leg does your horse prefer to lead with)
- Hind Legs (the carrying hind leg is more flexible, and the pushing hind leg tends to be straighter, stronger and less flexible)
- Front/back ratio (the wedge shape of the horse which I referred to earlier)
- Diagonal (one diagonal pair will be dominant, and usually the pushing hind is diagonal to the dominant front)
- Vertical (leaning in on an angle on corners)
- Topline (we want the horse to stretch here and be longer and rounded).
In general, a right bended horse tends to be left forelimb dominant and usually has a pushing right hind. Their concave side is their right side. Reverse all of these for a horse which is left bended (which seems to be less common overall).
To improve the horse first requires awareness of the asymmetry on the part of the trainer. All beings are asymmetrical, but through thoughtful and steady work, improvement is always possible.

Use of the Aids in ST
The pillars of ST work which are done on the ground require the use of the handler’s body language and voice, but several other aids are also important. The first is mental focus—Meg used the expression “inner picture, inner feeling”, which basically means that before a trainer begins any exercise with their horse, they should have a sense of what it is they are trying to accomplish. Related to this is the concept of “energetic aids”, which basically is saying that the handler should be centered, grounded and present, with their full attention on the horse and the task at hand. Finally, for several pillars, artificial aids like a long whip (for driving, slowing or reinforcing) or rein (used similarly to the riding reins, with inside/outside and direct/indirect cues offered) are also included. A direct rein influences the horse’s poll while an indirect rein influences the shoulders, almost like having a lasso around the horse’s neck.
The demonstration section of this clinic was focusing on the work in hand, a pillar which comes after a horse already has a basic understanding of the ground work done with a cavesson on a single line, attached to the nose. Basic circle work and an introduction to the lateral movements should be established through ground work before progressing to work in hand, which is done with a set of reins clipped to either side of the cavesson, as on a bridle. During the ground work phase, the handler works on the inside of the horse. But during the in hand phase, the handler will transition to the outside of the horse.
The whip becomes a tool of refined communication, based primarily by its position. It can be used to activate the hind end, or when held in front of the chest, indicates a half halt. Held at the girth, it asks for more bend or forward intention. Pointed towards the opposite hip, it becomes an advanced aid to increase the angle of the haunches in. When kept down by the handler’s side, the whip is in neutral.
Progression of Exercises
In each stage of progression through the pillars, a series of specific exercises is introduced in order. During each exercise, the horse is encouraged to maintain “LFS”—lateral bend, a forward and downward tendency, while stepping under their center of mass with the hind leg.
- Standstill: Meg says many folks new to ST work tend to gloss over this exercise, because it seems too easy or basic. But mastering the stand still, in which the horse halts with front feet square, head and neck lowered, while willingly flexing left and right, provides an important foundation. It also gives the horse a first introduction of the cavesson and its pressure, and helps to teach them to center their mass away from their dominant fore limb.
- Circle: Usually done only in the walk, the circle is used to help establish LFS. “We don’t tend to do these in trot or canter, because it is hard to go from the circle to a straight line and keep the horse well balanced,” says Meg.
- LFS on Straight Line, progressing to Shoulder In
- Haunches In
- Renvers
- Half Pass
- Pirouette
- Trot
- Canter
Training Theory
When it comes down to it, what I witnessed at this clinic was the application of highly effective classical and operant training techniques. This is really at the root of most good animal training, whether you are talking about riding horses or training dogs or teaching some exotic zoo animal to engage in a medical exam. ST work is about applying the 3 R’s—Release, Reward, Relax. When the horse makes a move towards doing the thing you want, the handler offers a “bingo cue” (some sort of consistent sound), they release the pressure, and then immediately reward the horse with verbal or physical praise or a treat. There is then a short break to allow the horse to process what he just learned.
It is the timing and dosing of the pressure and release process which is most people’s downfall. Basically, handlers need to AVOID pressure which is held too much, too long, too often, too suddenly or too steadily, and EMBRACE release which is early, often, quickly administered, long and soon. Release more than you take. Through this process, the horse learns to carry the posture on his own.
There are three phases of the training process. The first phase is teaching the horse. In this phase, we are trying to help the horse begin to understand the exercise, and to develop the new neural pathways which will allow it to be performed. At this stage, the movement may lack gymnastic quality, or be in slow motion, similar to how we might learn a new dance step. In the optimizing phase, the trainer focuses on improving the quality of the movement and encourages the horse to work towards self-carriage in the body and mind. Finally, in the improvising phase, the exercise can now be used for a purpose or in a goal-oriented way.
Another way to look at the training and learning process is to understand that in doing any activity, there is the comfort zone (doing what you know and is familiar), the stretch zone (where you are trying something new that is out of your comfort zone but still attainable) and the stress zone (where what you are trying to teach is too much, too soon). Growth occurs in the stretch zone, but not every day can be a stretch day. And when we live in the stress zone… no training occurs.
Demonstration
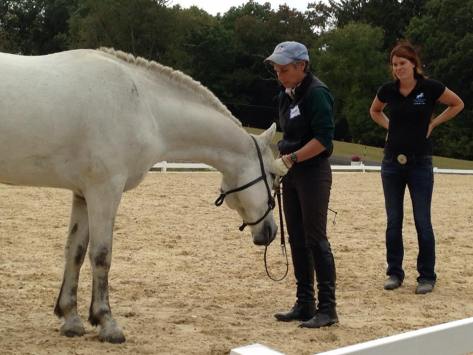
Meg demonstrated the in hand techniques with two of her own horses. The first horse was a 6 year old Hanoverian gelding who has had a “slow start” in his training progress due to various injuries. She demonstrated that she held each rein through the thumb and forefinger, so the overall contact was quite light. The outside rein should cross the neck in front of the withers, but not be more than half way up the neck. The goal is to work towards holding the reins closer to the withers than the head, so that the horse is ultimately coming forward from the hindquarters and into the rein (similar to riding). However, when the trainer loses quality, they should move their hold closer to the cavesson until the necessary elements improve. The handler’s body should be positioned off of the girth; Meg explained that it is really easy to get out in front of the horse’s shoulder.
This particular horse usually struggles with the stand still, but today demonstrated the position with his feet even and square. Meg emphasized that under saddle, the horse must learn to wait to move until the rider’s cue, and this practice starts here. She encouraged the horse to stretch forward and down using gentle pressure on the front of the cavesson, and then flexed him to the left and right with pressure on the sides.
After a few moments in the stand still, Meg moved on to doing small circles, 8-10 meters in diameter, to encourage the bending of the horse, while still asking for the forward and downward tendency. When she asked for transitions to the halt, the effort is made mostly from the voice. The ultimate goal is to use little to no pressure on the reins in the halt, as the horse will usually tend to come up in the neck and lean into this pressure.
Because changing the bend while in motion is fairly difficult, Meg halted her horse and changed the reins over to the opposite side to work in the other direction.
She then proceeded to demonstrate the shoulder in (be sure to not draw the horse’s nose further in than their point of shoulder) and haunches in (the horse is taught to bend around the whip, which provides the cue).
Next, Meg brought in her 19 year old schoolmaster, Paladin, an Anglo-Trakehner. He came to her due to intermittent front end lameness which had ended his competitive career; through ST work to straighten his body, redevelop movement patterns and correct asymmetrical muscling, the lameness has all but resolved.
Meg worked through all of the same initial movements with Paladin, but then also showed us work in trot and canter. She explained that the classical masters would sometimes introduce half steps in hand before introducing the trot in order to develop balance and strength; in the faster gaits, it is best to do very short bursts to prevent the horse from losing balance. No matter the gait of the horse, the handler should always remain walking, not jogging, to keep up.
Teaching these progressive exercises in the walk and trot with a youngster can help them to understand what is wanted before trying to do the movements with a rider on board. The movements may also be done in the canter, but this requires more collection than a young horse will have; it is better to introduce the canter under saddle first and allow the horse to develop more strength before teaching these exercises in that gait.
Take Aways
When I signed up for this clinic, I was not expecting a full immersion into an organized training system. I am almost always initially skeptical of programs which promote a particular prescripted philosophy, special equipment (ex: buy this halter/video series/magic stick for just 99.95) or come with too many impassioned disciples who all function at only a very basic level. So before I “drink the Kool-Aid”, I like to try to learn a little more.
Straightness Training (http://straightnesstraining.com/) is a pretty comprehensive program. Its founder, Marijke de Jong, has created an ambitious and heavily trademarked/registered system of instruction, coaching, certification and support. Under the “FAQ’s” page on her website are some interesting threads on integrating ST work with “other types of riding” as well as what the difference is between classical riding and Straightness Training. Here, deJong compares the different schools of classical dressage training (German, Spanish, etc.) to the branches of a tree; while the specific approaches and techniques taught in these different schools may vary, they all have the same roots. deJong’s work is drawing off much of the in hand training approaches used by classical masters. She seems to have studied this subject far more deeply than I have ever attempted to, and it is beyond the scope of this blog for me to do any analysis on the connections here.
I think we as horsemen are all enthralled with the idea of having a horse which responds to our aids with lightness and sensitivity and to have the kind of relationship with our horse that is seemingly effortless and harmonious. Certainly in Meg’s demonstration she showed that with time and care, her work on the ground has allowed each of her horses to respond to quiet and soft aids as they worked through their lateral movements. Despite being distracted by outside stimuli and twenty auditors, both horses chose ultimately to focus on Meg, with a minimum of fuss and no force.
I think my major, most important take away from this clinic was a reminder that we must all reward more often and for less effort. It is so easy, especially in dressage or equitation work, to drill ourselves and our horses. In doing so, we fail to recognize the “try”, the little effort the animal or student puts forward to improve, because we are too focused on shaping the response to be what we want in a final performance. But in order to get to that evolved, confident and smooth answer, there are many small, incremental steps of growth and improvement. If we as teachers and trainers do not reward these steps, the progress and growth we specifically seek can be deterred.
