Category Archives: Clinic Reports

Exploring Fundamental Horsemanship with Kip Fladland

“A bad day with your horse is still better than a good day doing most anything else”~ Kip Fladland

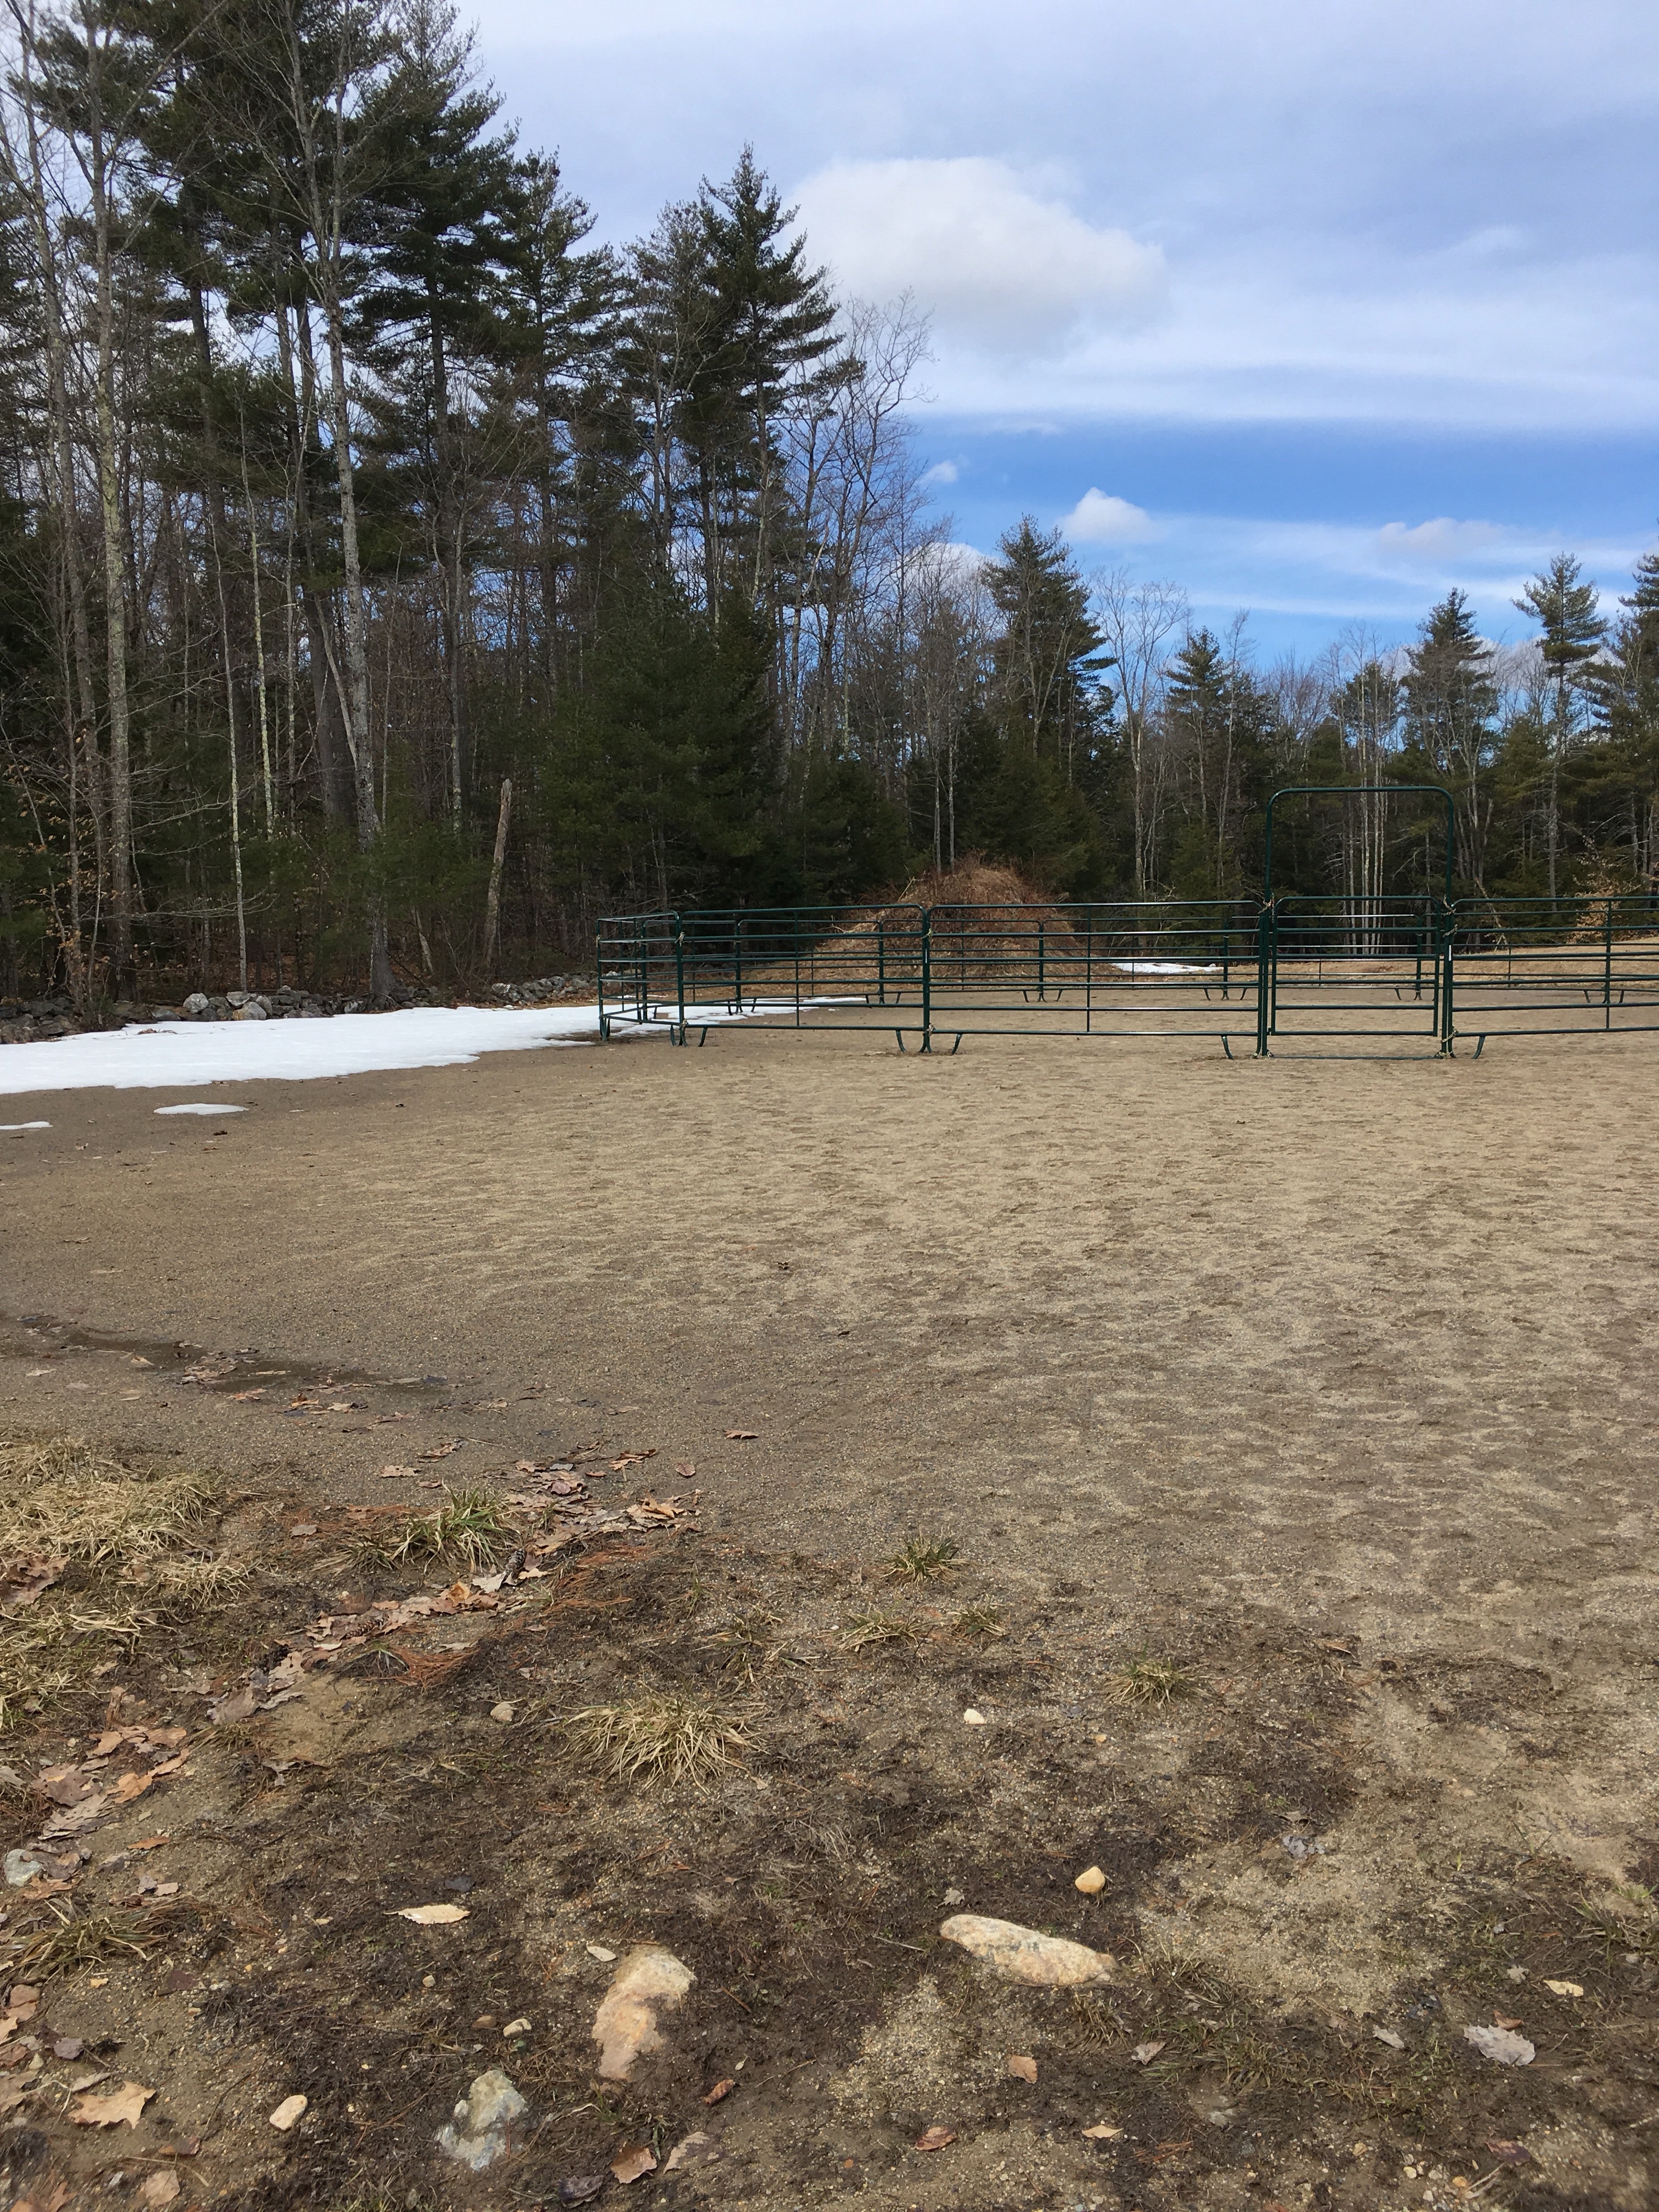
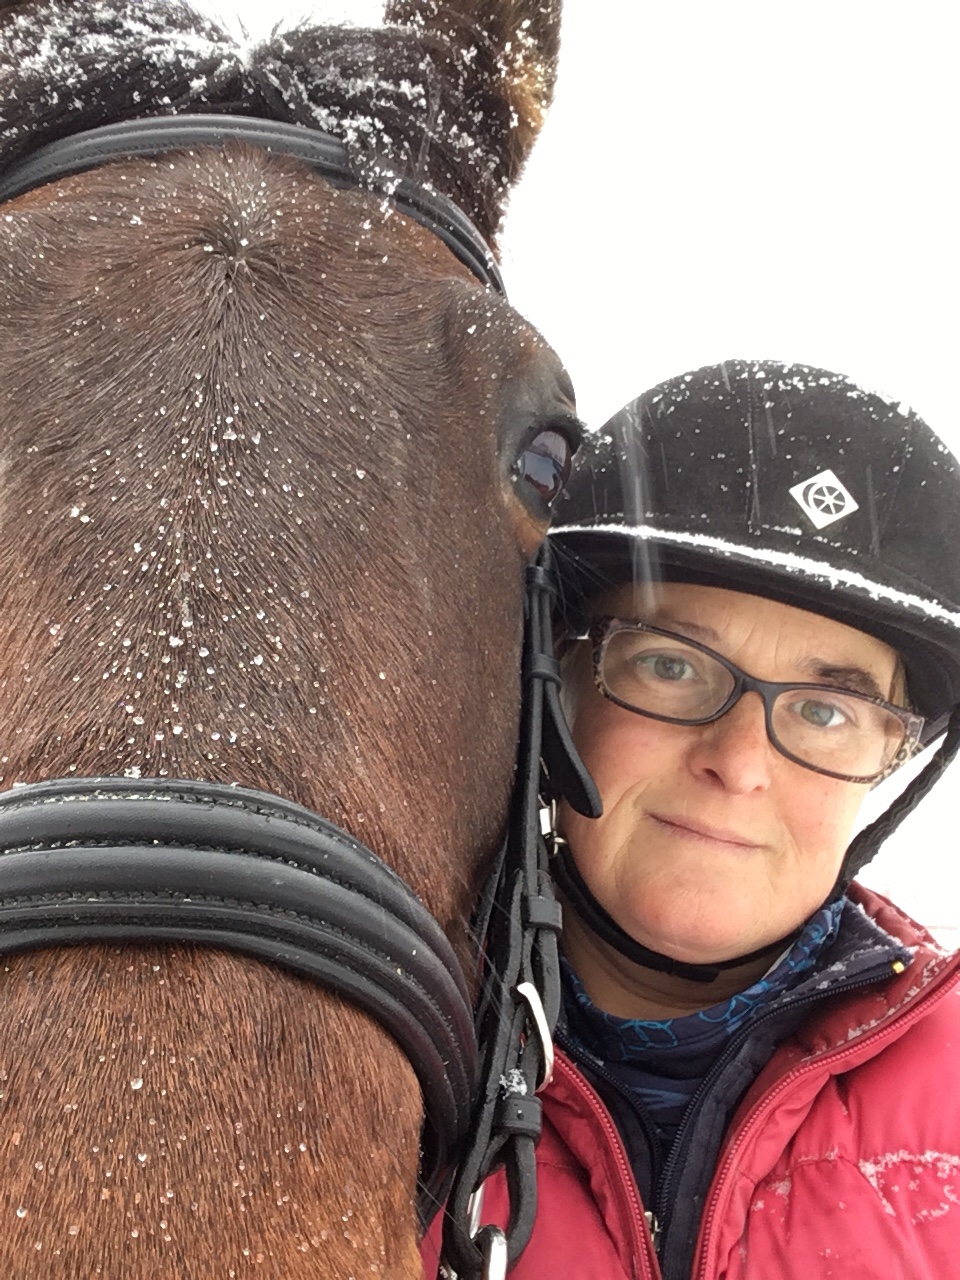
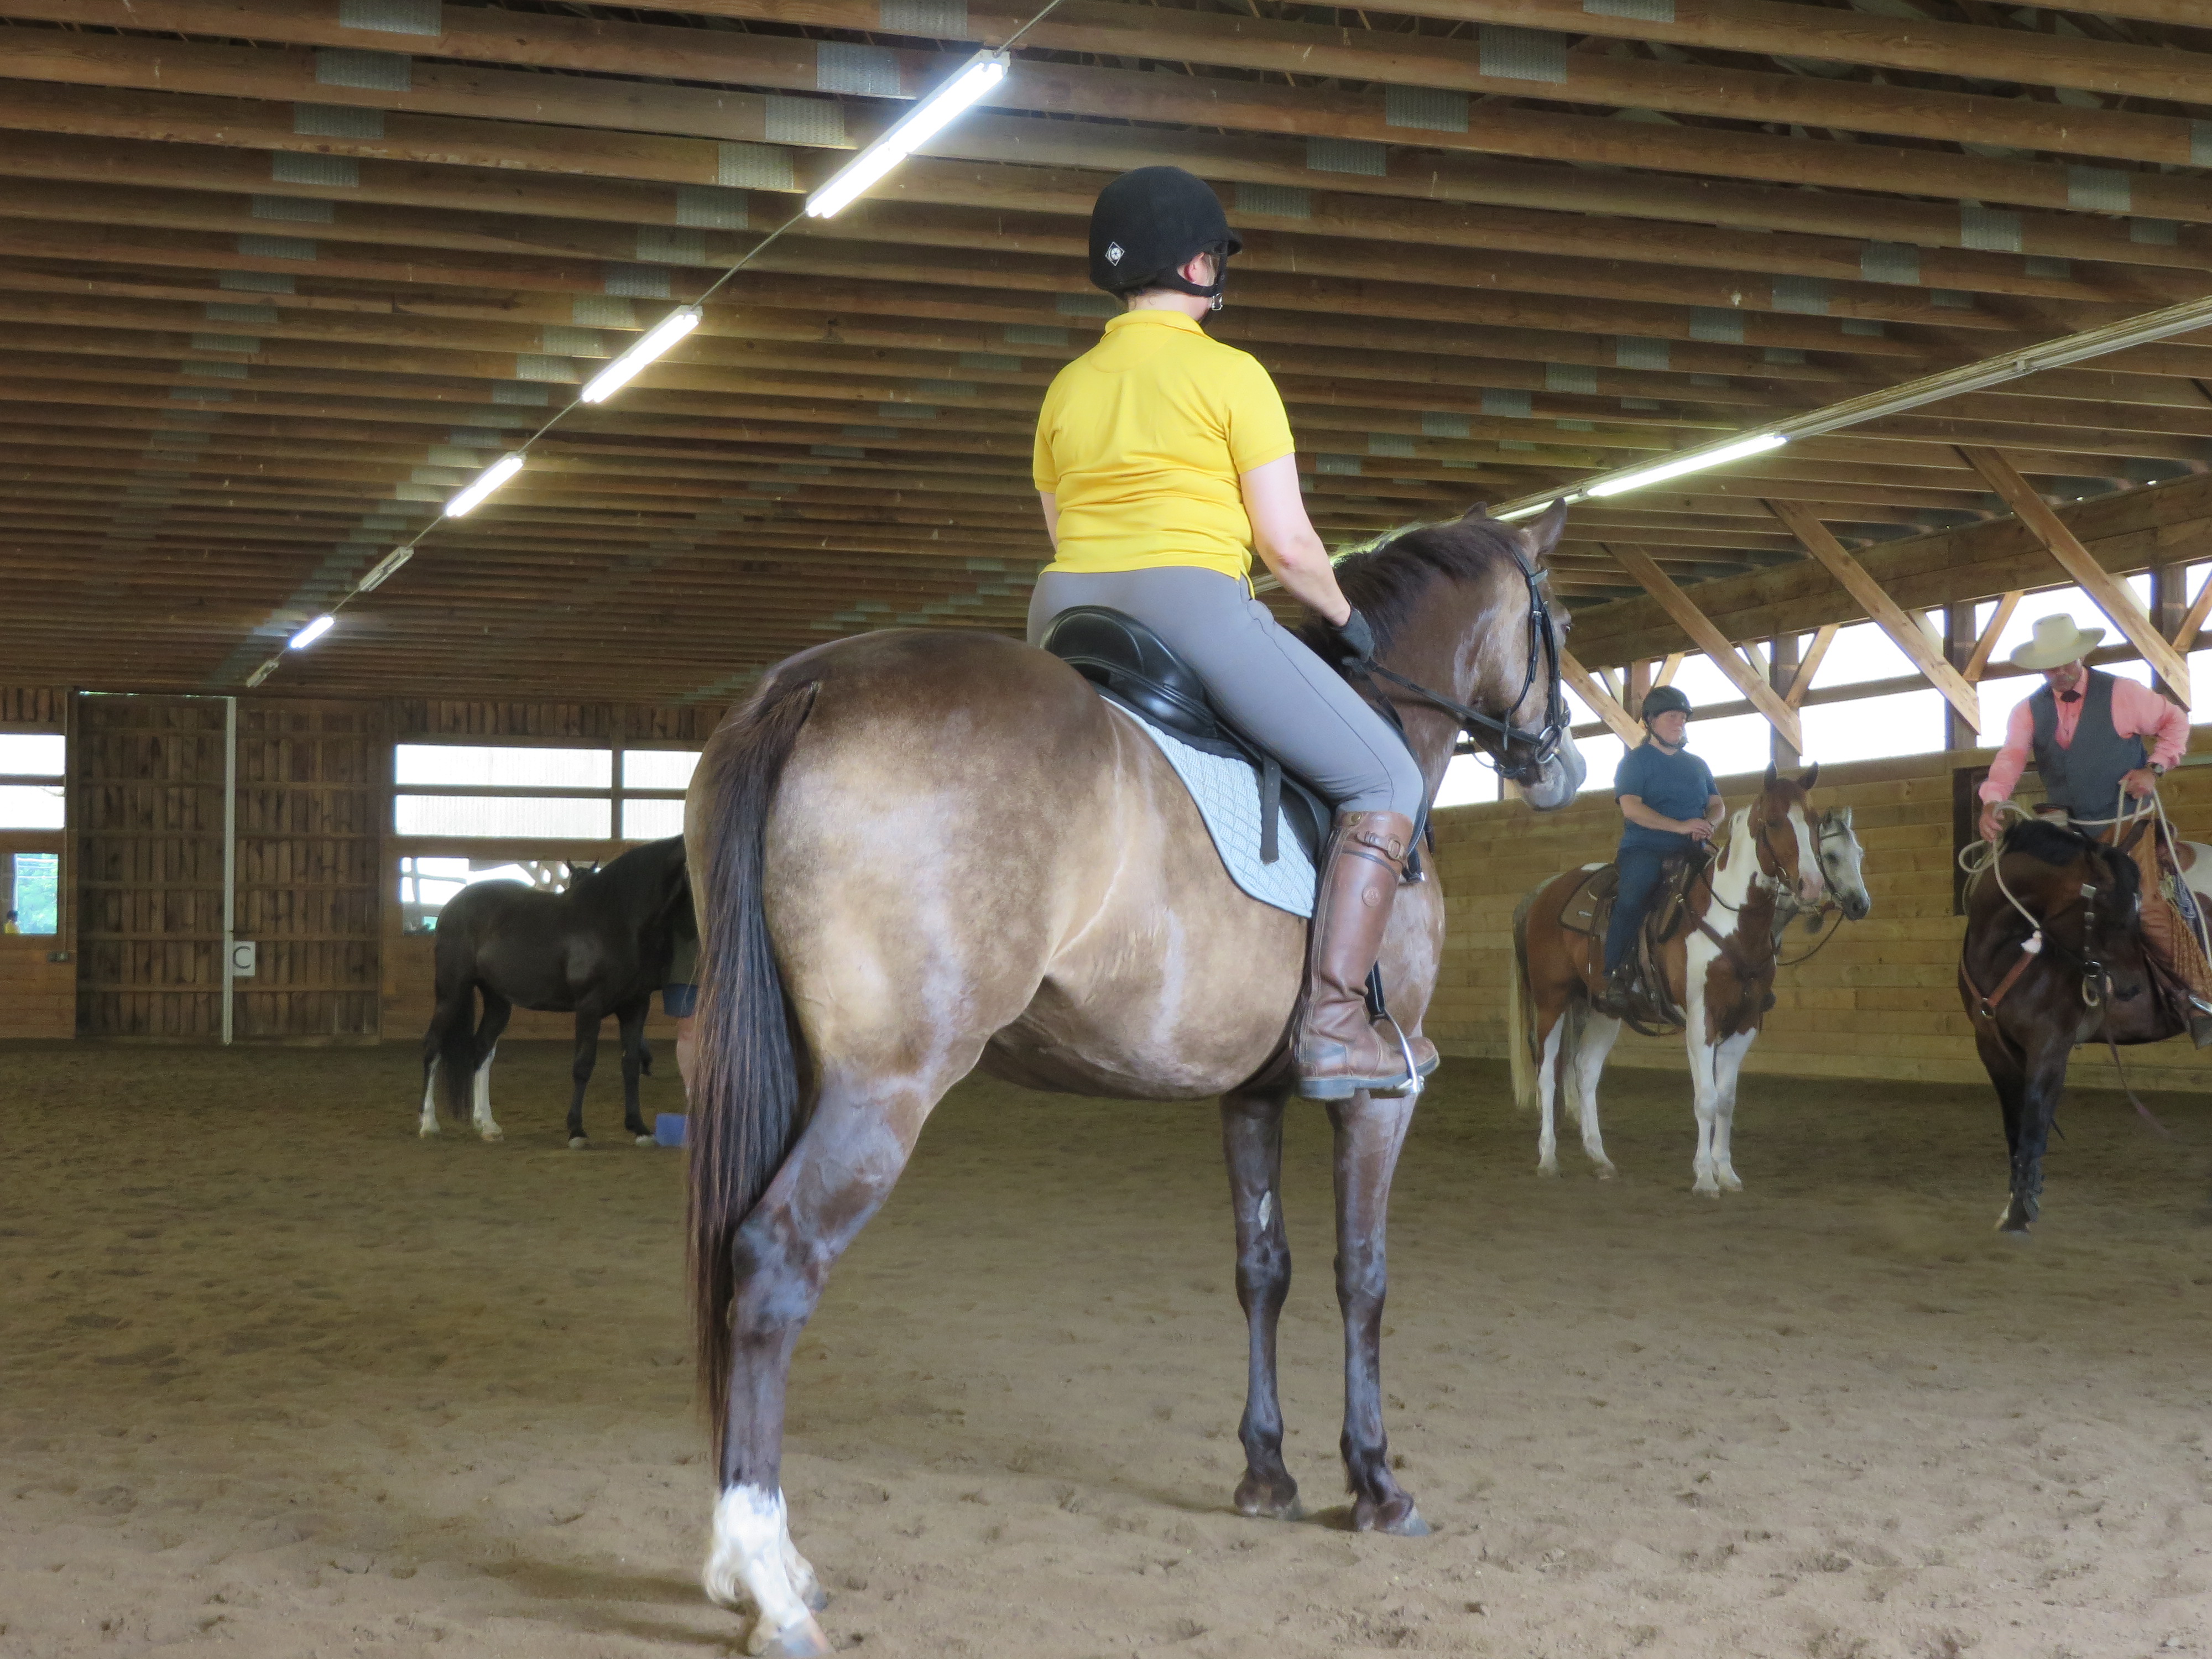
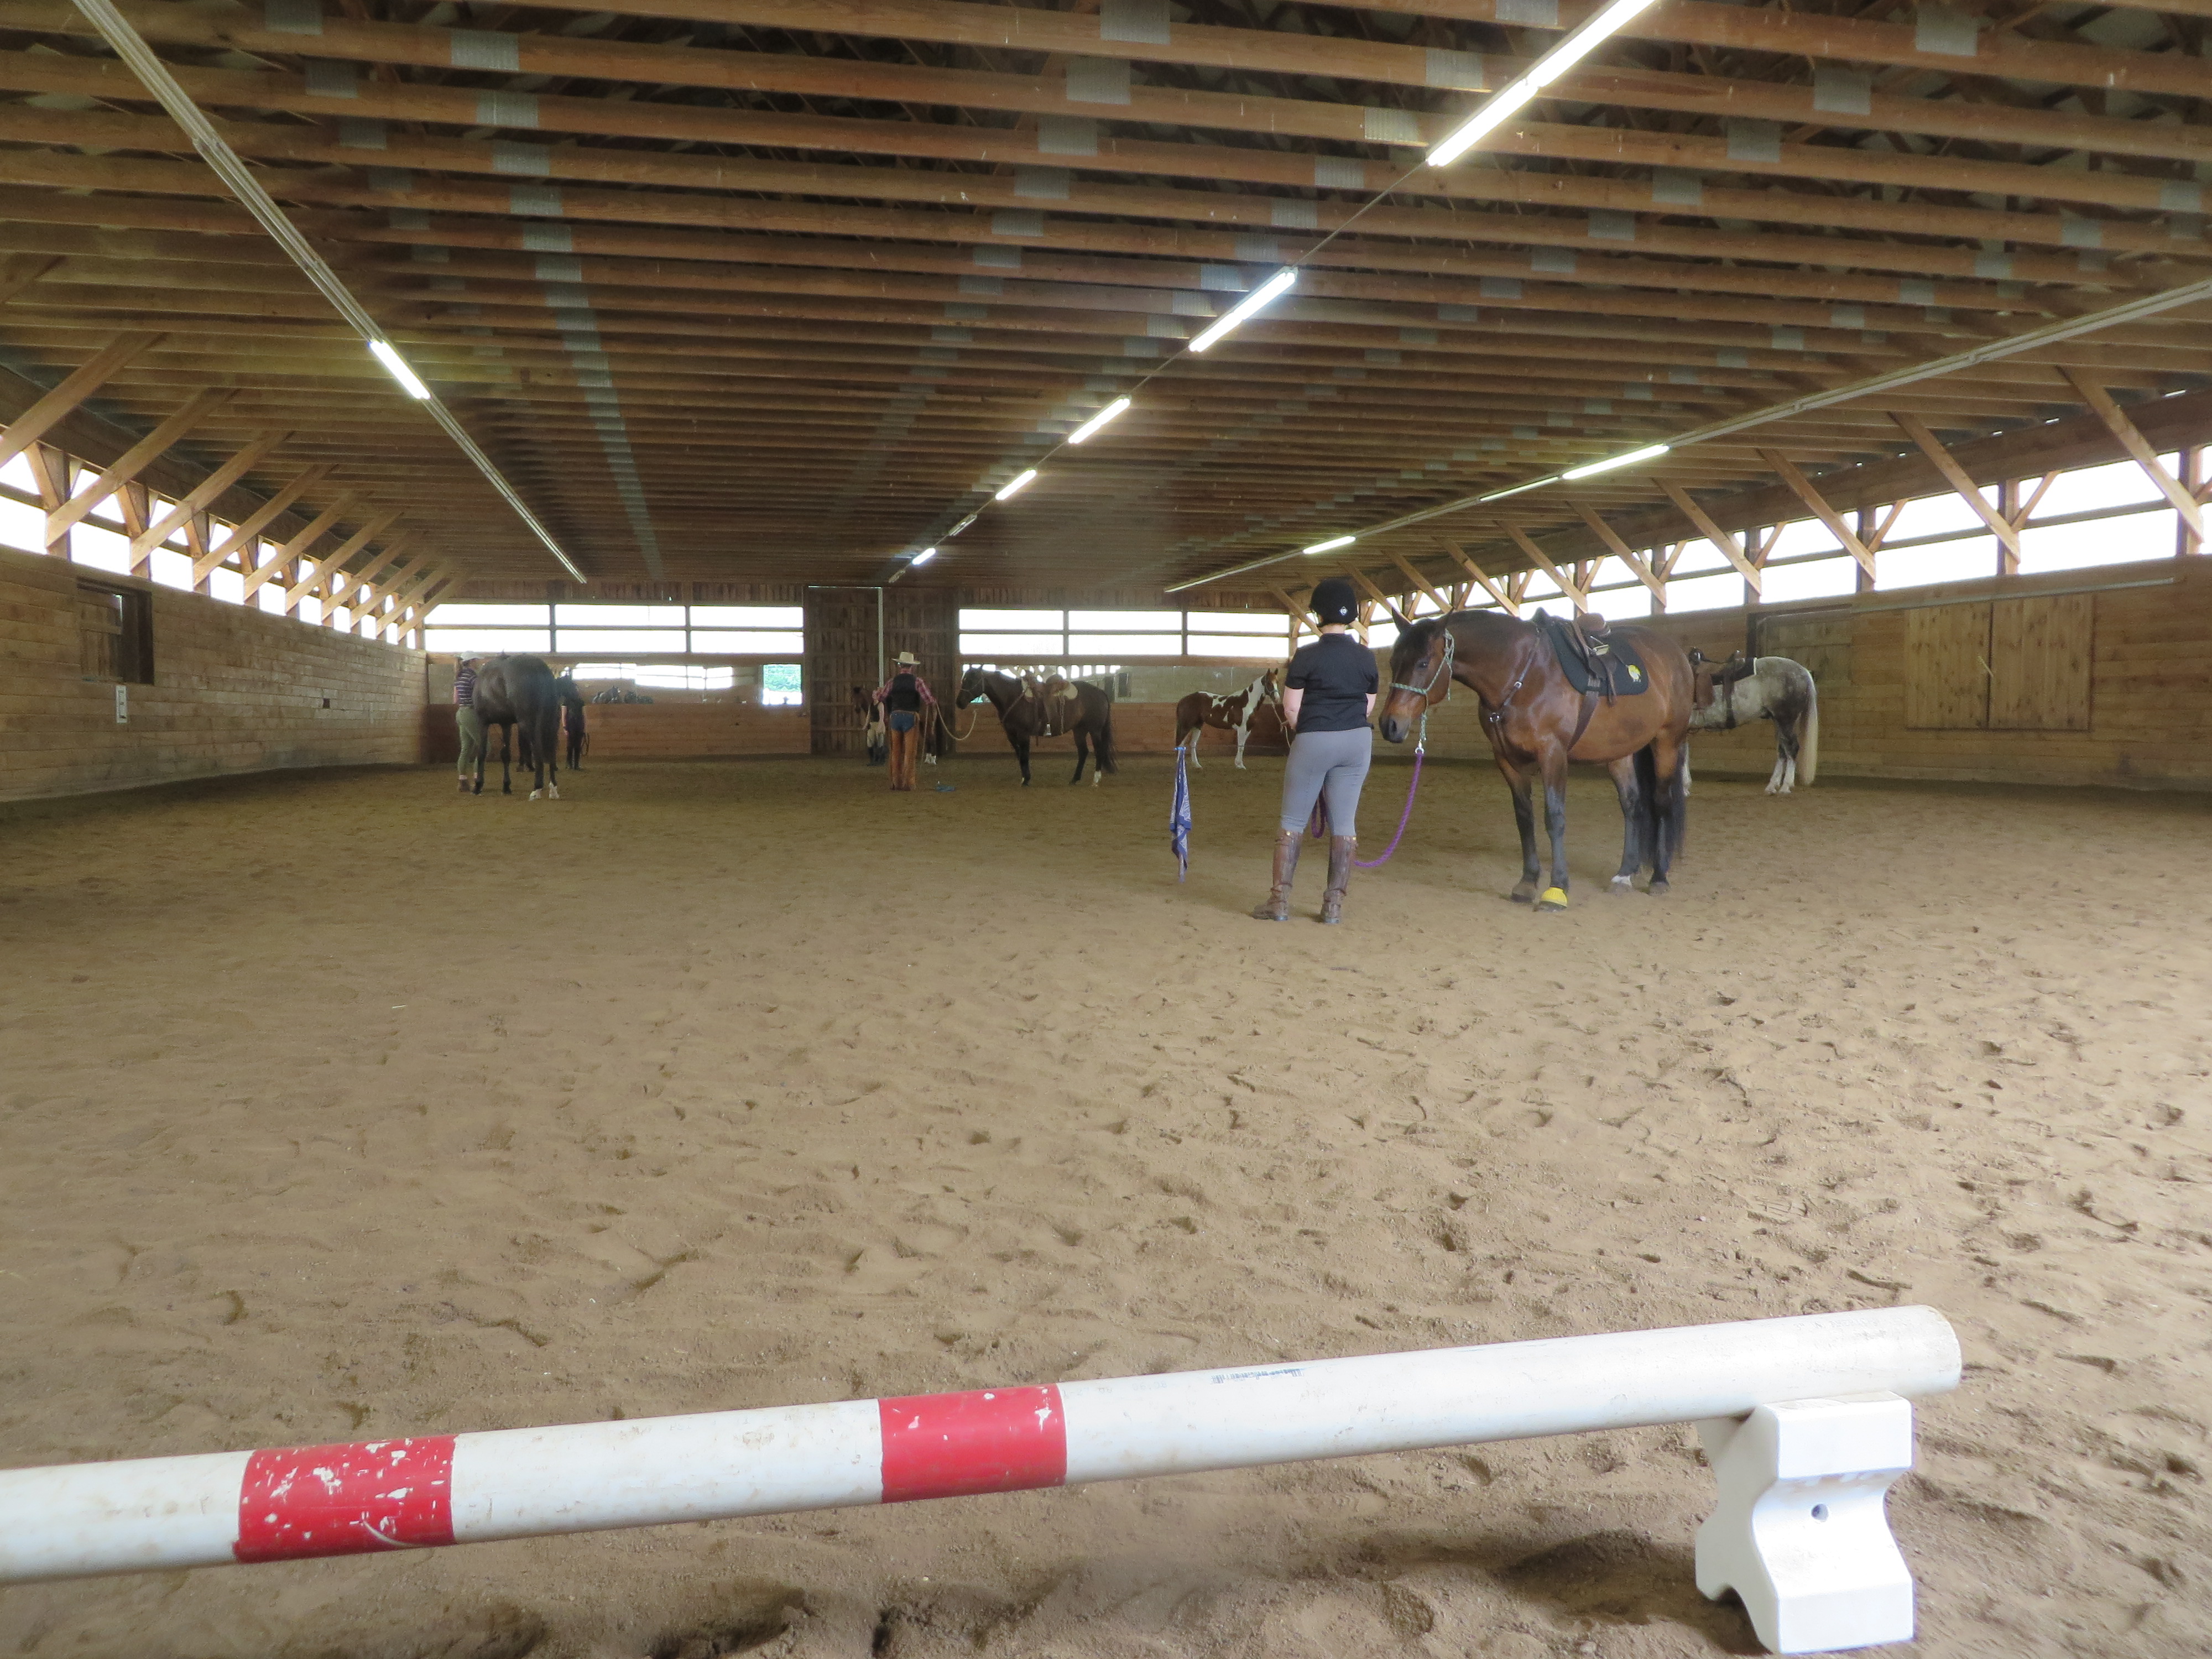
                During a heat wave in early June, I had the opportunity to participate in a three-day clinic focusing on groundwork and foundational horsemanship with Kip Fladland at Linden Woods Farm in Durham, New Hampshire. I first heard about the clinic during the depths of our New England winter and decided it sounded like the perfect opportunity to get my rising 6-year-old Connemara/Thoroughbred cross, DRF Isabela, off farm for an educational outing.

                As the owner/trainer of two younger horses (Izzy and her stablemate, the 4-year-old Morgan mare Spring Hollow Or Noir), I have been increasingly interested in understanding how effective groundwork can play a role in giving green horses a solid foundation. I think what most attracts me to these techniques is seeing how horses properly trained through effective groundwork tend to be sensitive yet sane, confident and connected to their handler, yet also respectful of boundaries. The training becomes almost a series of puzzles for the horse to solve, and it engages them as a partner rather than forcing submission.

 Note that I said “properly trained”; when it comes to groundwork, most of the time what I actually see are (middle-aged) women with their rope halters waving around their arms ineffectually while their horses proceed to walk all over them. I am sure this behavior is not these owners’ intended outcome, but they as of yet lack the finesse, feel or practice to get the timing right with their body language, with the end result being a confused and slightly feral horse.

JEF Anna Rose and I on day one. Note our elegant homemade flag and her non-matching bell boots. This is definitely the first time I have ever put her in a rope halter.

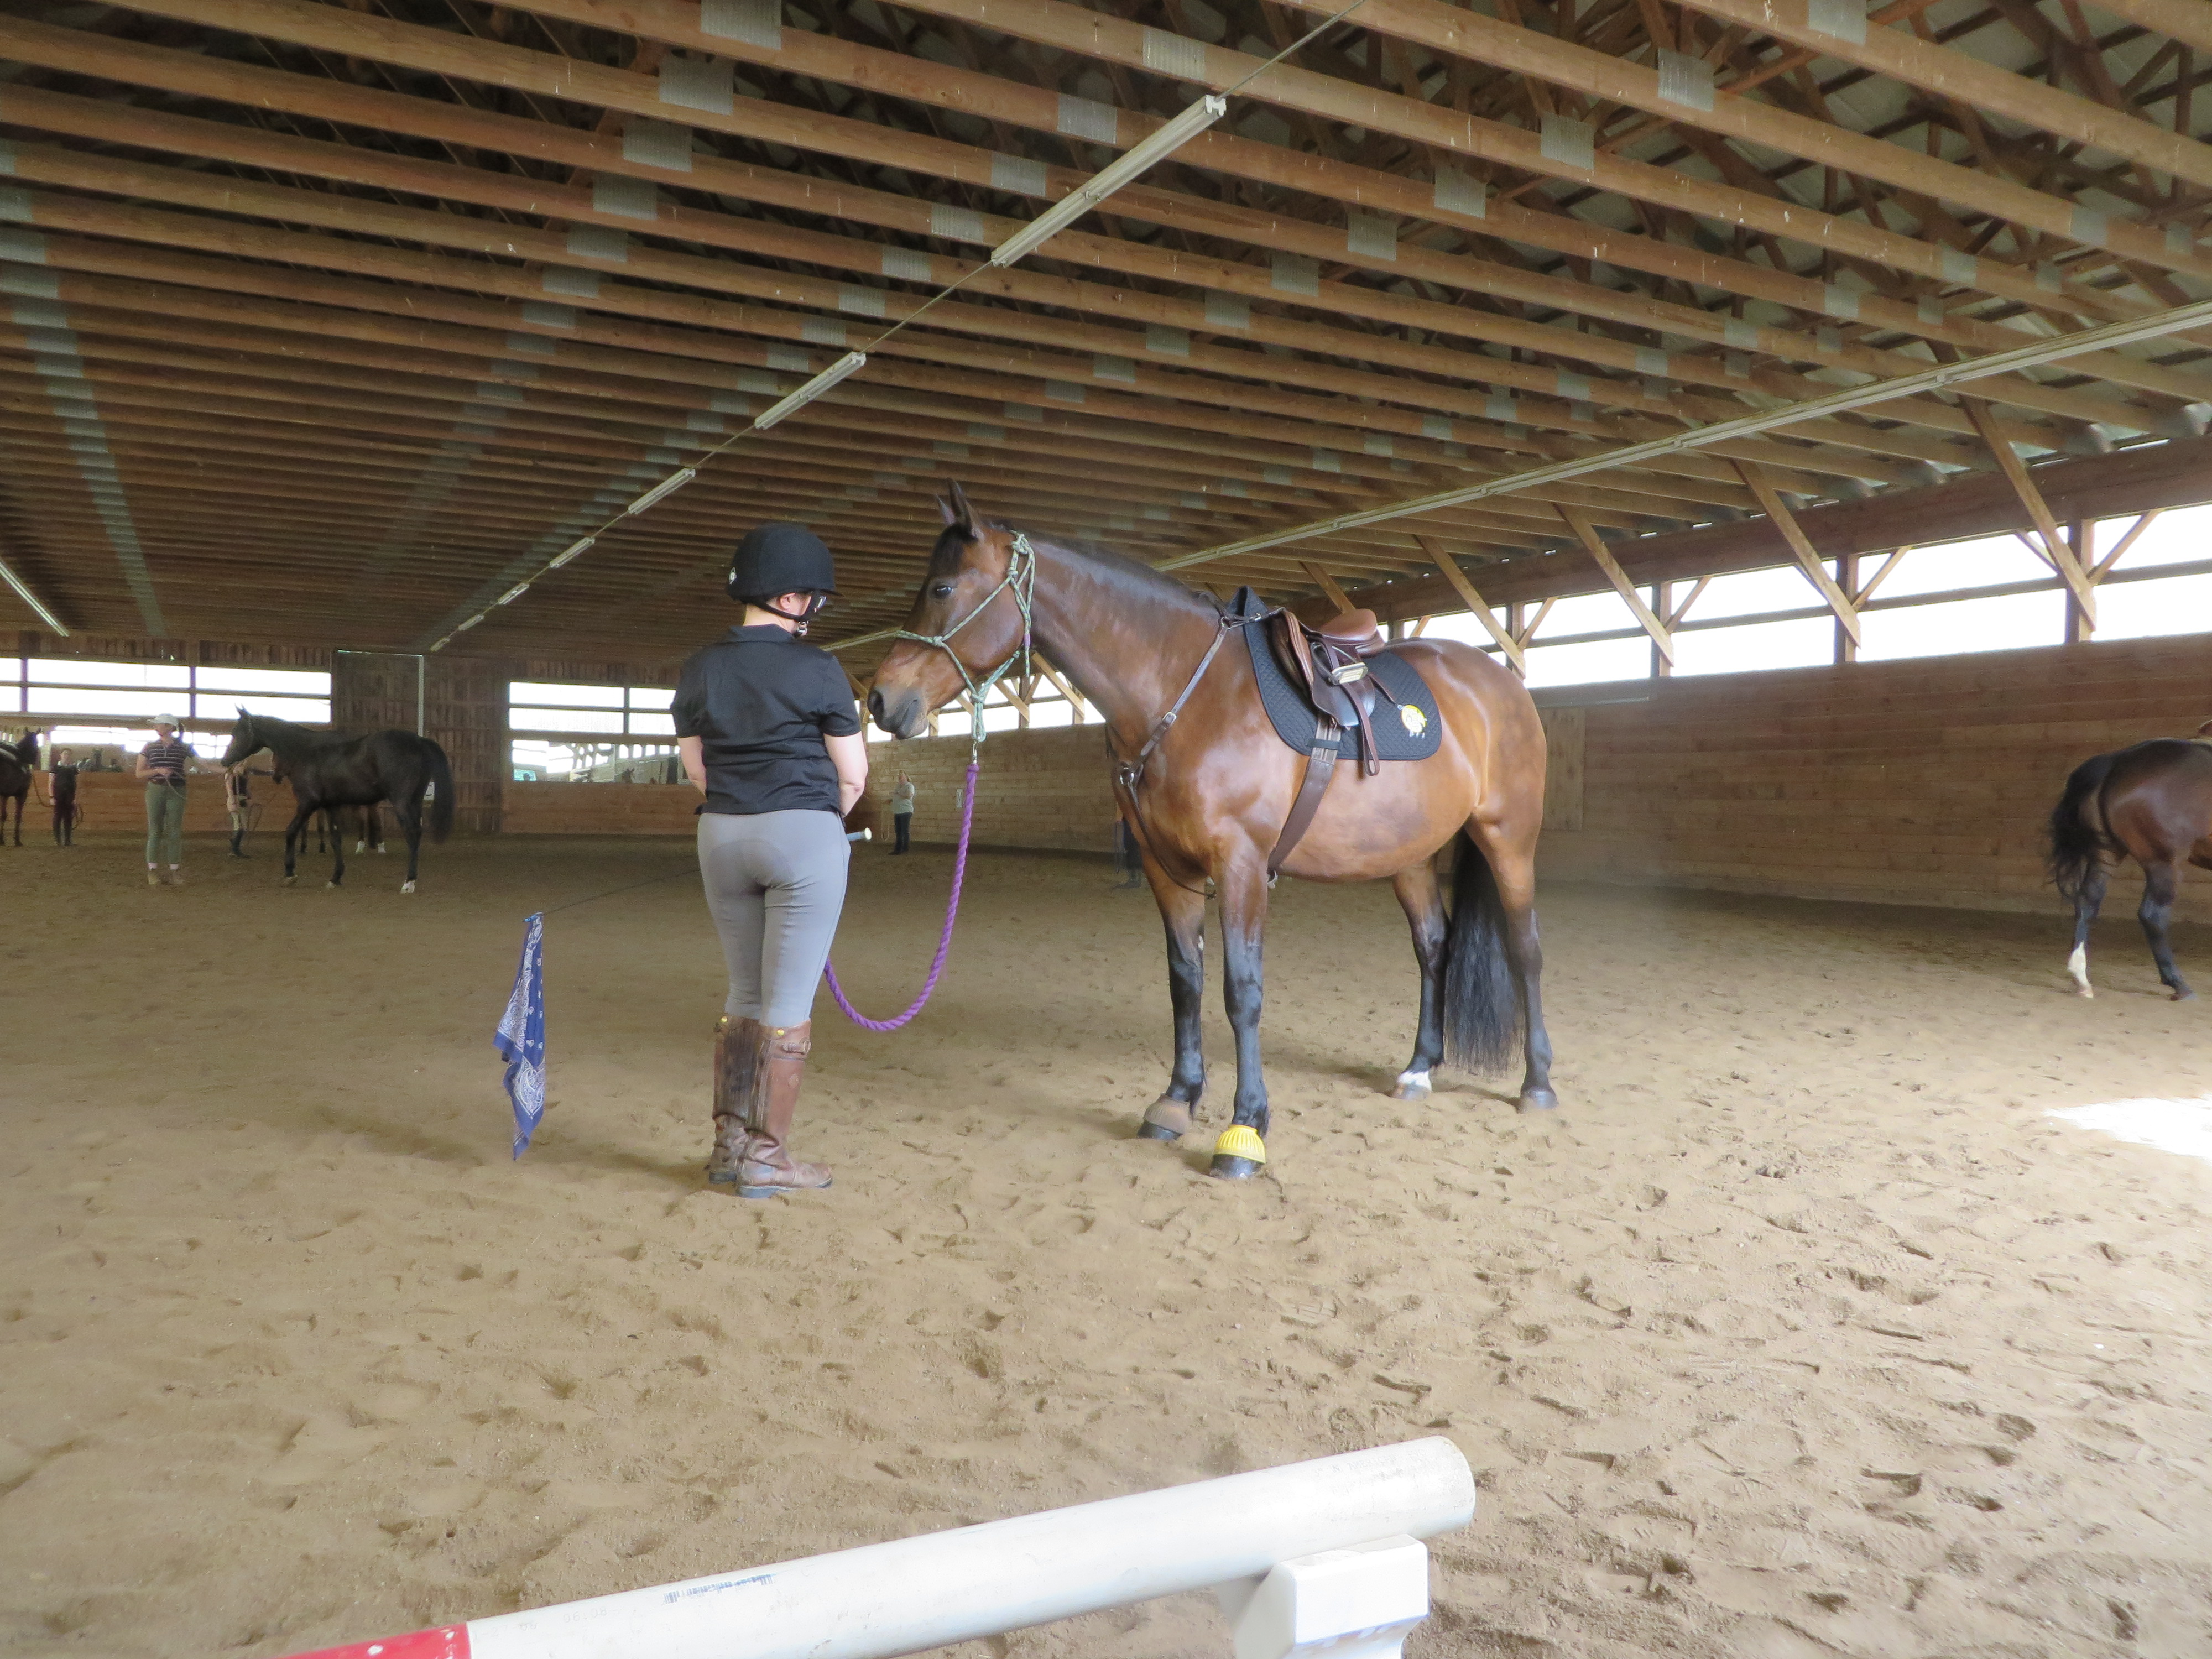
                Lest you think I am being unnecessarily harsh toward middle-aged women and their rope halters, I now resemble that remark. Izzy’s rope halter arrived in the mail only about ten days before the clinic and my “flag” was made from an old dressage whip whose lash had broken off, a faded blue bandana, and a rubber band that came with my asparagus. And when I began trying to use said flag at the clinic to effect certain responses from my horse, while also maintaining particular body positioning, it felt like learning a new dance with the instructions coming in an unfamiliar language. I frequently felt awkward, overconfident, briefly successful, then full of questions.

                Since returning home, I have continued to practice the techniques I learned over these three days. I am confident that I have forgotten more than I remember, despite my notes and application in practice. However, I do feel that playing with some of these basic techniques has resulted in positive changes, particularly with my young horses.

DRF Isabela looking a little alert at the start of the clinic on day two.

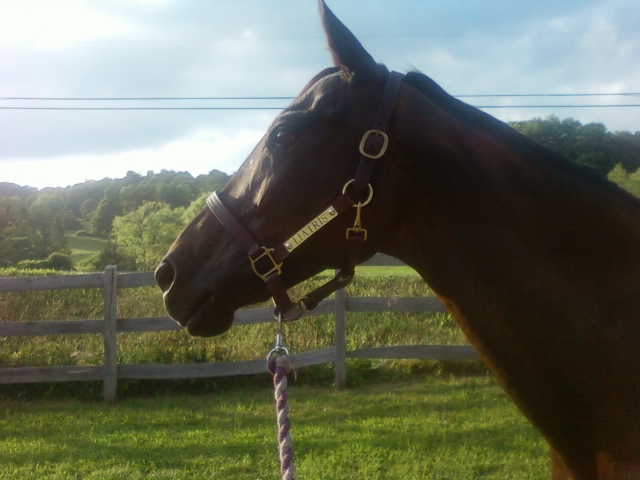
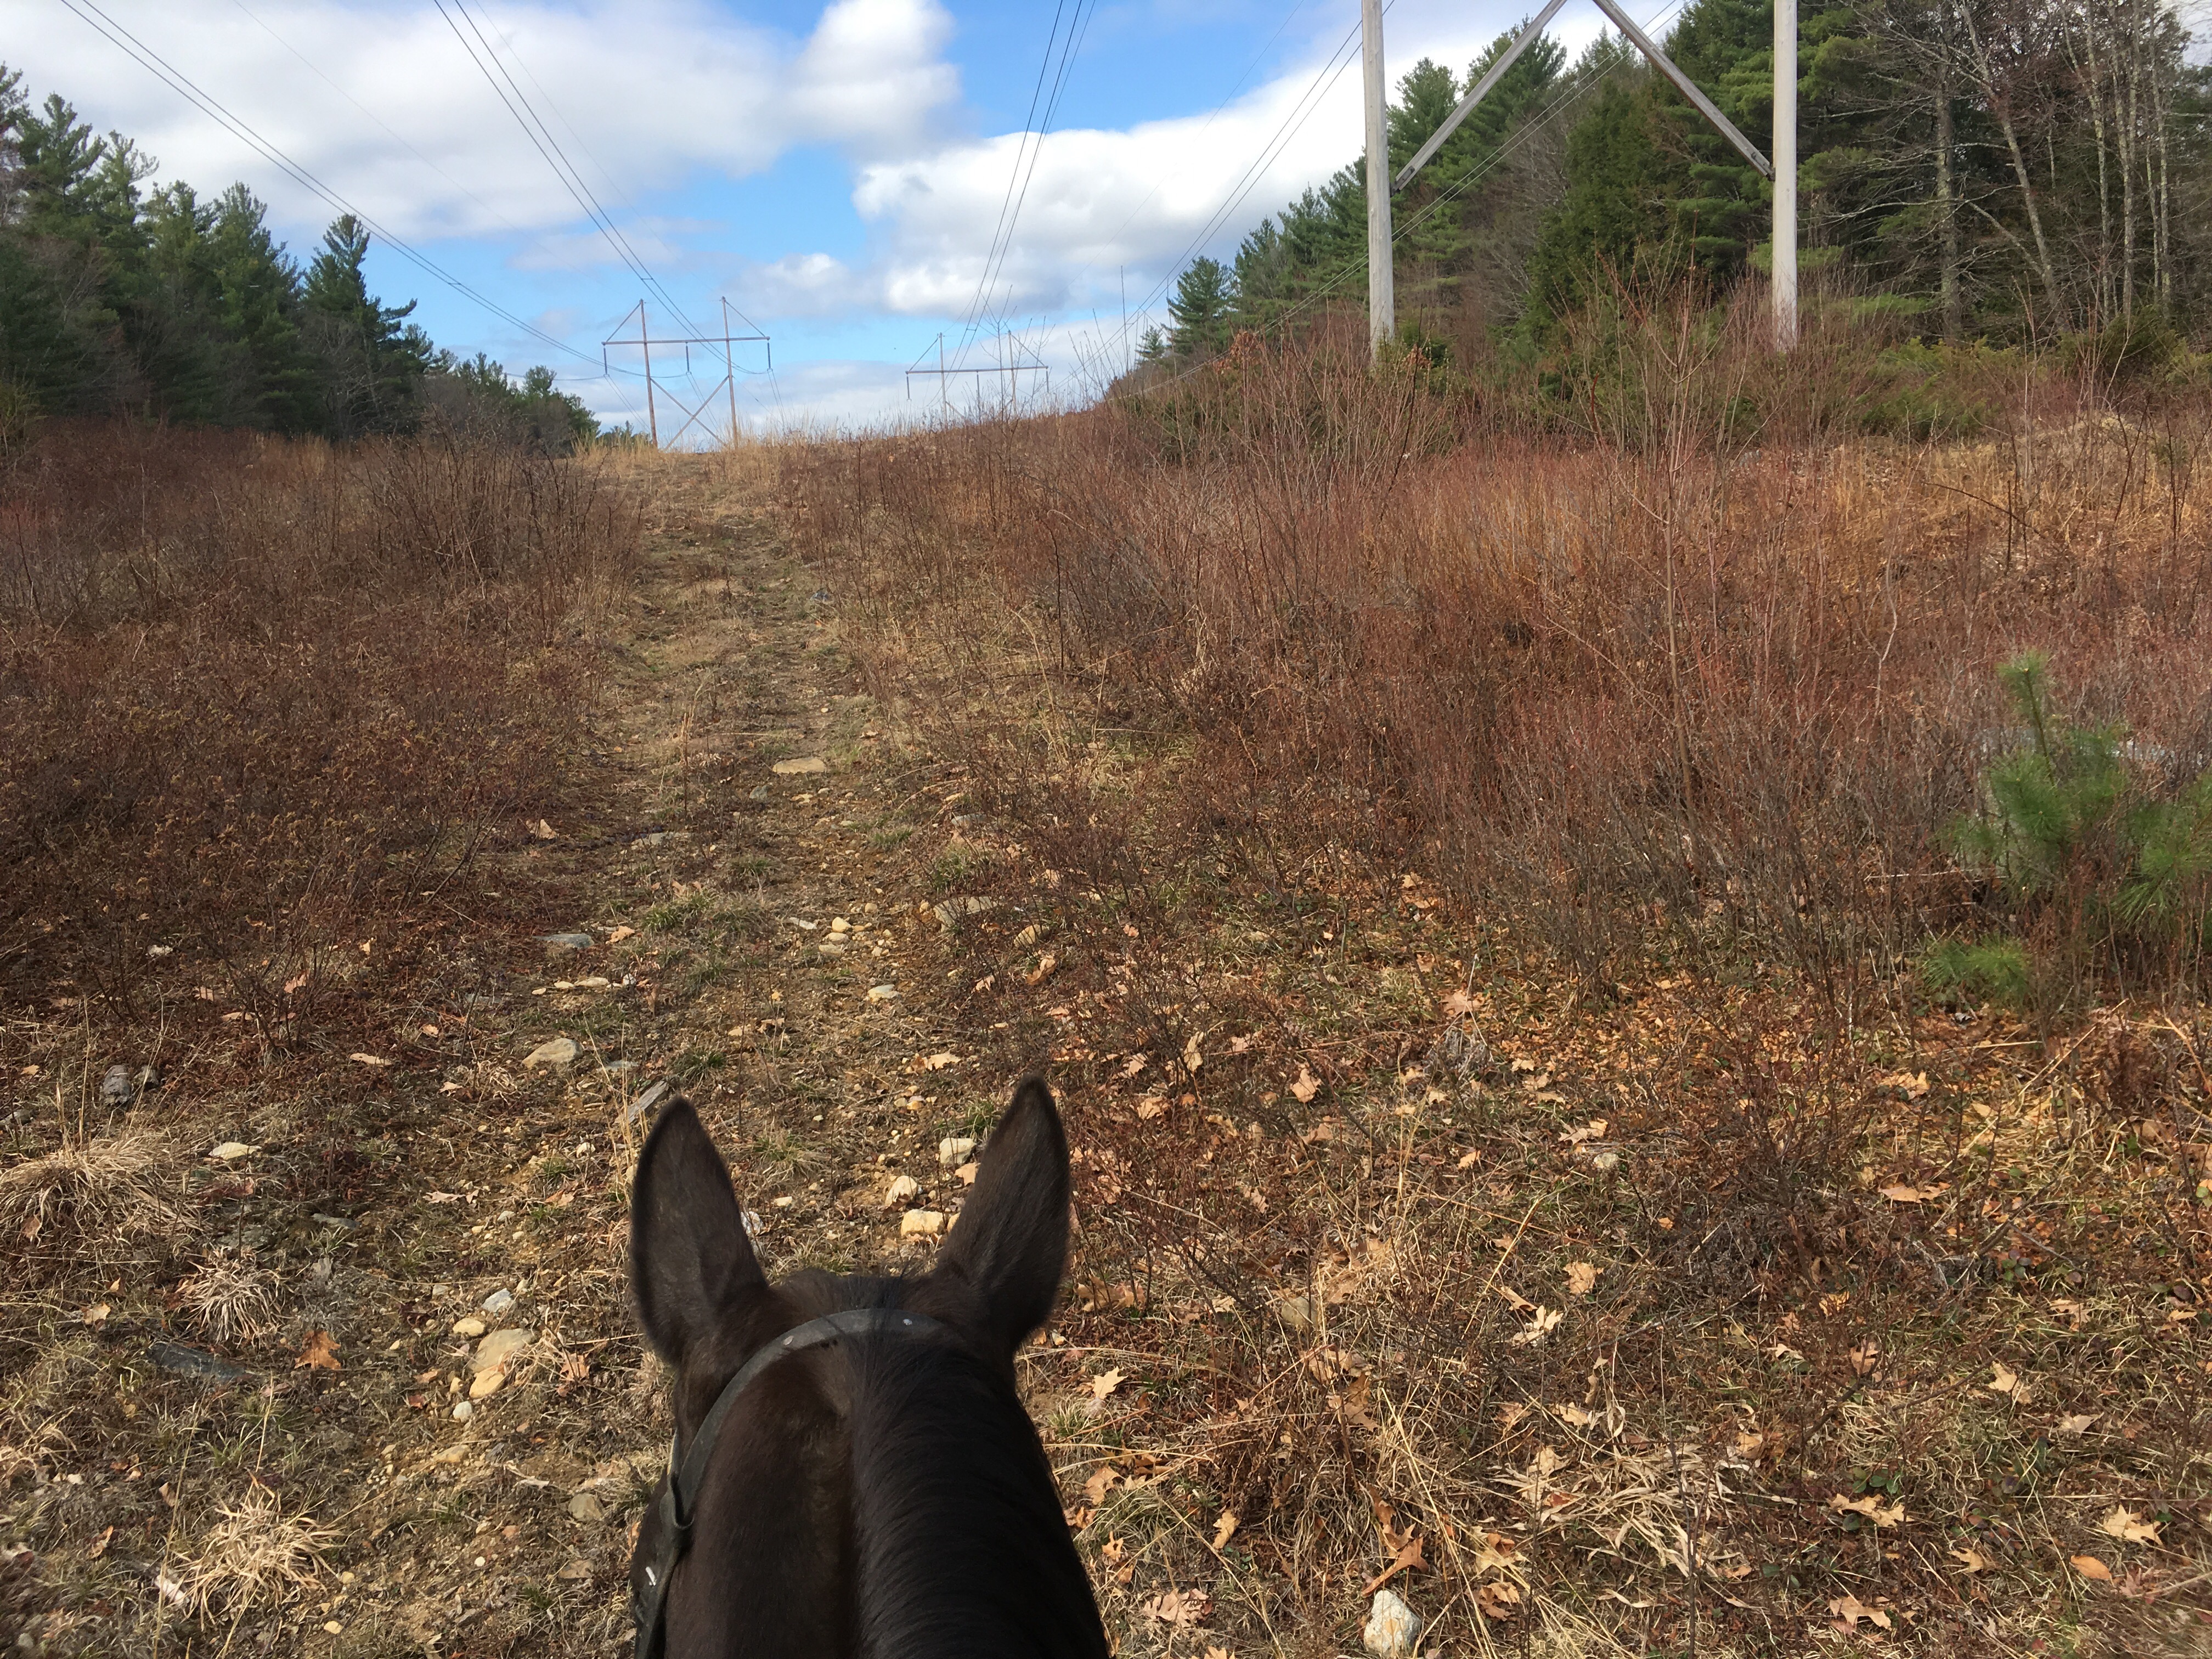
                With the pandemic curtailing our travel plans last year, I looked forward to taking Izzy out in public and start exposing her to the world beyond Cold Moon Farm at this clinic. As it goes with horses, circumstances dictated that I needed to bring my veteran halfbred Connemara, JEF Anna Rose, for day one, but Izzy was able to make the trip for days two and three.  

                Here are a few of my top take-aways from this experience:

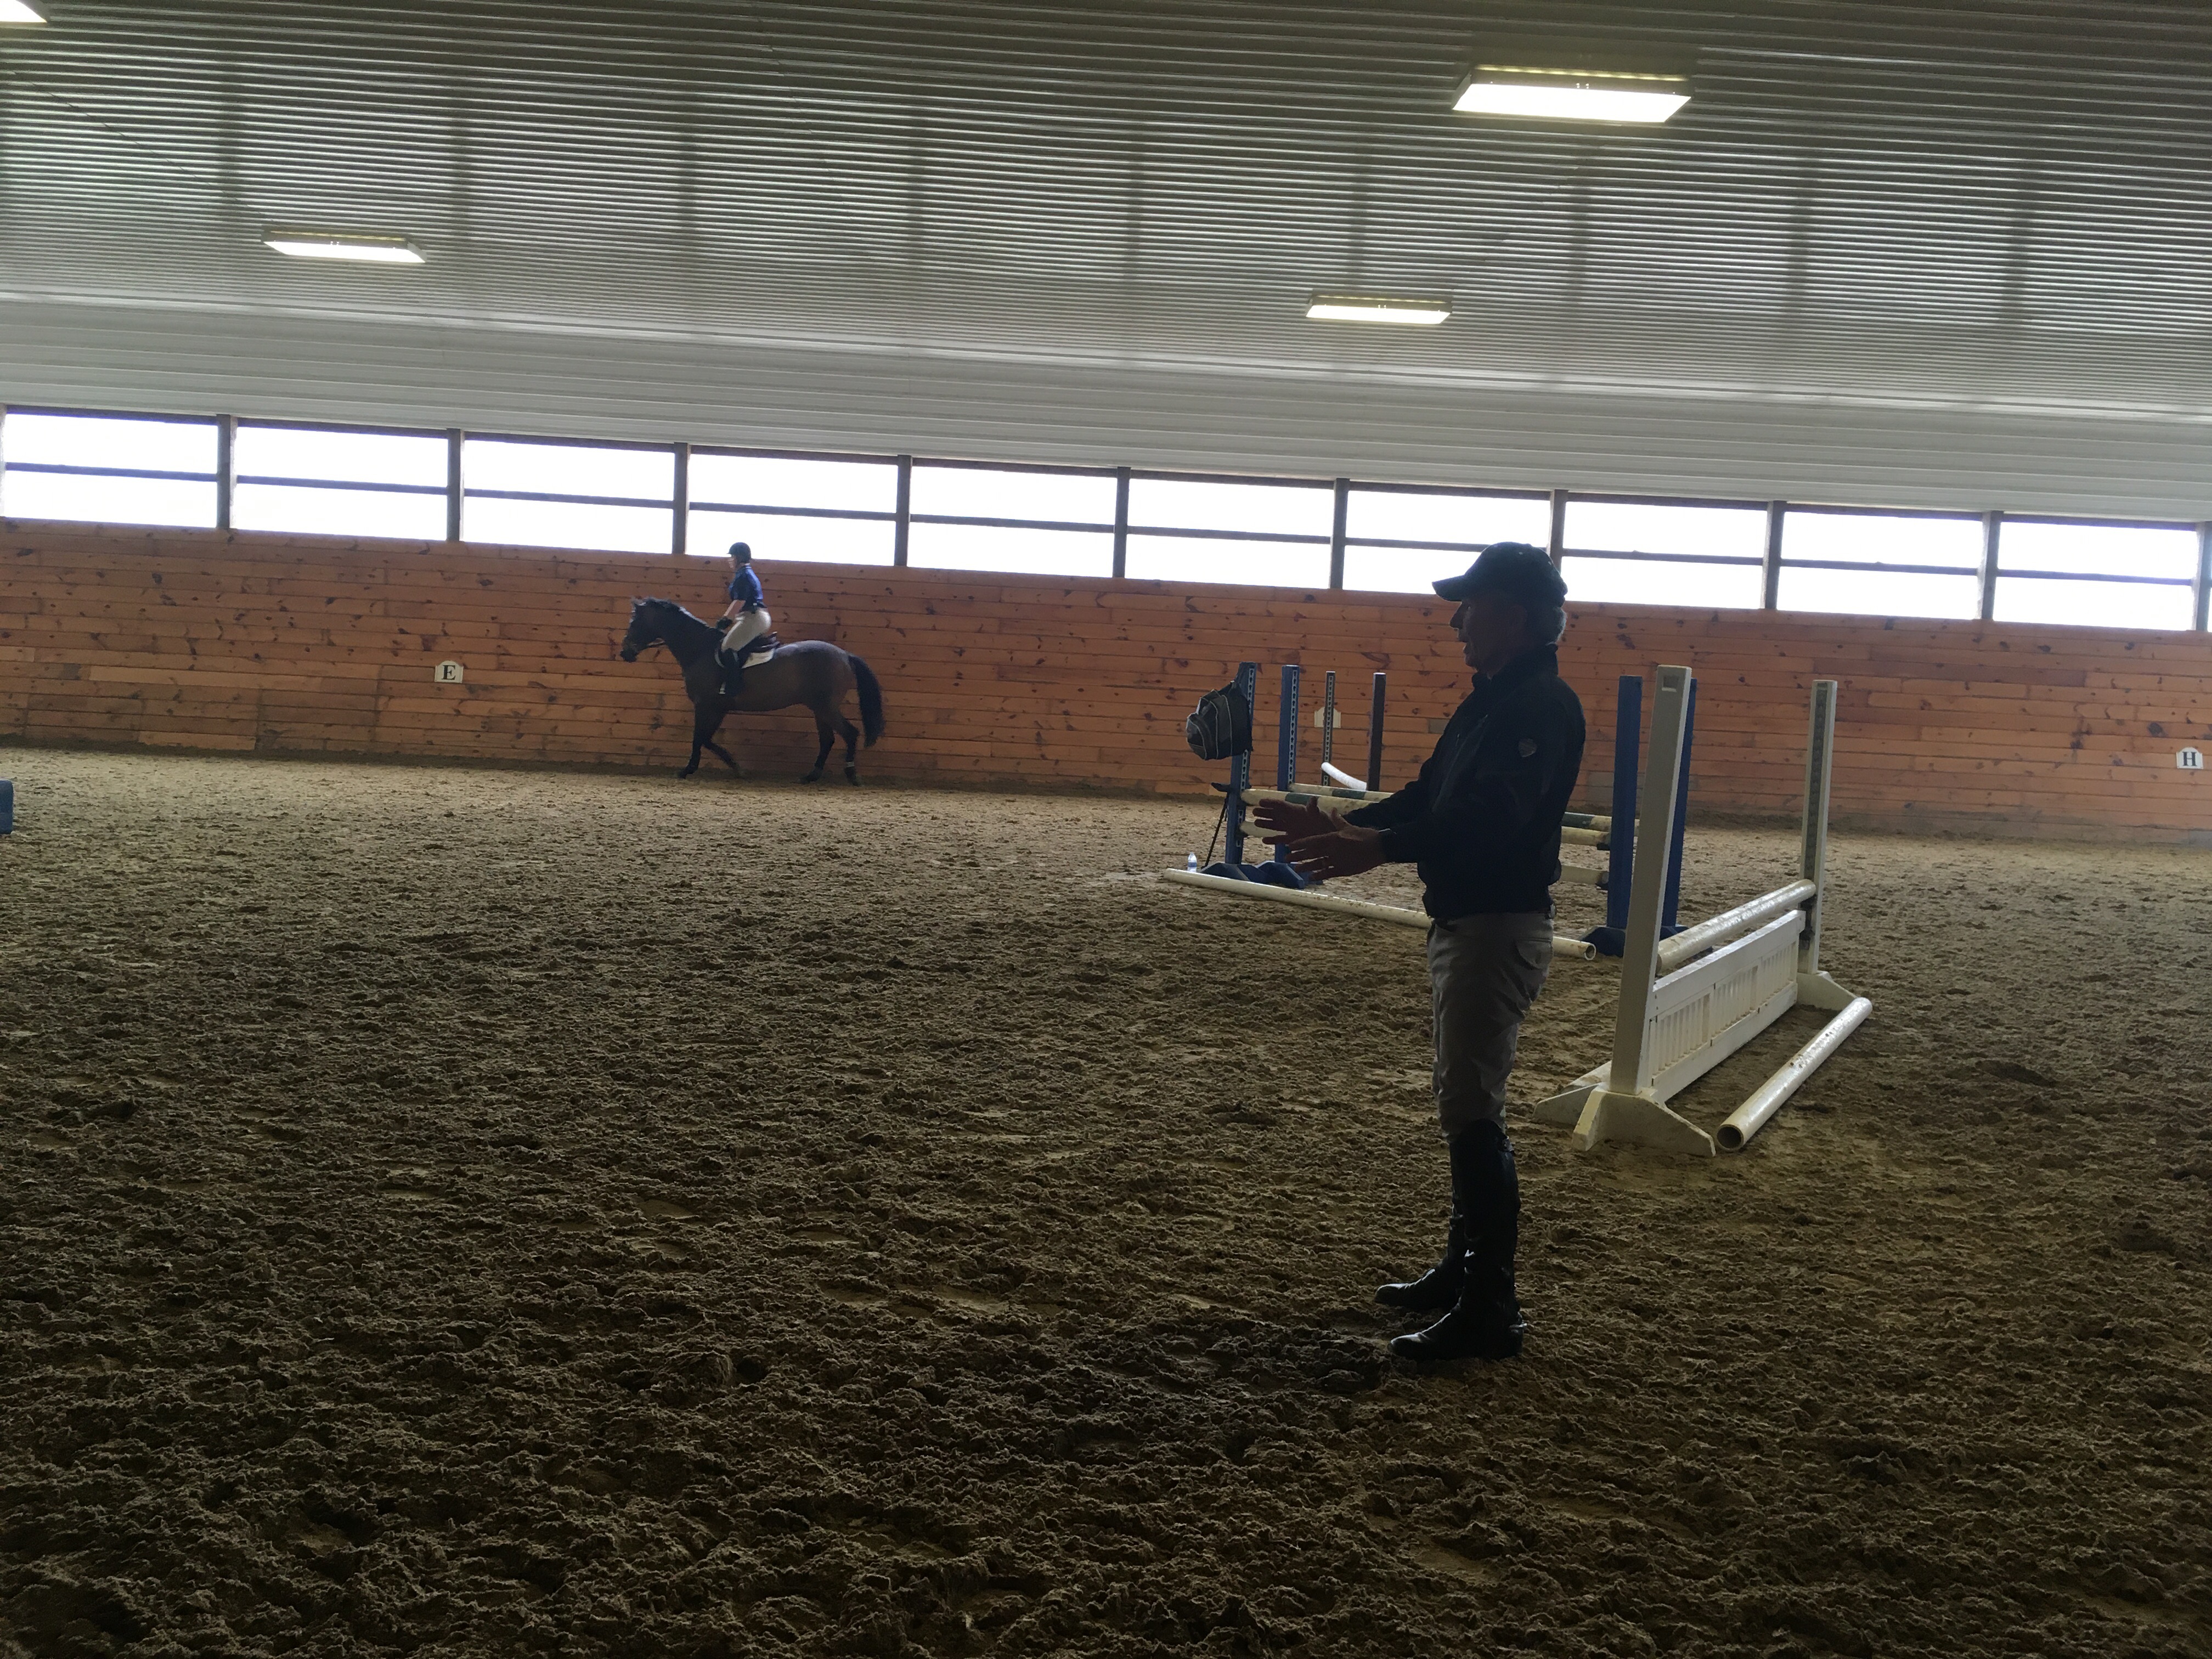
  1. Controlled flag handling is key. Learning to handle the flag effectively is probably one of the most important pieces in terms of communicating your intent and desire to the horse. The flag can be used to direct them forward, turn them and encourage more activity from the hindquarters, but it can also be used to reassure them and give them confidence. The horse has to become what I would call “positively de-sensitized” to the flag, much like they do with dressage wands or longe whips. In other words, your horse should respond to the flag, but not fear it.

On day one, I had no further finished explaining that Anna tended to be rather dull and non-responsive to aids when she reacted to the flag as though I chased her with a flaming arrow. Kip watched as she spun around and around in an effort to get away from the flag’s presence near her haunches with a rather dry comment: “And you say you ride this one?”. I laughed and replied that if Anna were half as electric under saddle as she was toward that flag, we might have gotten a little further in our dressage work. By the end of the session, she tolerated the flag on her, near her and touching her pretty much anywhere.

You will see that Anna fairly quickly acclimated to the flag and became her usual rather non-reactive self.

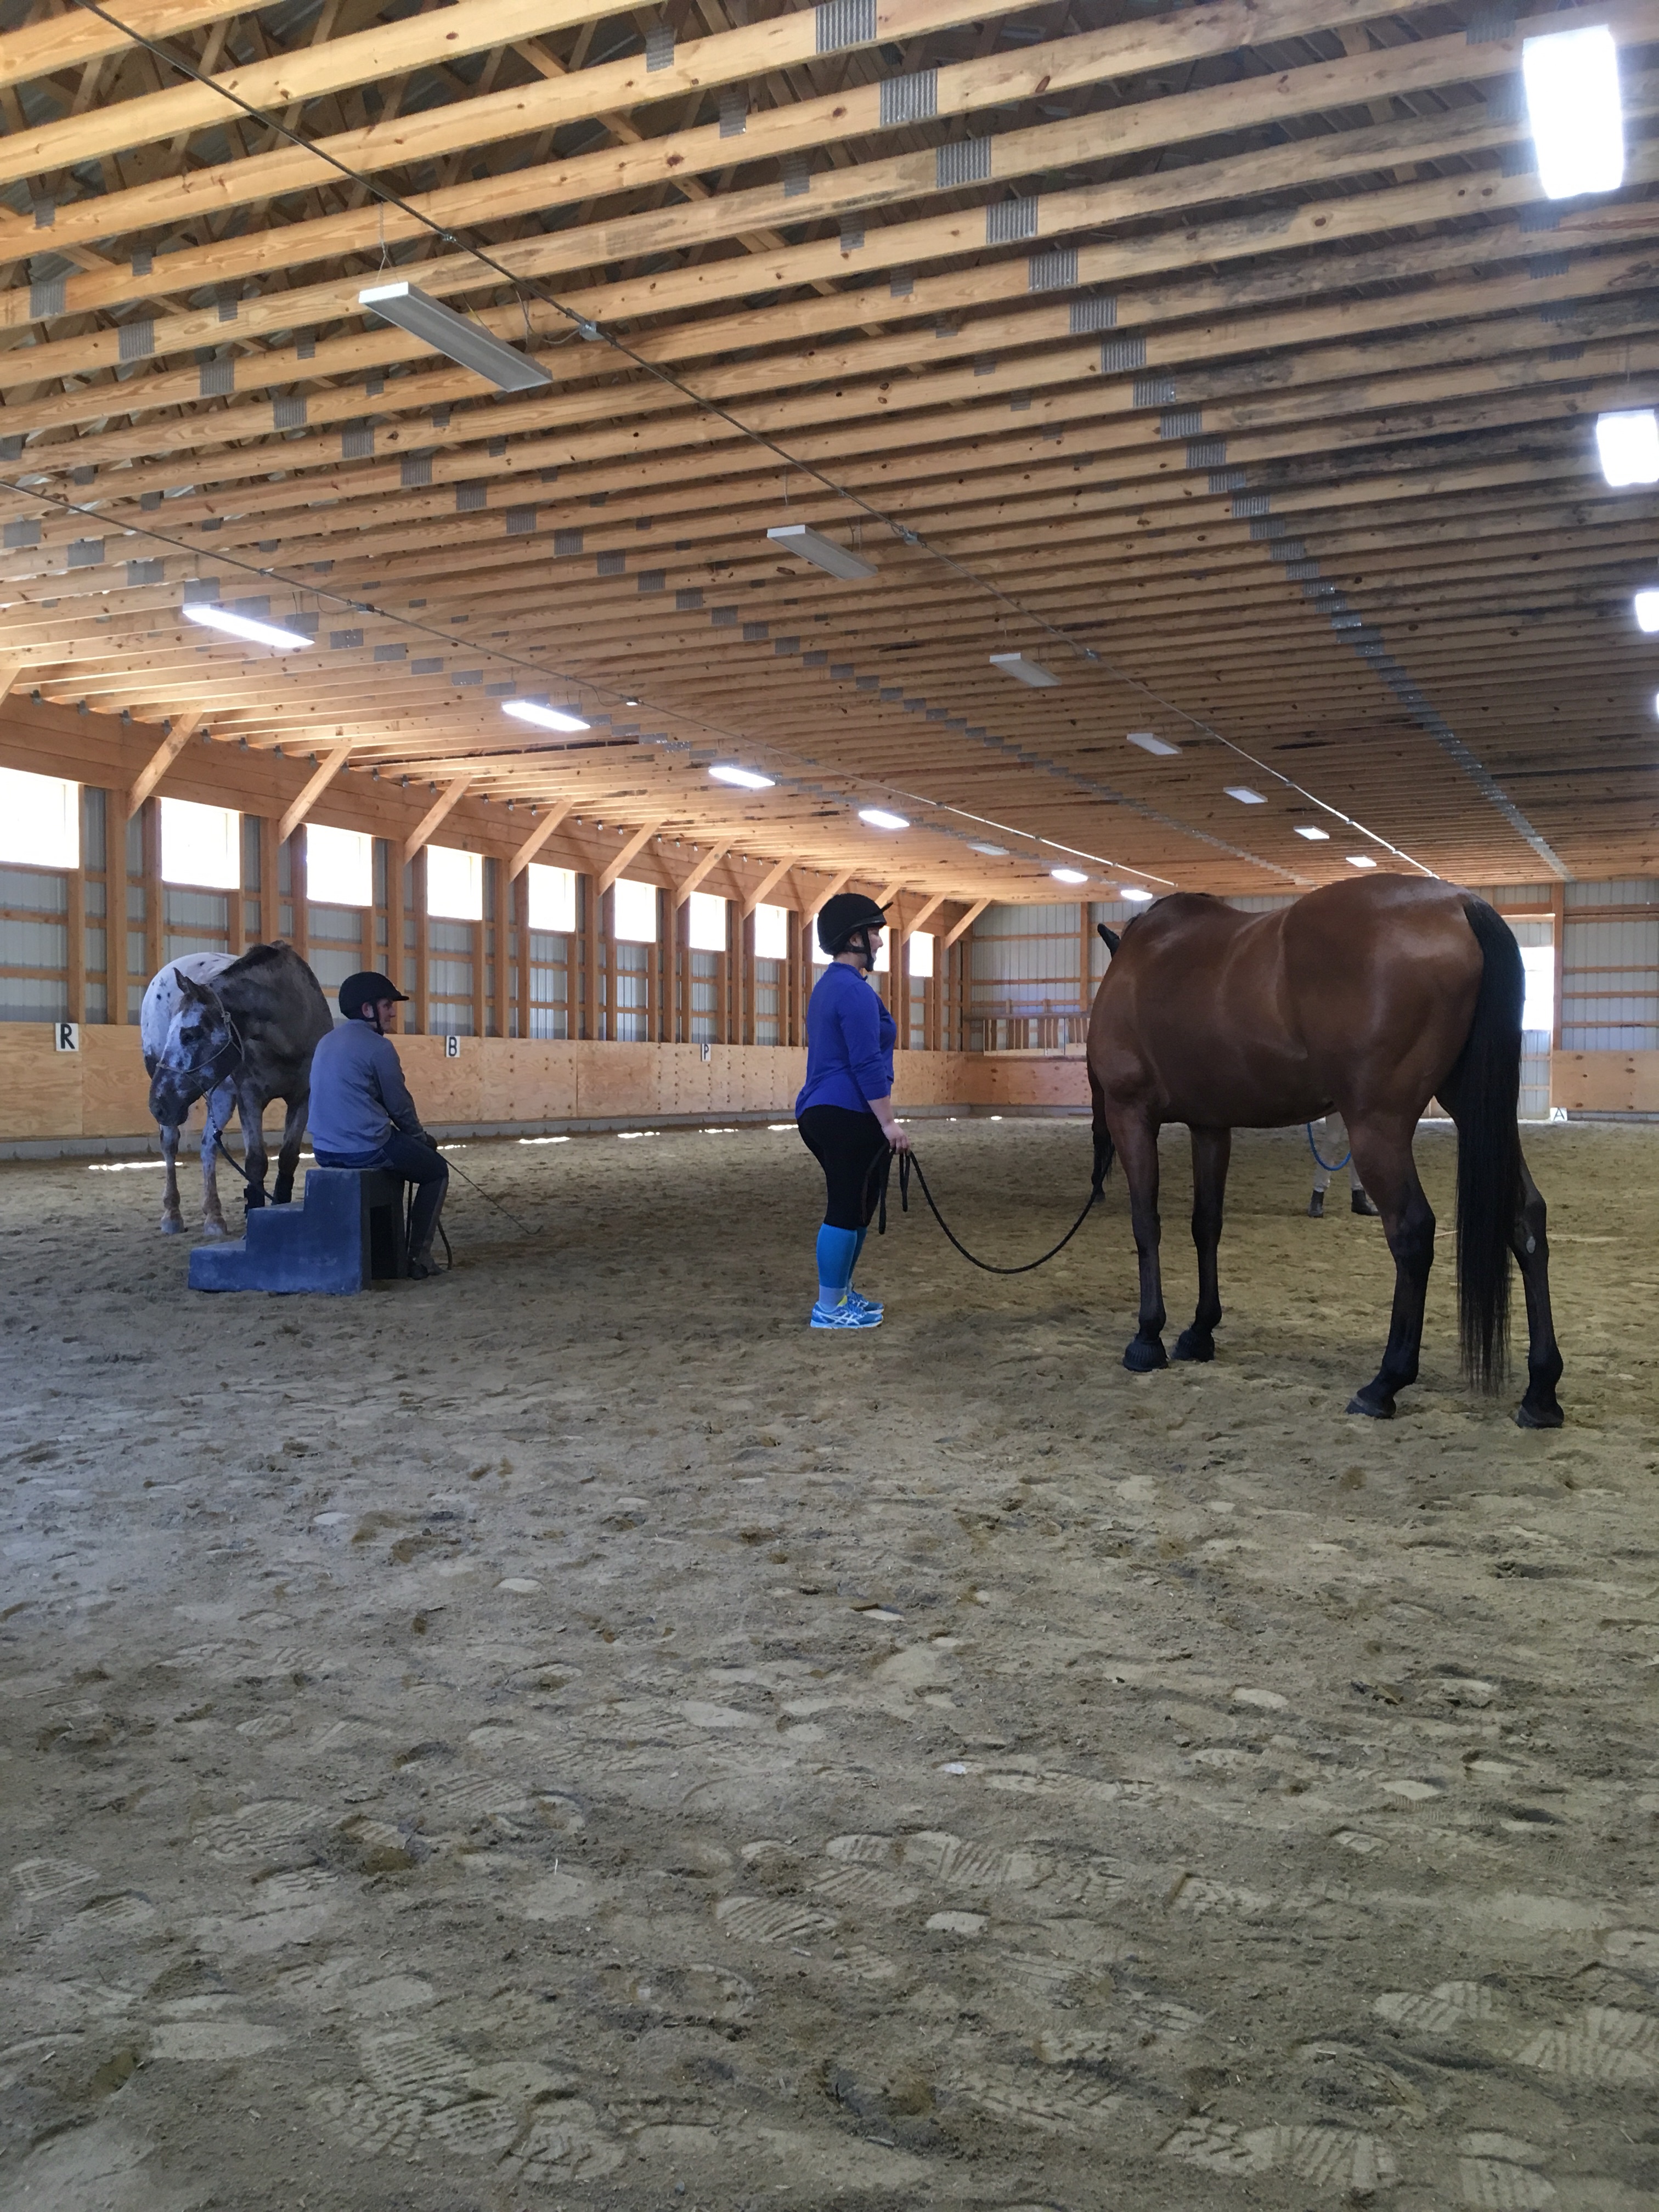
On day two, a new horse joined our group who was rather impressively reactive to the flag. Leslie Ann McGowan, trainer at Double A Equestrians and a long time student of Kip’s, stepped in to handle the horse. Despite the horse’s honest fear and confusion, Leslie Ann remained calm and simply consistently exposed him to the flag until he started to settle. Throughout the clinic, horses had occasional big responses to the aids, or misunderstandings of the aids, to which Kip replied at one point, “She’s not a teacup and you aren’t gonna break her.” As with humans, sometimes for the horse to learn, they must make mistakes and express frustration and confusion before understanding what is expected of them. As trainers, we can’t be afraid of these messy moments if we hope to help our horse learn.

The flag is held like a tennis racket, and there are four ways to change the flag from one hand to the other, each of which will achieve an increasing degree of engagement in the hocks. When your flag changes hands, the horse usually is also changing direction. One important note is that you should never switch the flag on the ground through the blind spot in front of the horse’s nose. If you do this, the movement can scare them and some horses will strike with their forelegs.

It would appear that here I am attempting to send Izzy forward but have perhaps failed to open the forehand first. Sigh. So much to learn.

The position of your opposite arm combines with the flag to direct the horse. If using the flag to send the horse forward, the hand should be in a leading position. If rubbing the horse with the flag to reassure them, your opposite hand should drop toward your thigh.

  • Reward the try but also don’t wait for perfection before you ask for more.

Whatever you are asking the horse to do: move away, turn, yield in the poll, etc., it is important to recognize the smallest effort by releasing the pressure as soon as you sense the horse is yielding to what you have asked. One of the most common ways that trainers go wrong is they hold too long, or expect too much, and the horse begins to resist rather than try.

At the same time, if we wait for every piece to be perfect before moving on, we will never get anywhere at all. As with most training, we must accept the try, and a result that is a little bit better than before, rather than nitpick doggedly until the horse is perfect.

A nice scratch on the forehead for a good effort.

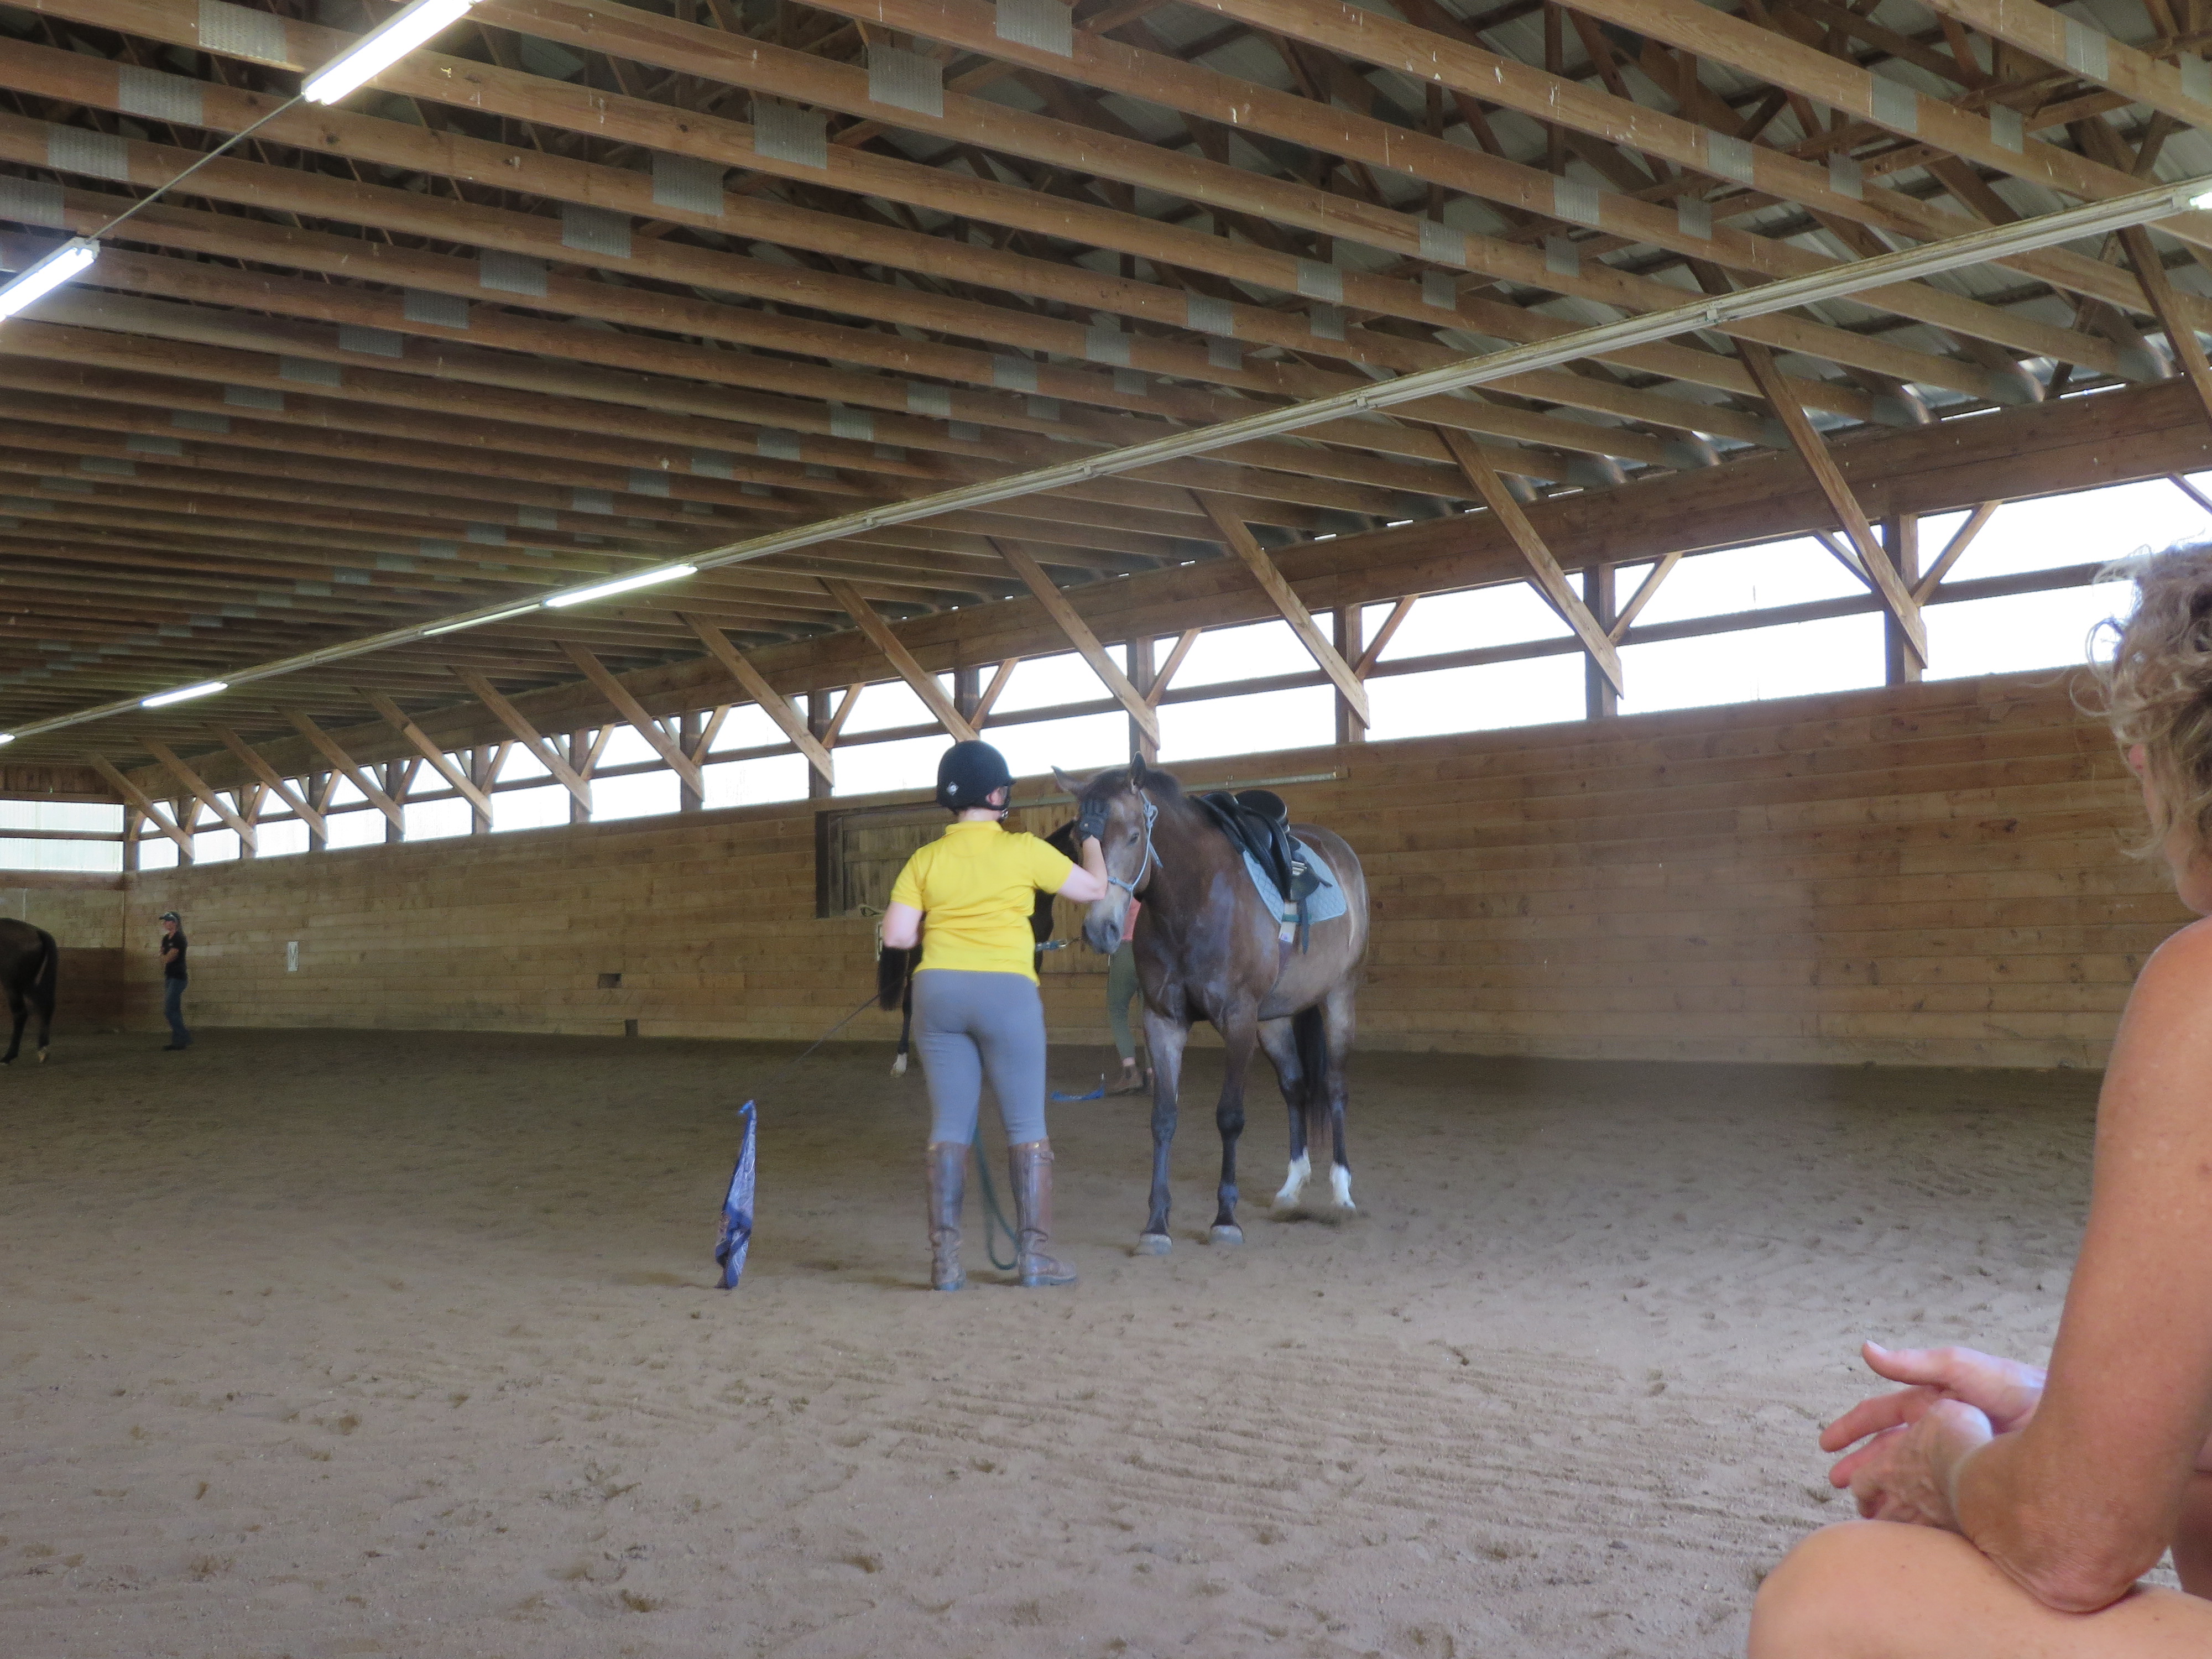
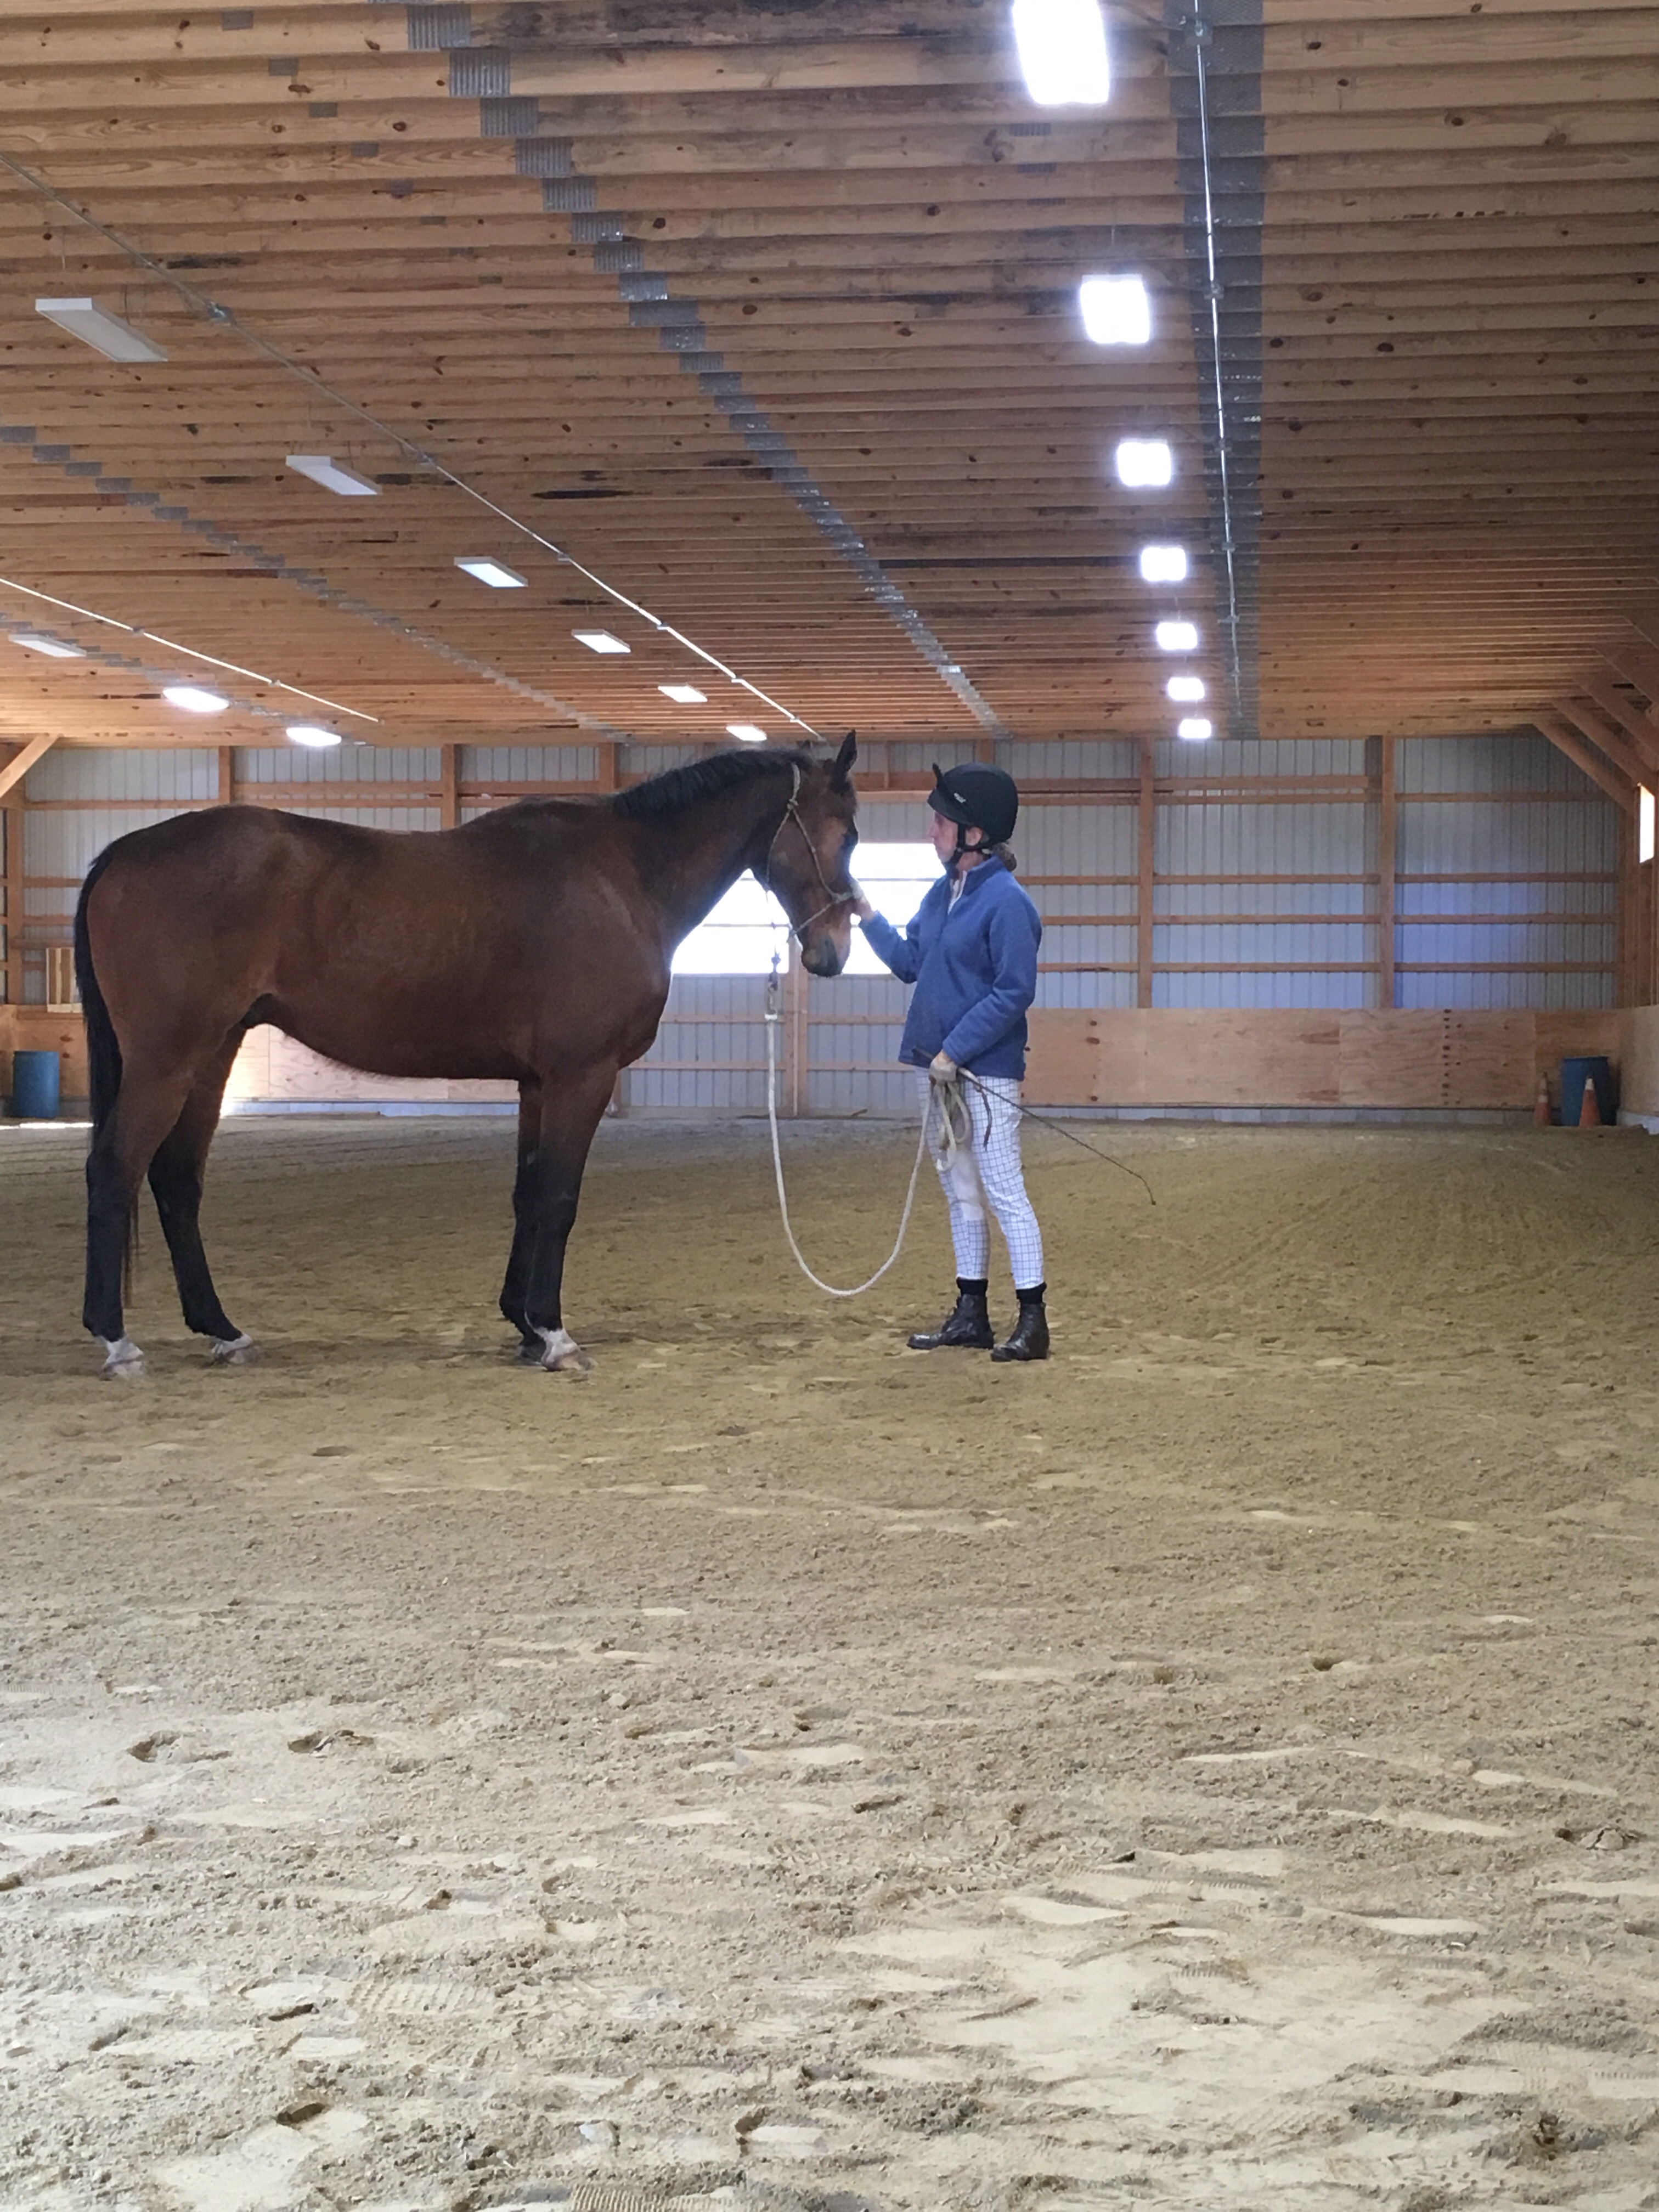
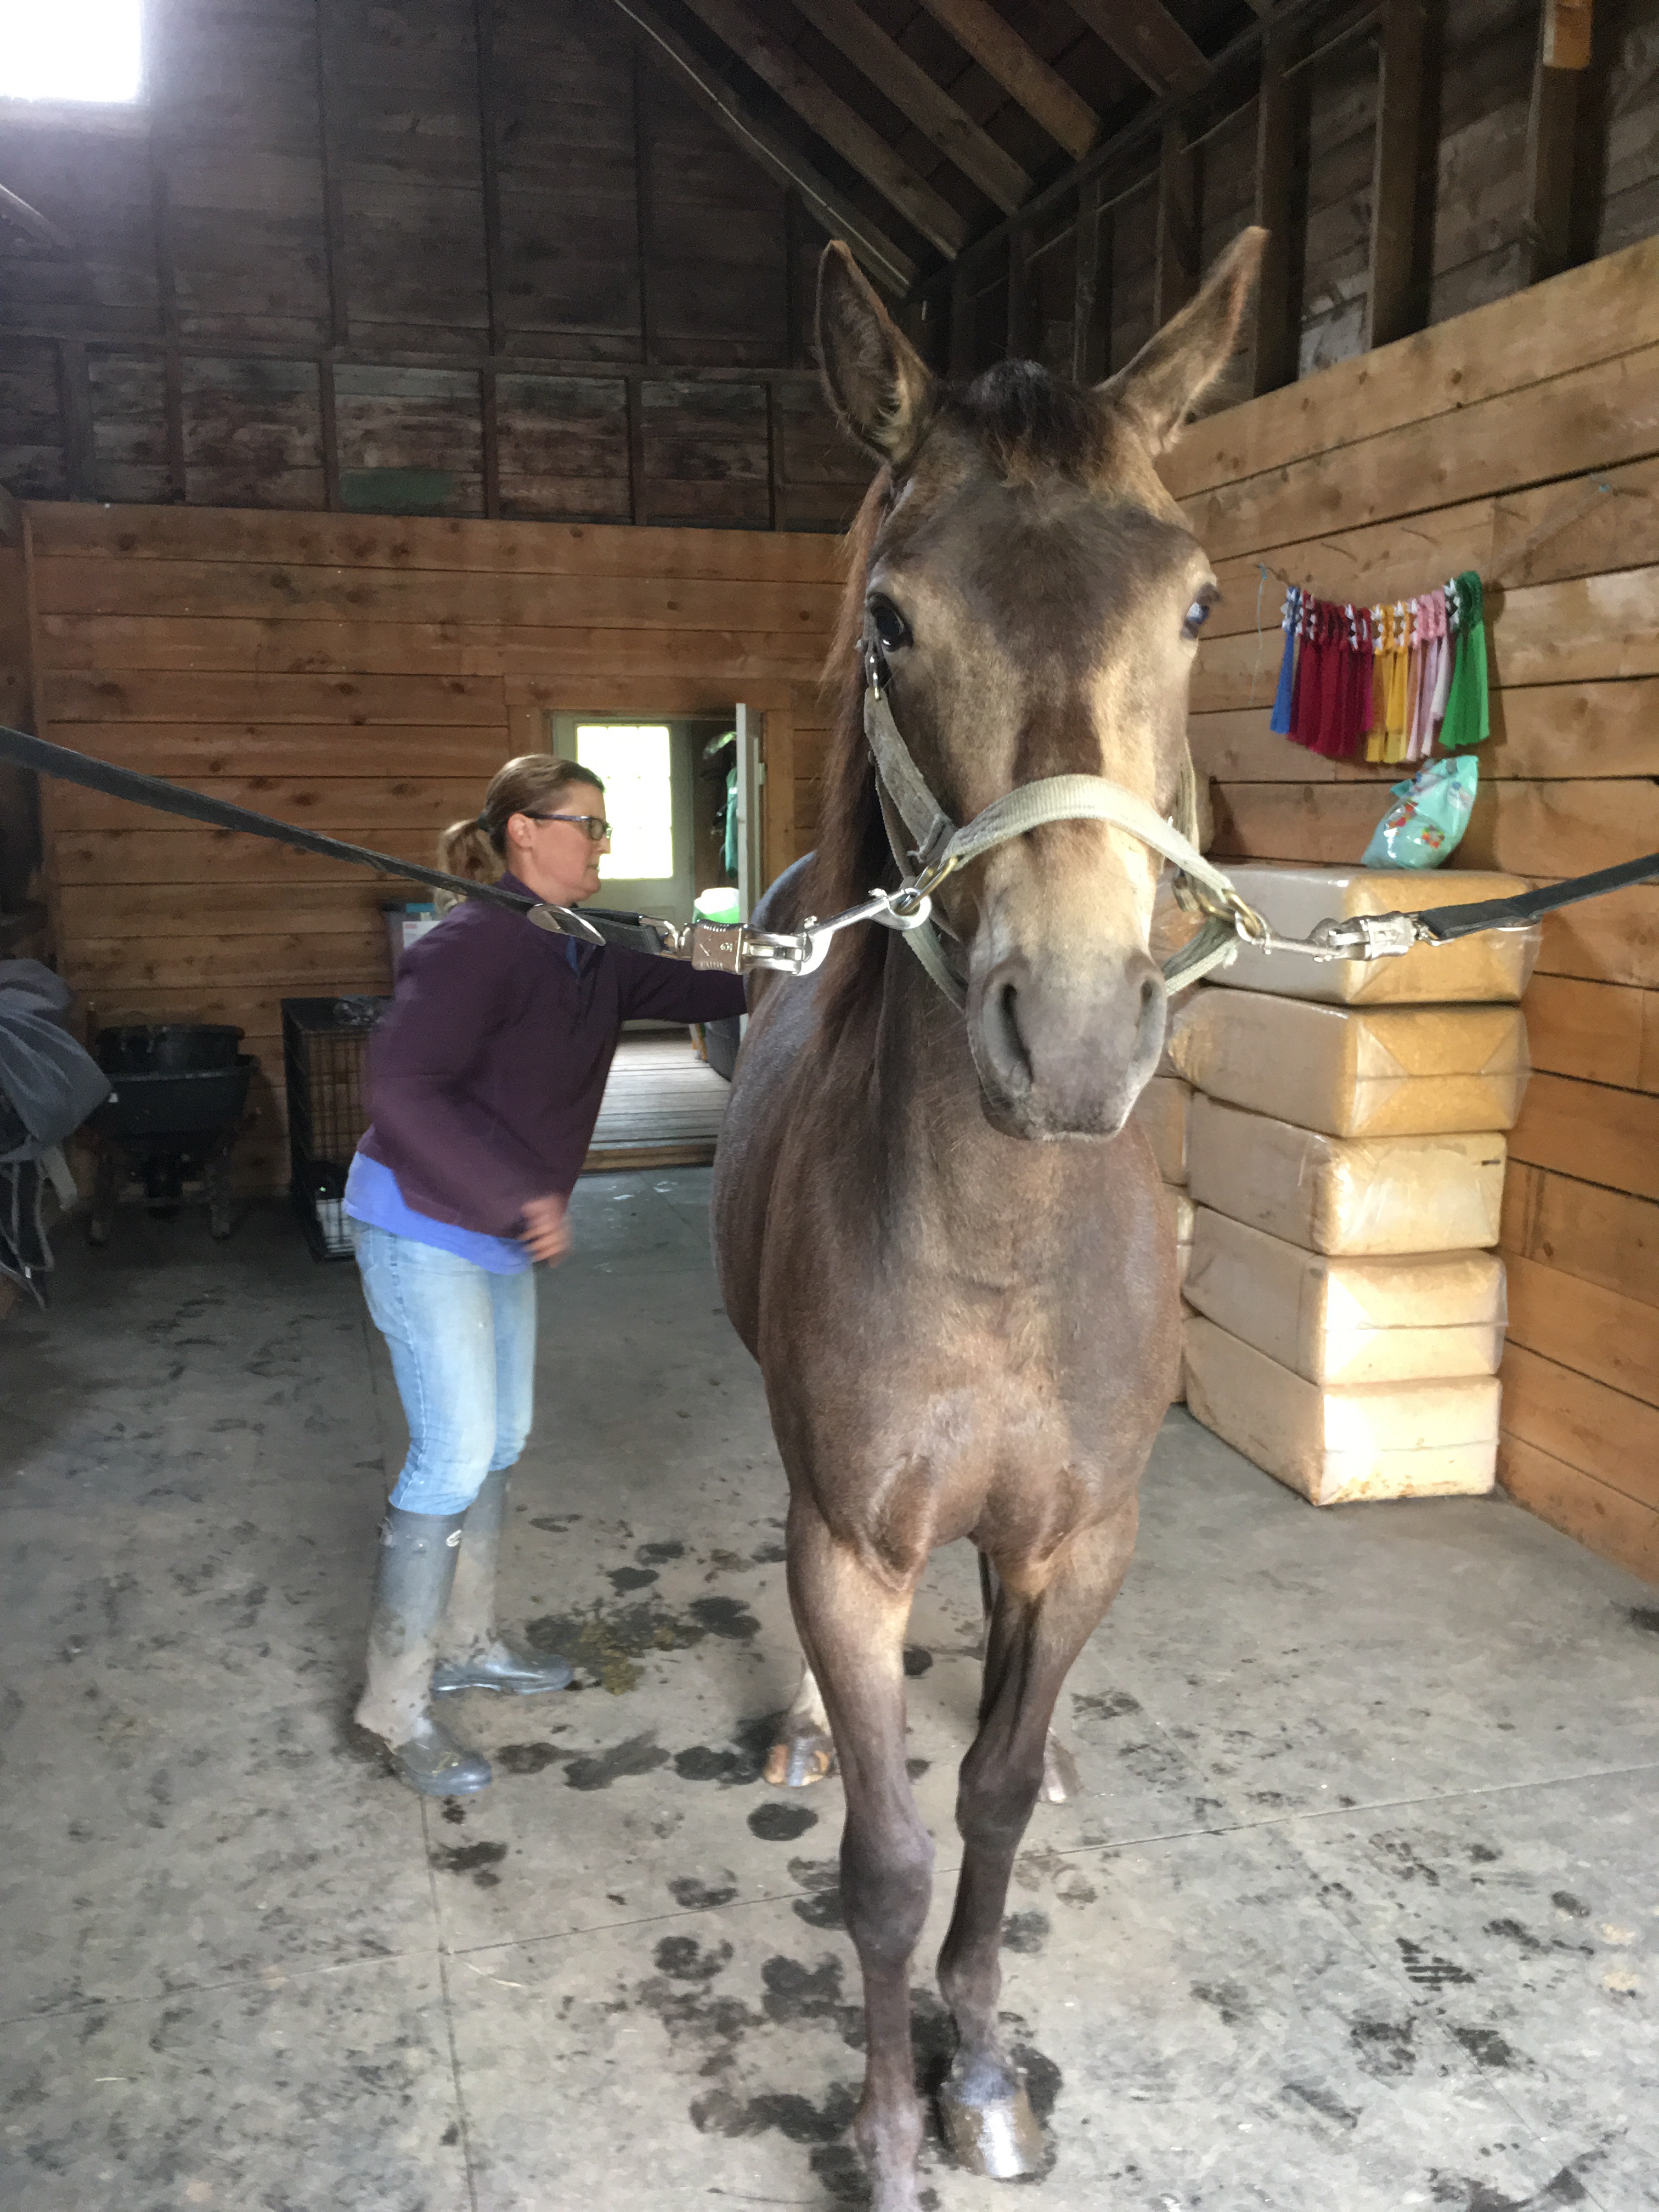
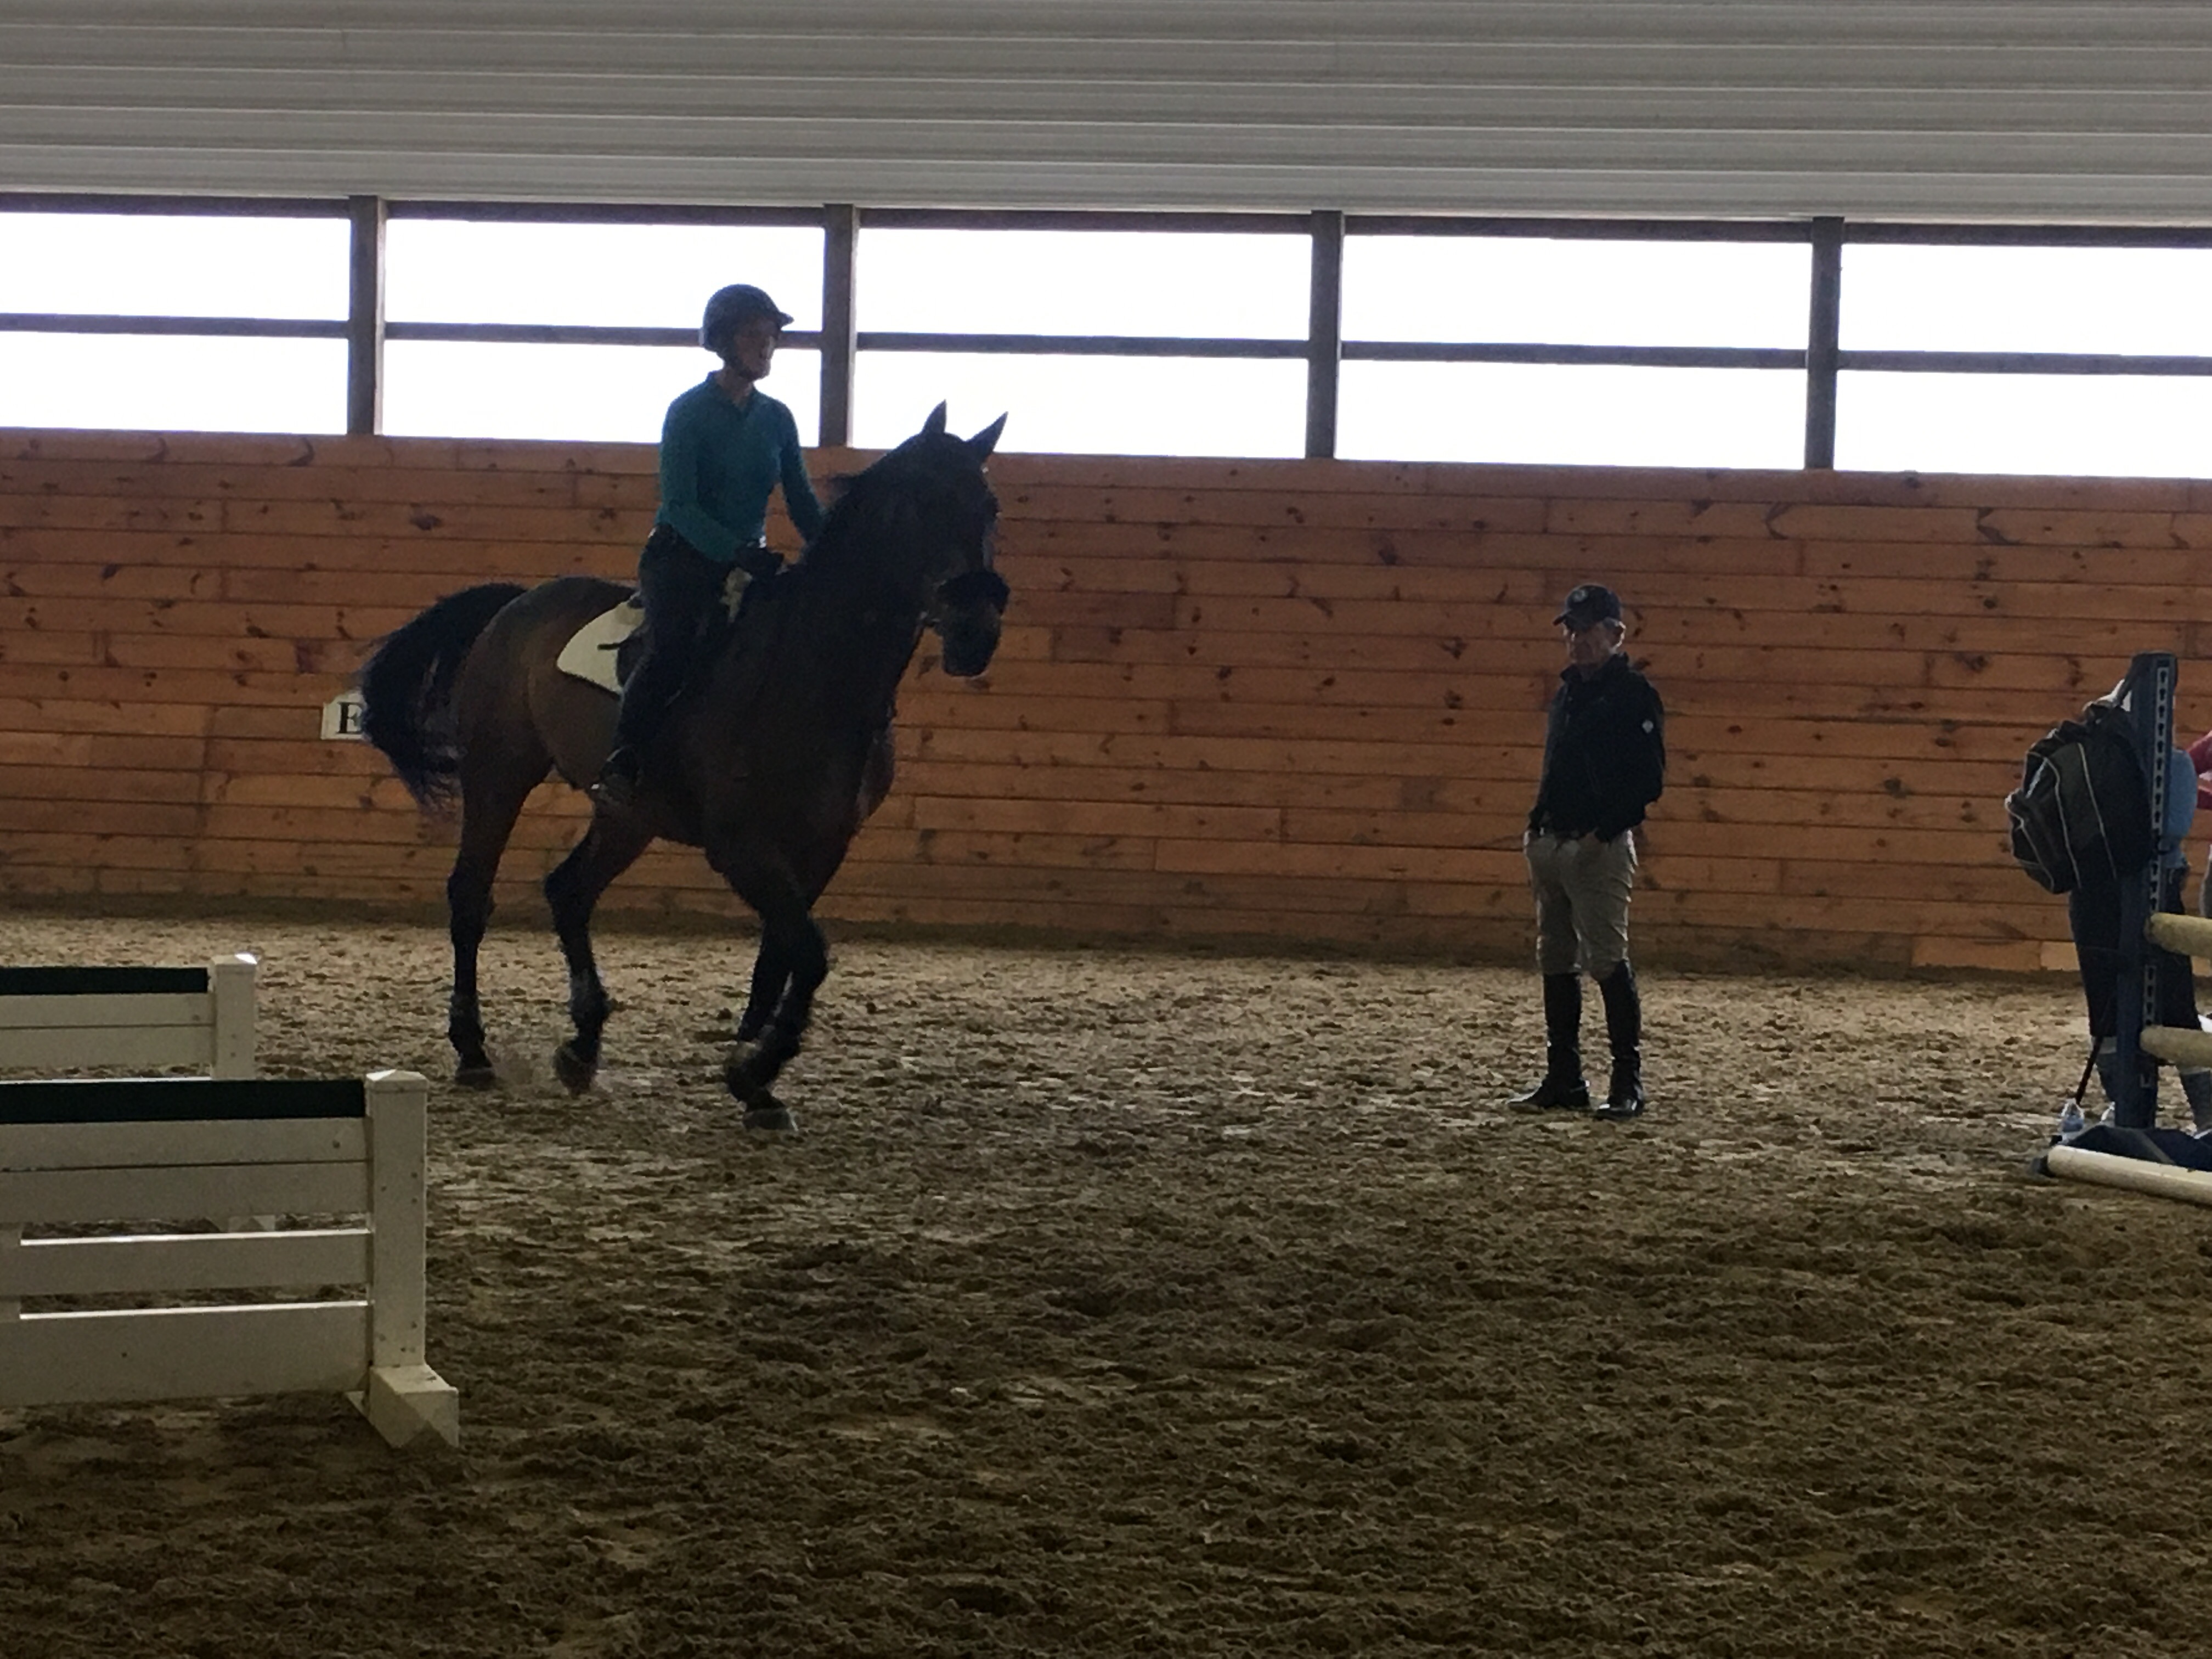
One of our first tasks was to ask our horses to step out and away from us, leading with their outside foreleg. Kip called this “opening”; if you are “opening” to the left, the horse’s right fore will step out and the horse tracks left. To initiate the movement, we raised our hands toward the horse’s head and neck and without contact (at first), applied pressure to ask the horse to move. At first, in response, horses may raise their head, step into the handler, back up, move forward, or simply not move at all. The handler must hold her ground and not back up; the horse must learn to move out of the handler’s space. Through all of those little mistakes from the horse (‘do you want me to go this way? Or this way? How about this?) the handler must remain calm, clear in her mind of what she is looking for, and ready to release as soon as the hoof moved out.

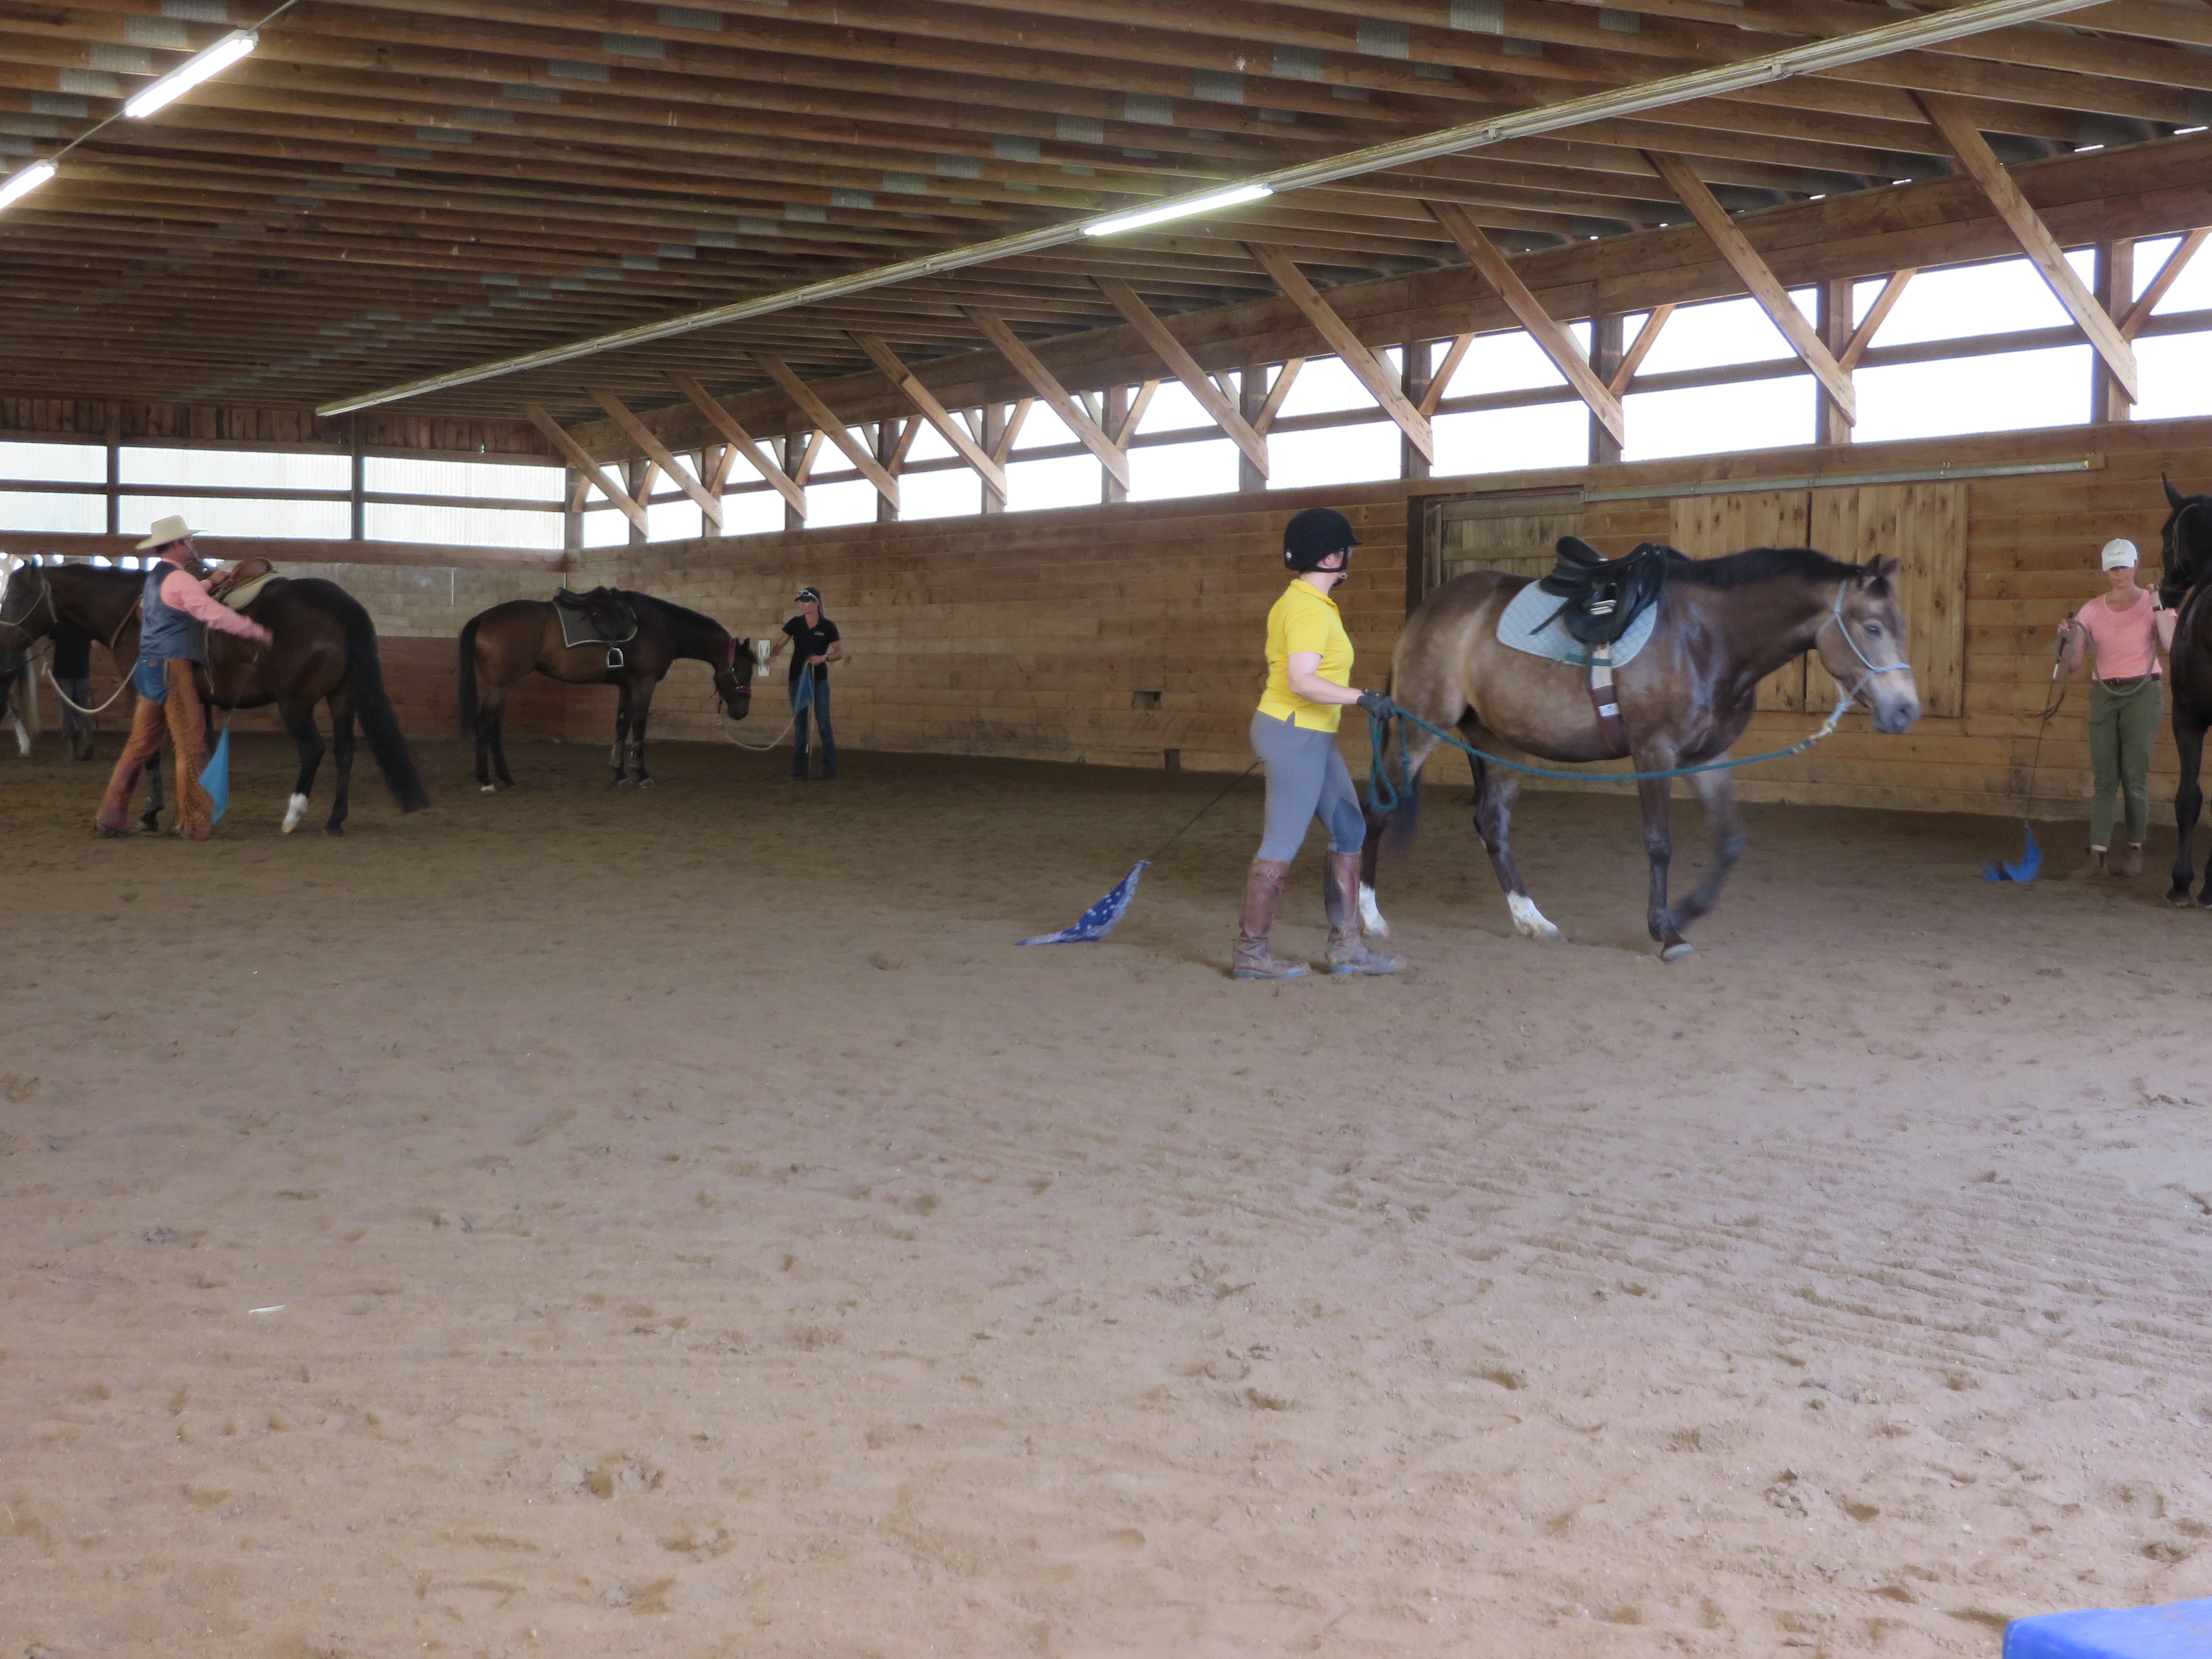
Our next task was to open the forehand and then, using the flag, send the horse out on a small circle around us. We were to keep the horse actively moving, slightly bent to the inside through their body and with the legs moving “united”; Kip describes this as when the left legs are on the same track as each other and the right legs on their own matching track. The flag can be used to create the energy, encourage the horse to step away, or to reassure them; if the horse has become too desensitized to it, the handler will need to use the flag assertively to once again elicit a positive response. Once the horse marched several circles united and with correct bend, we asked them to halt by stepping toward the hindquarter and raising the lead diagonally toward the withers. The horse’s hindquarters should step out (crossing over with inside hind) and their neck bend in. Kip called this “disengaging” the hind quarter, though he doesn’t love that term.

Working on the active, bent circle.

In doing some of these movements, I was struck (not for the first time) by how much overlap there is between some of these concepts and the fundamentals of dressage. My former coach, Verne Batchelder, had a movement he called “the circle of submission”, in which the rider actively executed a volte and asked the horse to step the hindquarters out for several strides while maintaining the inside bend and position of the neck. However you say it–asking the horse to yield their hips, engage their hocks, move their feet—ultimately requires that the horse be willing to allow their bodies to be manipulated and their toplines to begin to relax and stretch. It is simple biomechanics; a horse cannot reach further under his body with the hind legs if his back is tight.

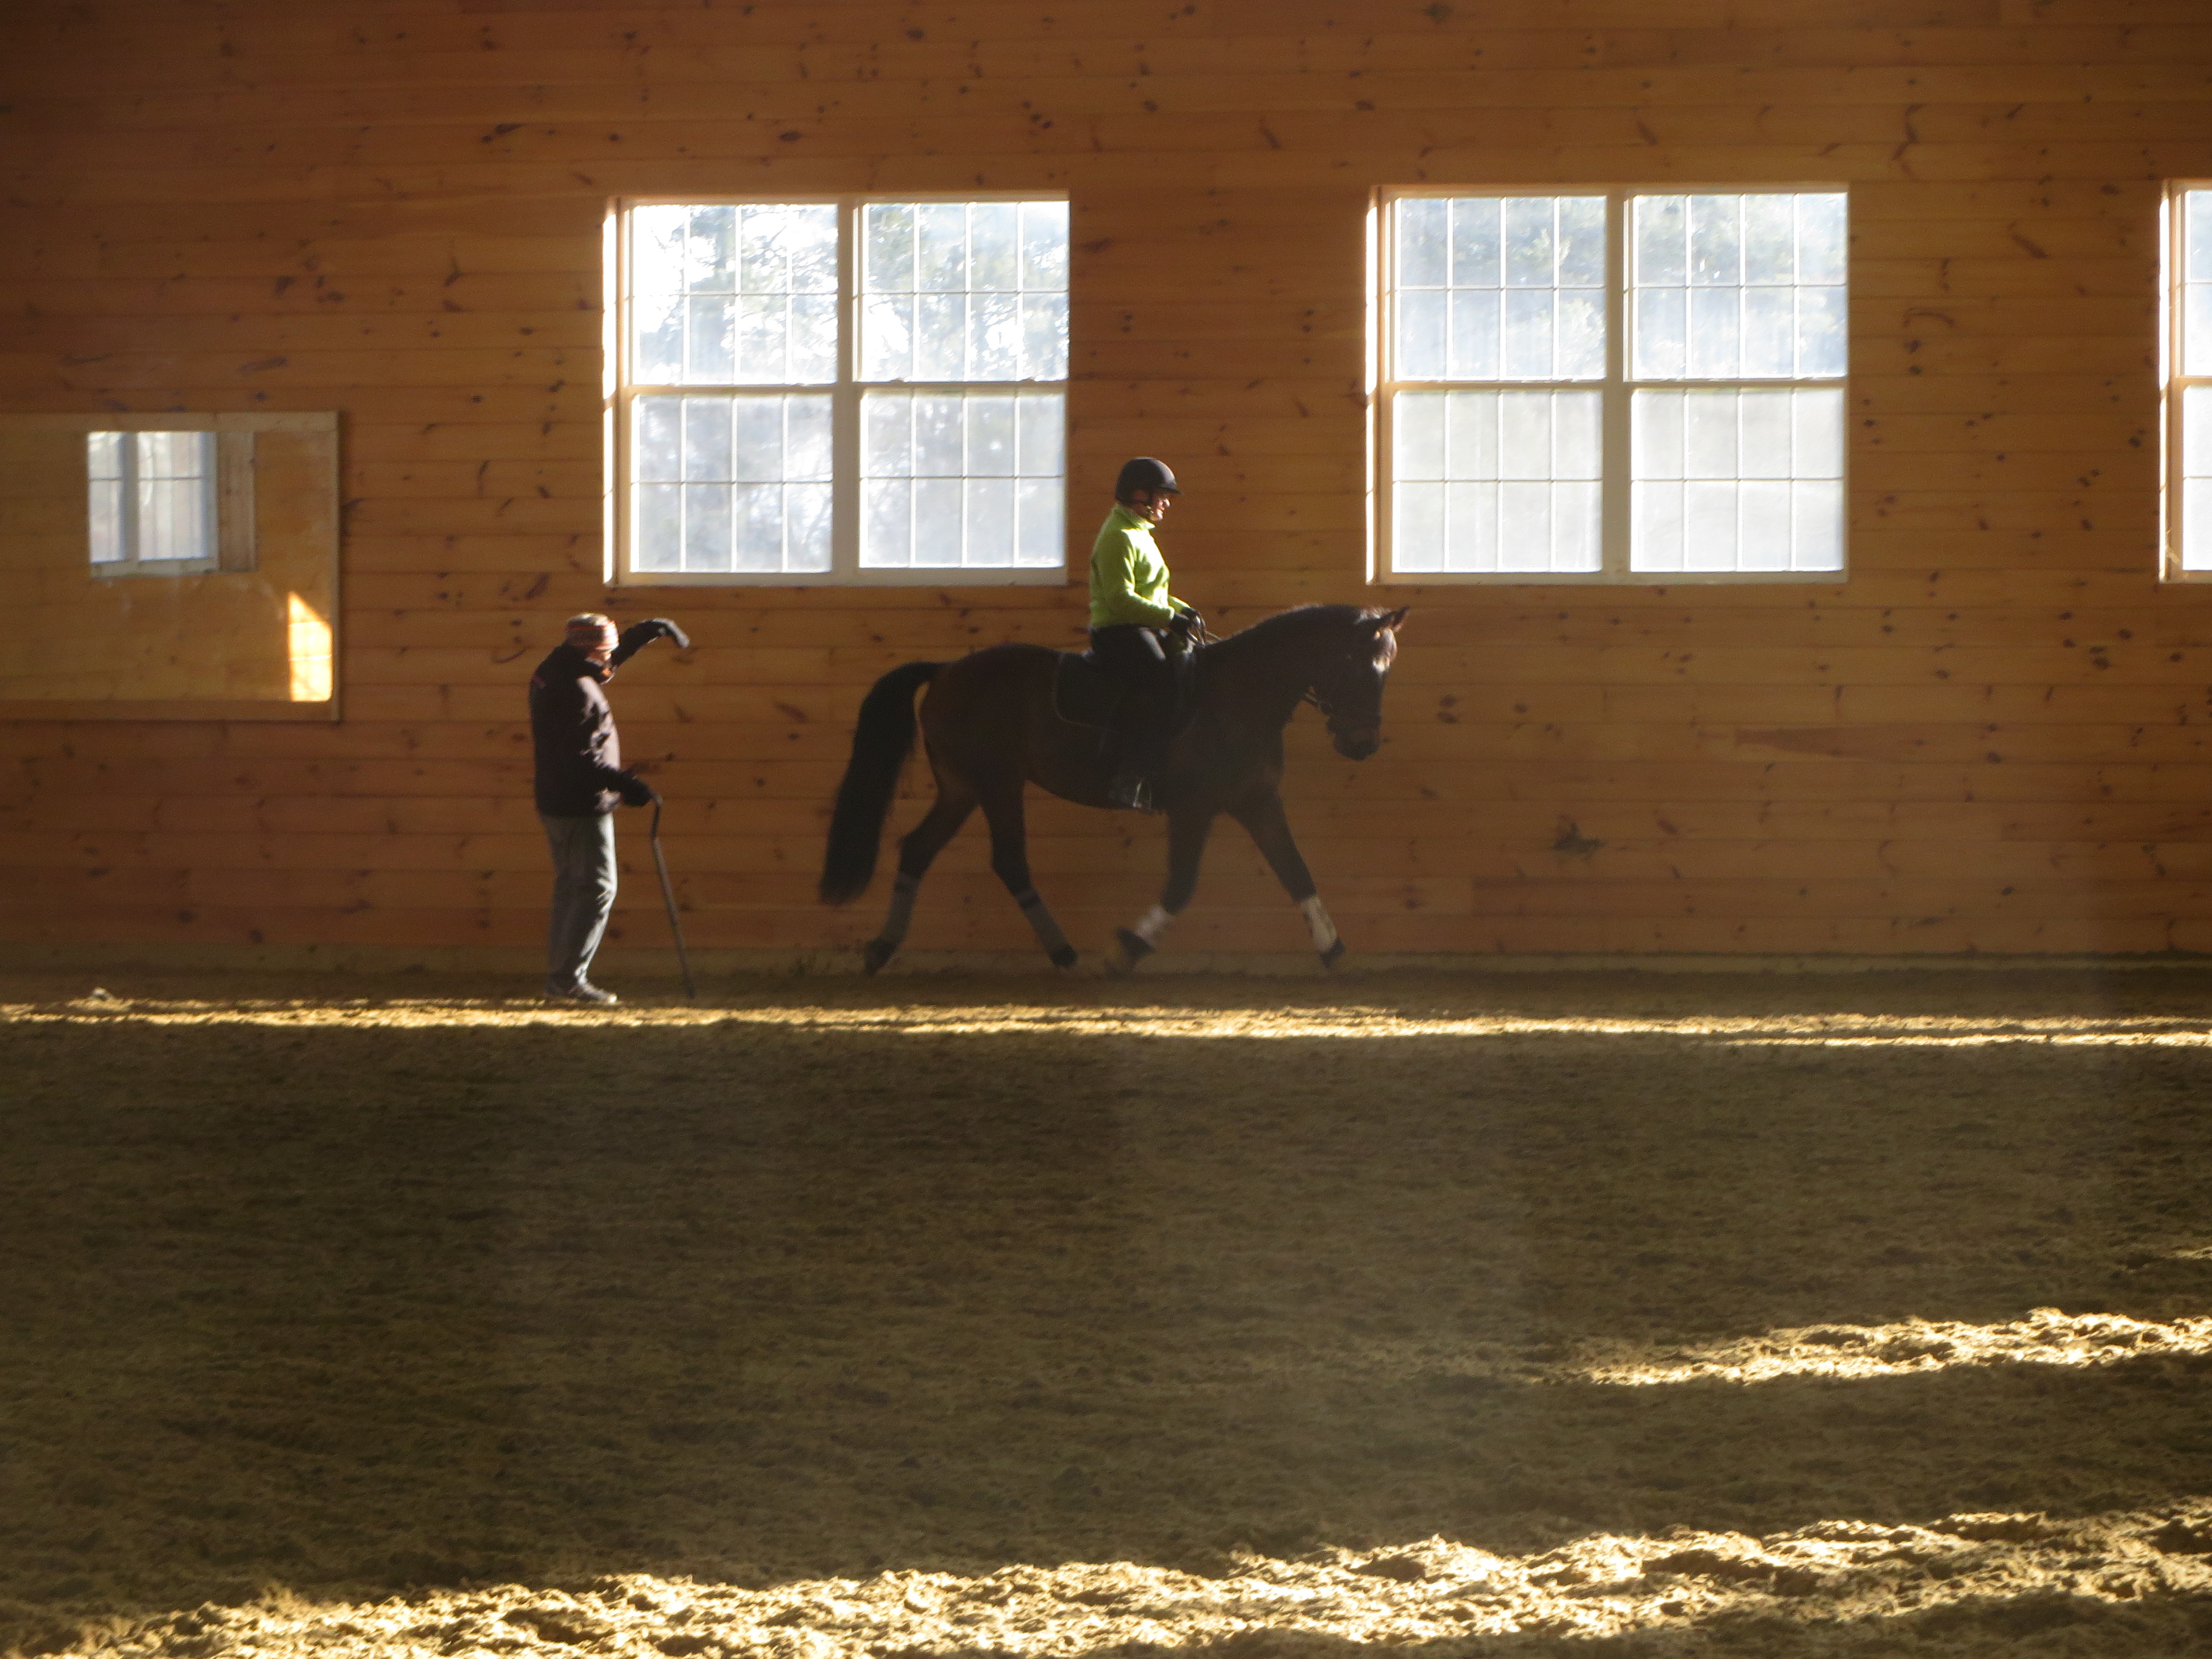
Kip taught a mounted session in the afternoons; I was able to make it back to observe a few hours of day two’s lesson. He emphasized that all of the flag exercises he does on the ground, he also does while mounted. Though I didn’t get to see much of how he incorporates the flag into mounted work, he mentioned that at the end of day one, he backed a leggy 2-year-old warmblood that was in our group; by the end of that first ride (which was a very low stress experience, from what I was told), he was riding with the flag.

Each session, Kip worked with a horse with whom he could demo the various skills and techniques. I was floored to learn that this calm, elegant Quarter Horse mare of Karen Bishop’s was only 4 years old! She demoed in the morning set and then was ridden in the afternoon. Truly wise beyond her years!

  • I should ask my horses to back more often and with more intention.

Kip introduced several ways of asking the horse to back in hand which can then be translated to work under saddle. The most basic option requires the horse to back to the end of the lead rope from a rather light flick of the line; we also played with asking the horse to back with poll flexion off of noseband pressure from the halter (from each side) as well as backing on a straight line off a short shank (also from each side). This last form of backing can easily be added onto a yield of the haunches.

Practicing backing up in hand. Here, you should have your hand upside down on the knot of the halter, as opposed to right side up like I have it here. That way you can use your elbow to keep the horse’s head away from you if they swing it up! Kip had us apply side to side pressure on the noseband using the knot under the chin, with the goal of the horse softly flexing in the poll and smoothly stepping back.

In later sessions, we also learned how to add neck flexion in time with the lift of the foreleg on the outside, which caused the horse to back onto an arc. We later played with backing parallel to the wall, then timing a flick of the flag with the “about to step” movement of any individual limb. This causes the horse to balance back and then push forward with more power. With four distinct limbs to focus on, there is plenty to practice.

On days two and three, when Izzy was with me, we also played with backing under saddle. Until that day, I had never asked Izzy to back even a single step with me on board, and Kip wanted us to start with five steps on a soft feel, then add a bend in the horse’s neck and back on a quarter turn! I can’t say we were the most successful pair in the ring, but thinking about our work on the ground helped with the intention under saddle. When Izzy expressed confusion, Kip had me break down the movement so it became one step back, one step bend.

Watching Kip demonstrate asking the horse to yield the neck in either direction at the halt. Depending on whether a leg aid is applied, the horse should either simply move their neck or also yield their haunches.

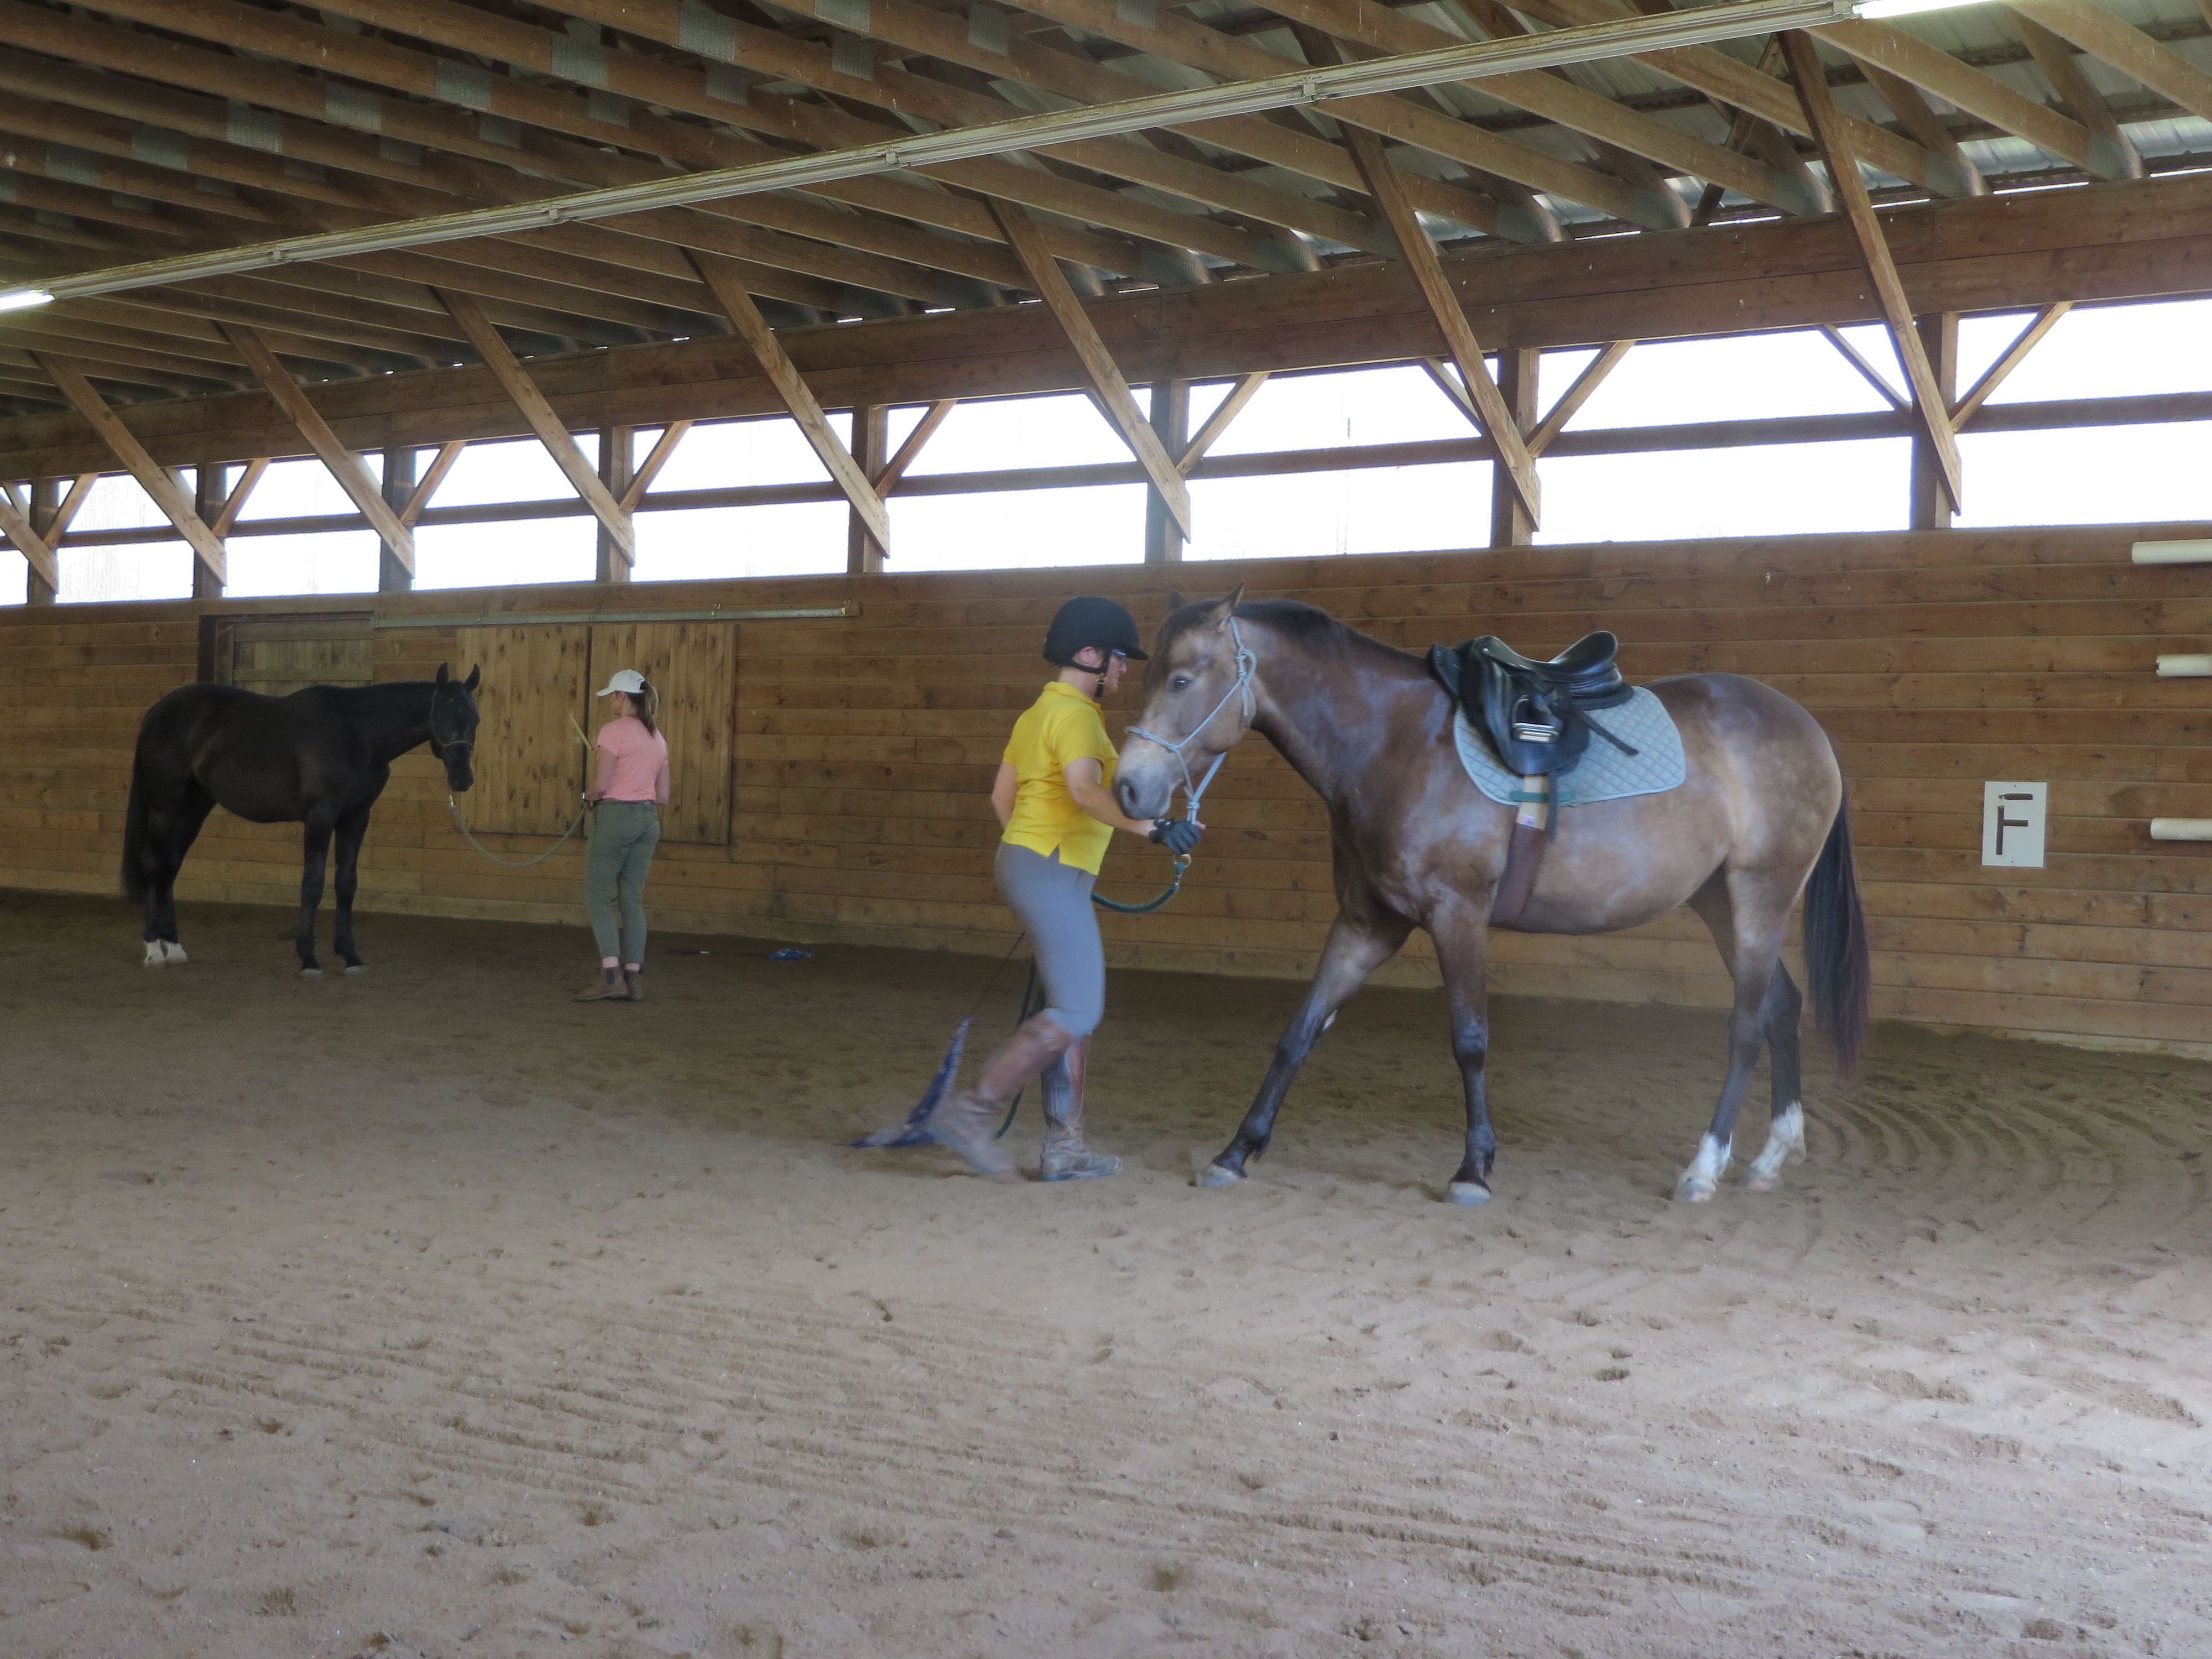
One of Kip’s overall themes was to never waste an opportunity to move your horse’s feet with intention. This could be as simple as opening the forehand or yielding the haunches, or as elaborate as walking on a straight line of your choosing with the horse walking half circles in each direction in front of you.

Despite three, three hour long sessions and the opportunity to audit two hours of a second group’s mounted lesson, I know that this clinic has only allowed me to scratch the surface of a skill set that Kip says has taken him twenty-five years of hard work to earn. Since the clinic, I have been playing with these tools fairly consistently with both Izzy and Nori, and in general most of the movements are starting to feel easier and better coordinated on my end. However, I do find myself wondering what I am doing wrong—because I am certain I have already forgotten about some important detail related to timing, posture or position—but I think Kip might say that it is better to try a little than not at all. You certainly don’t get any better at new skills by just daydreaming about them.

Practicing is important but sometimes it is also necessary to stop and listen to the instructions!

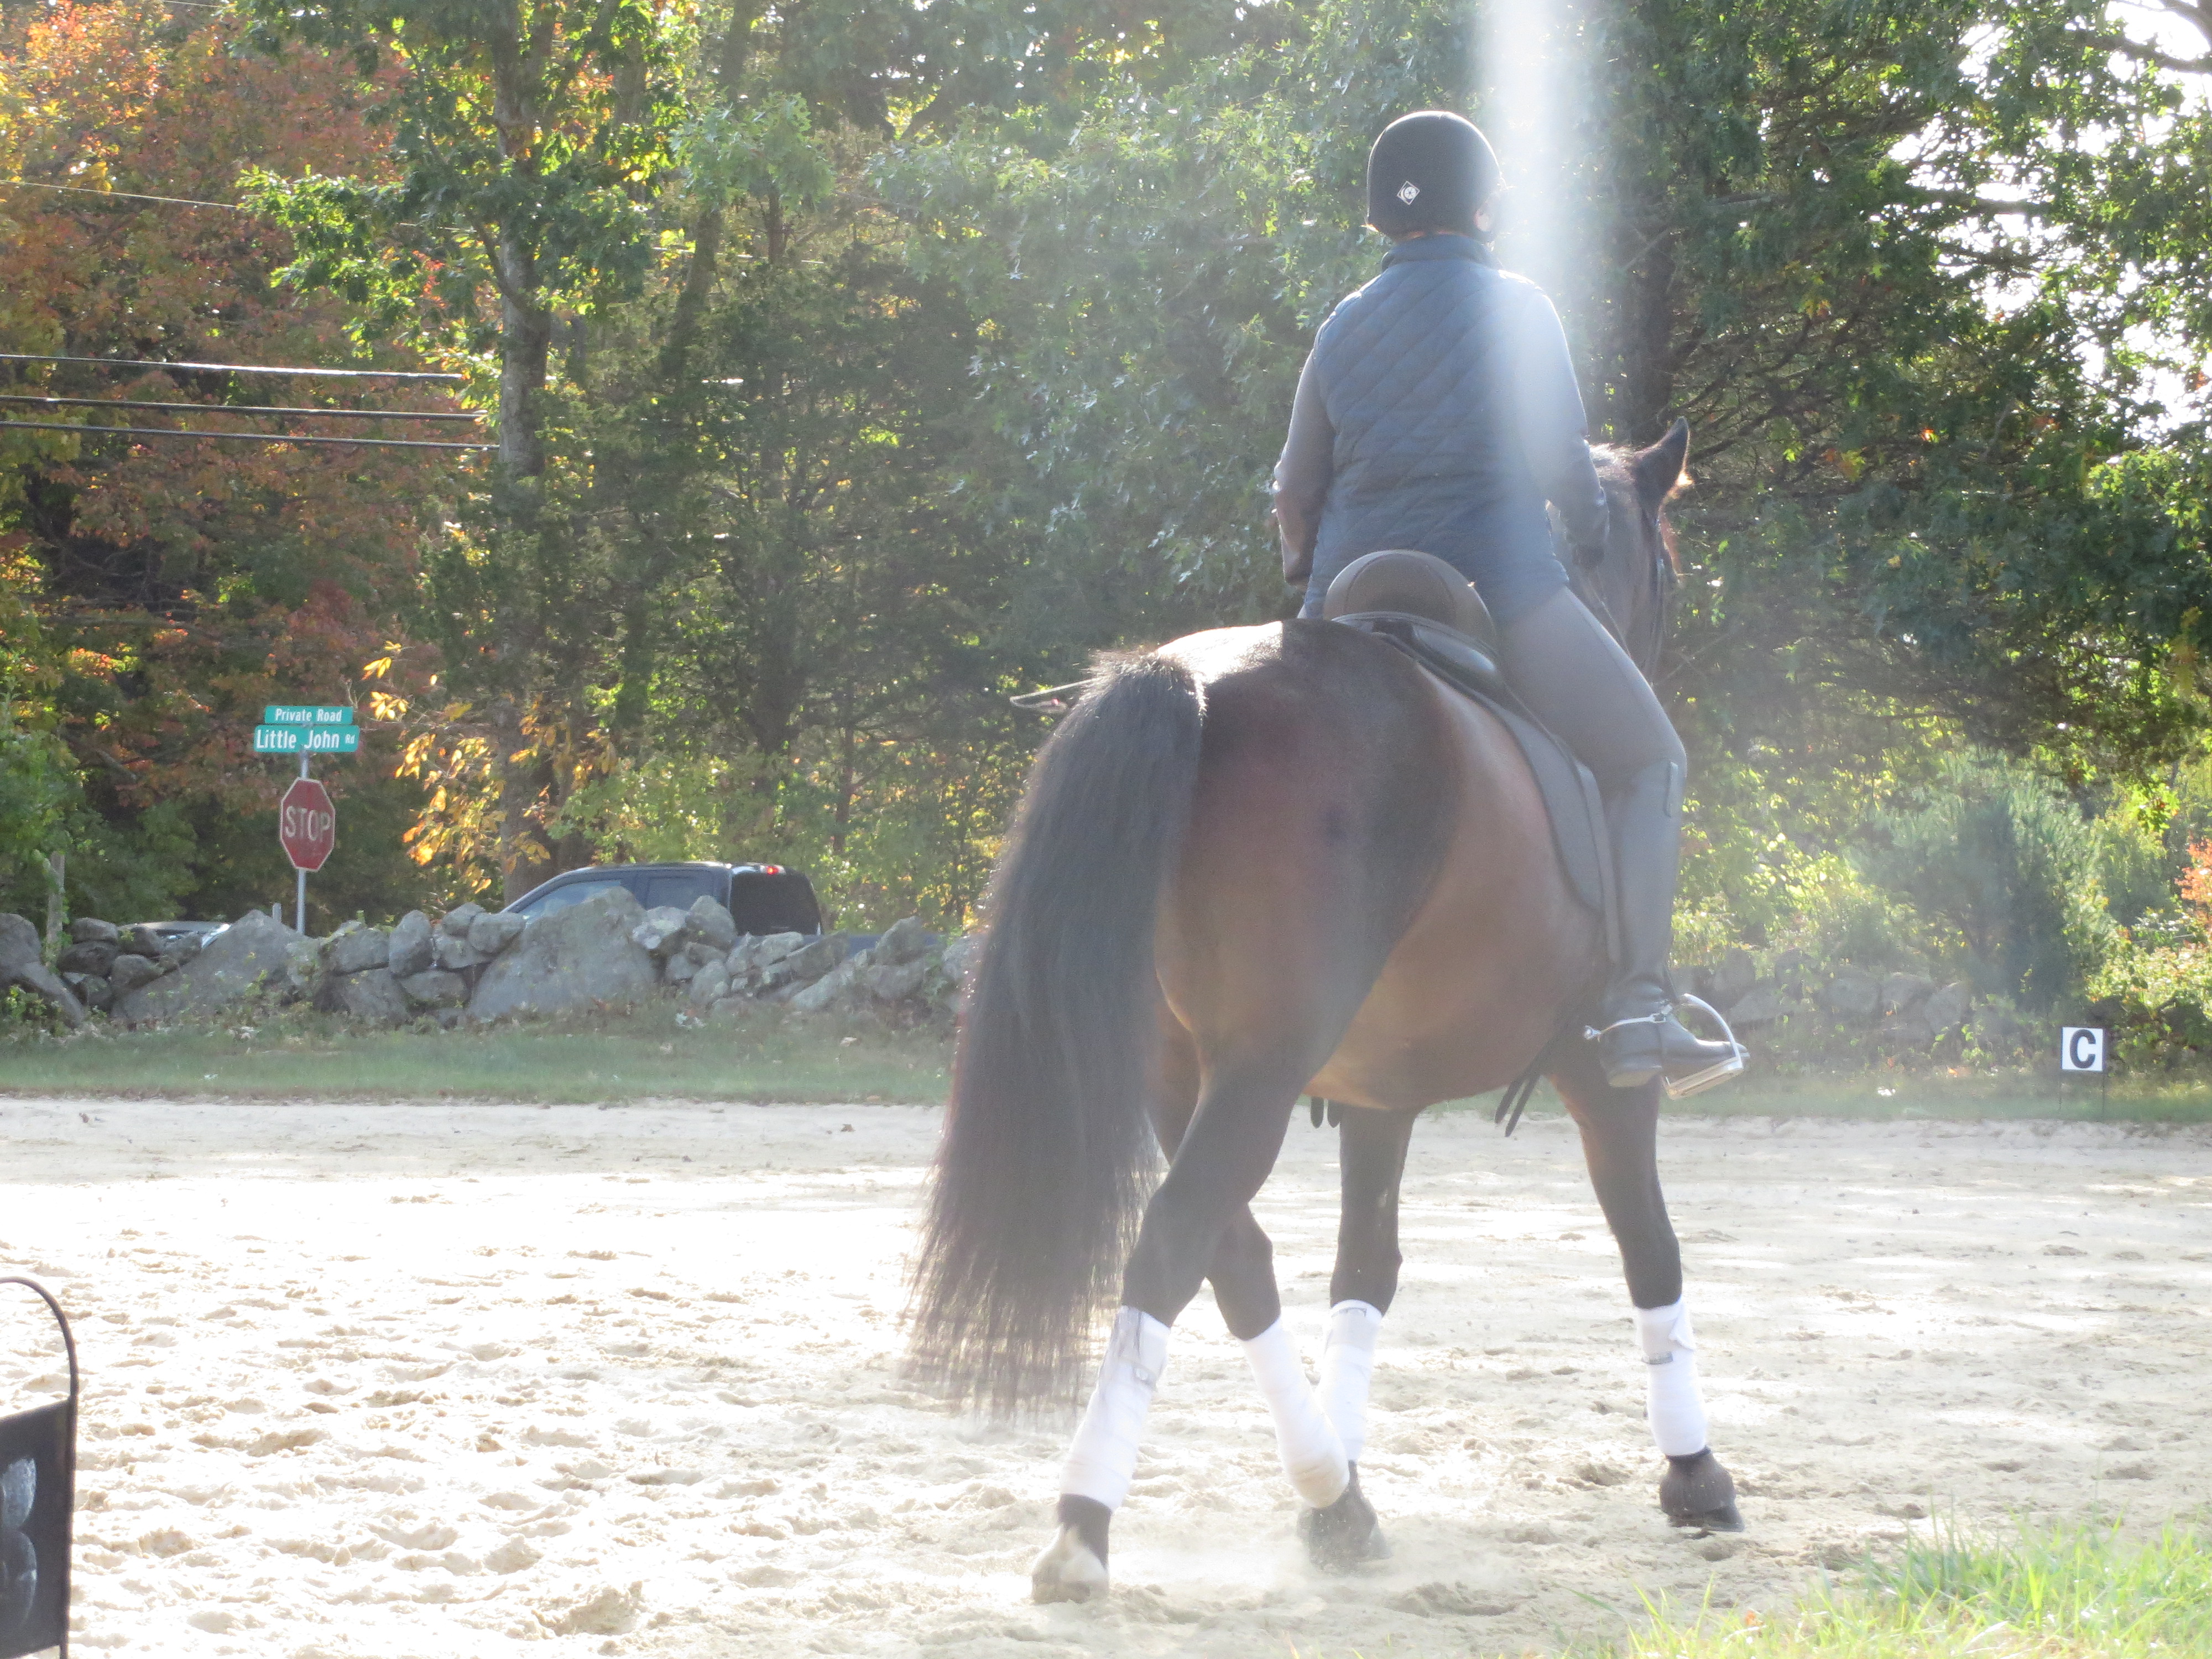
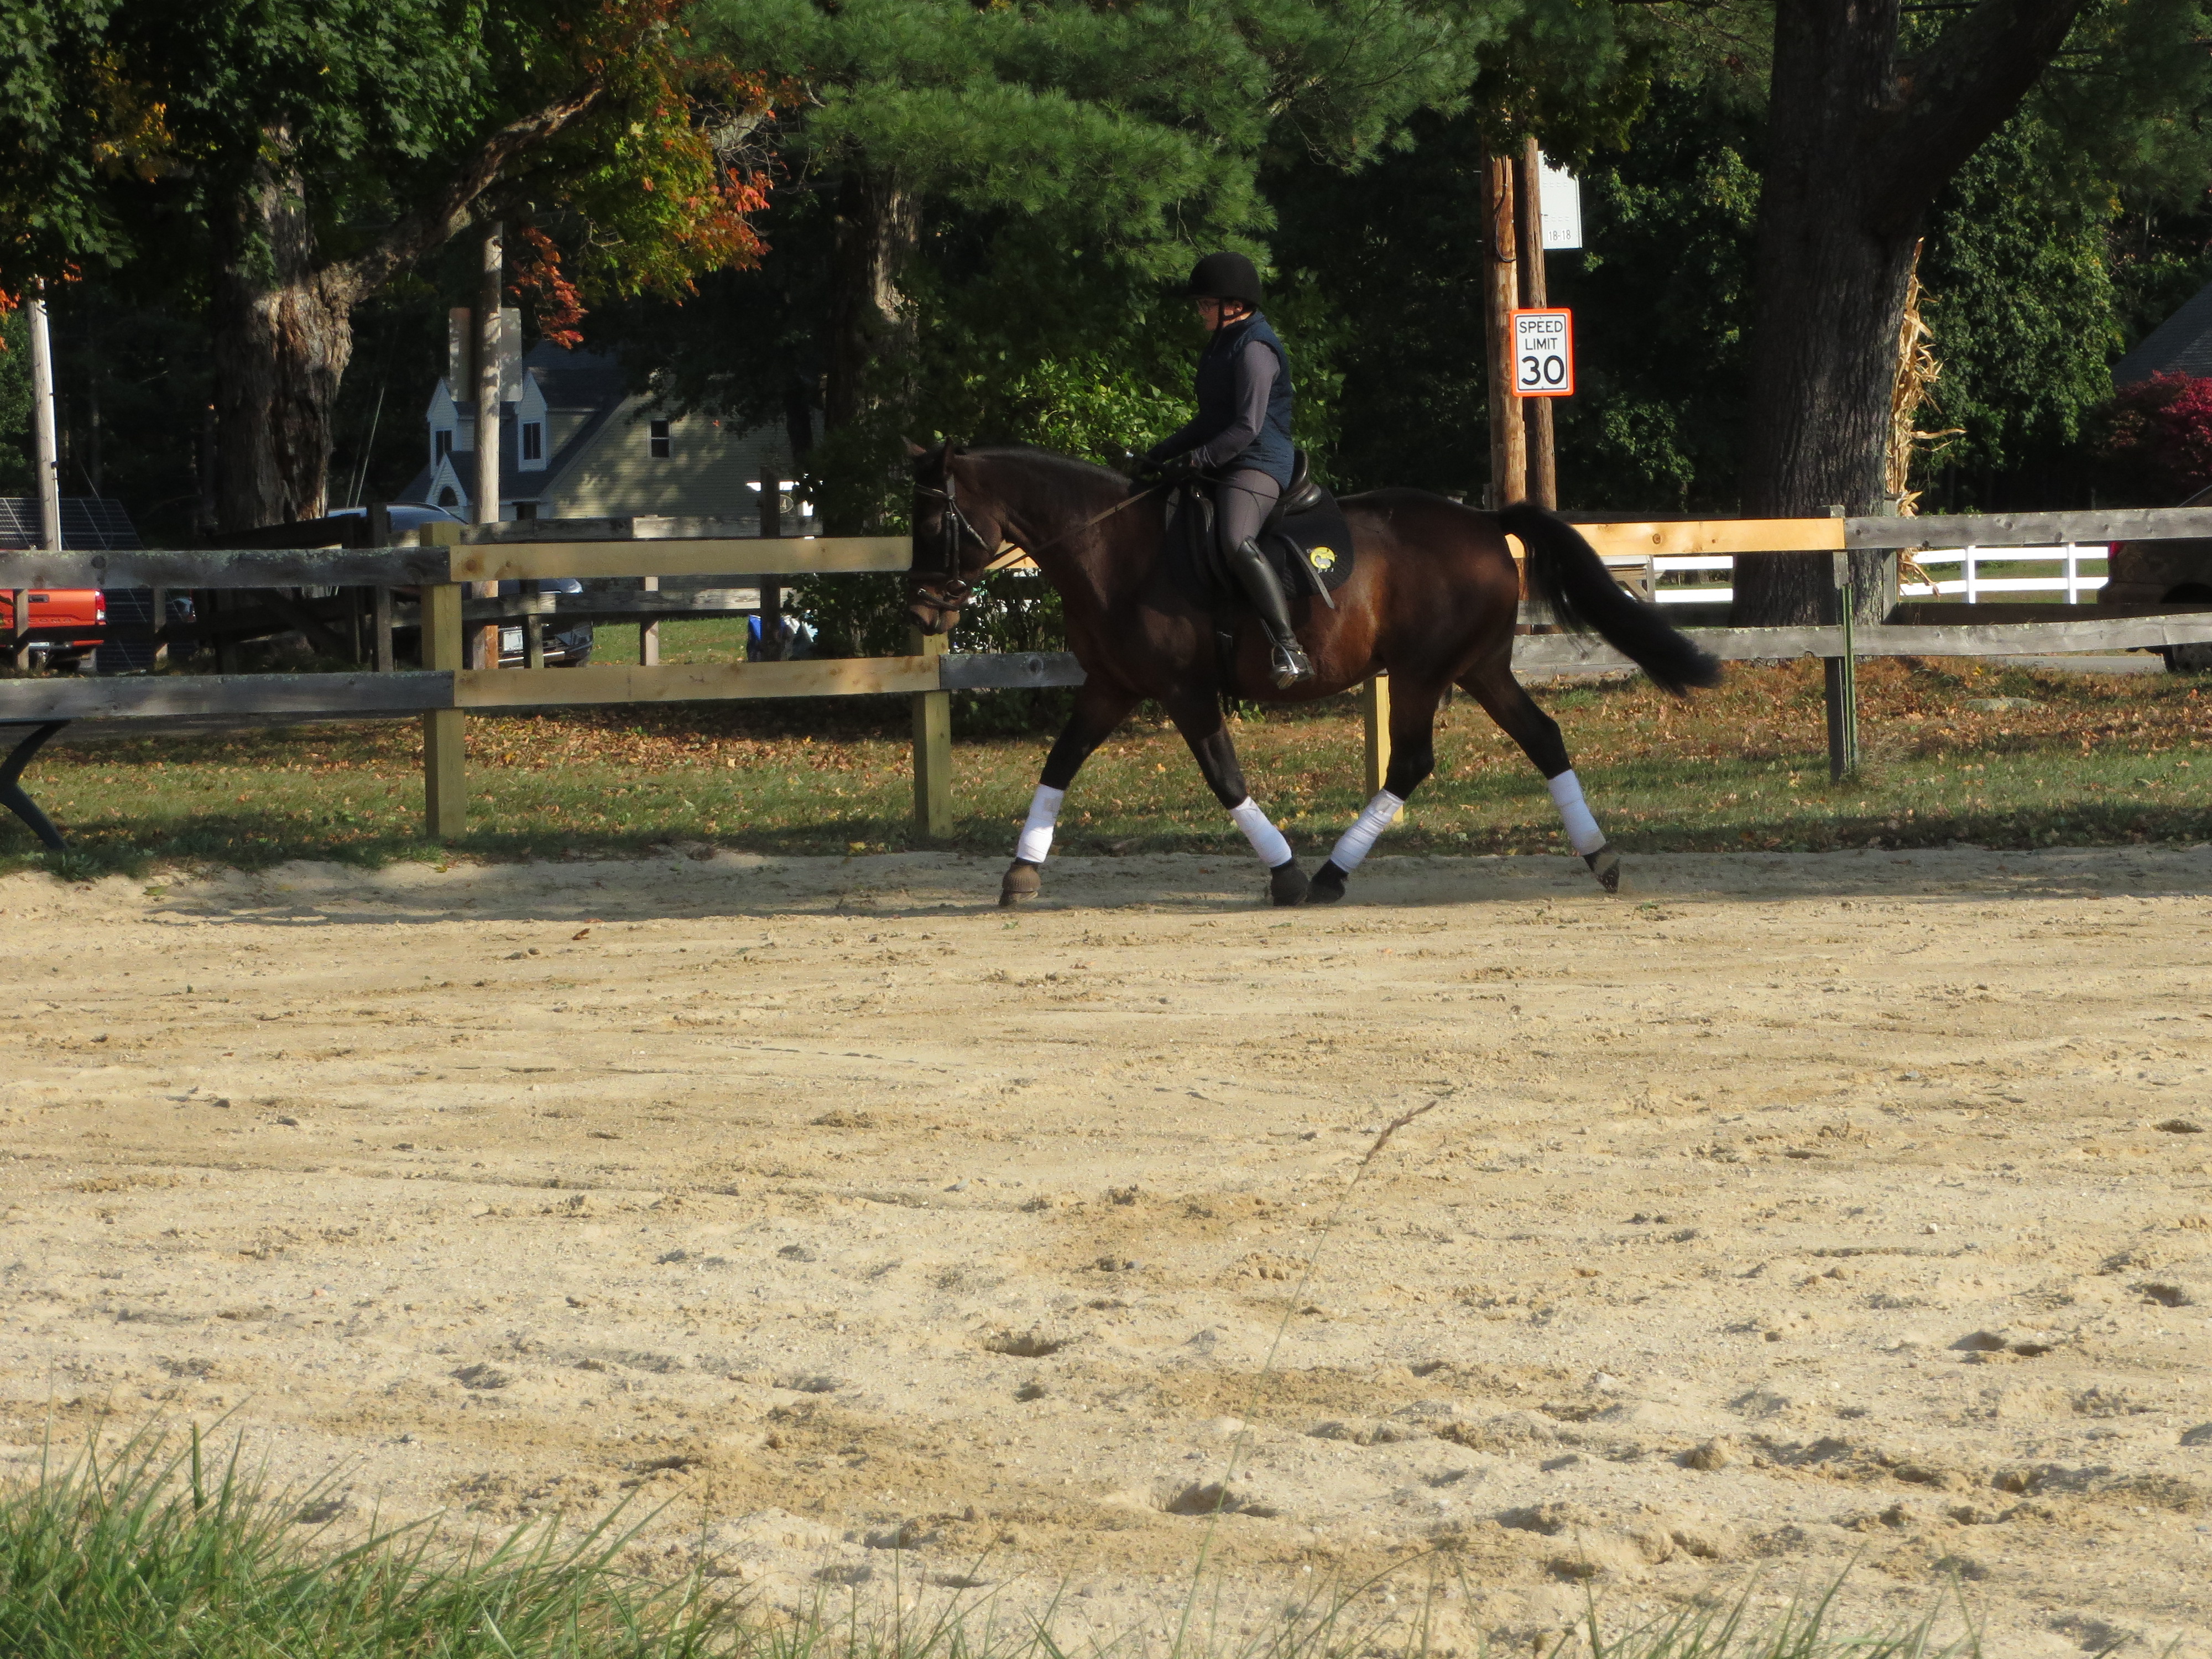
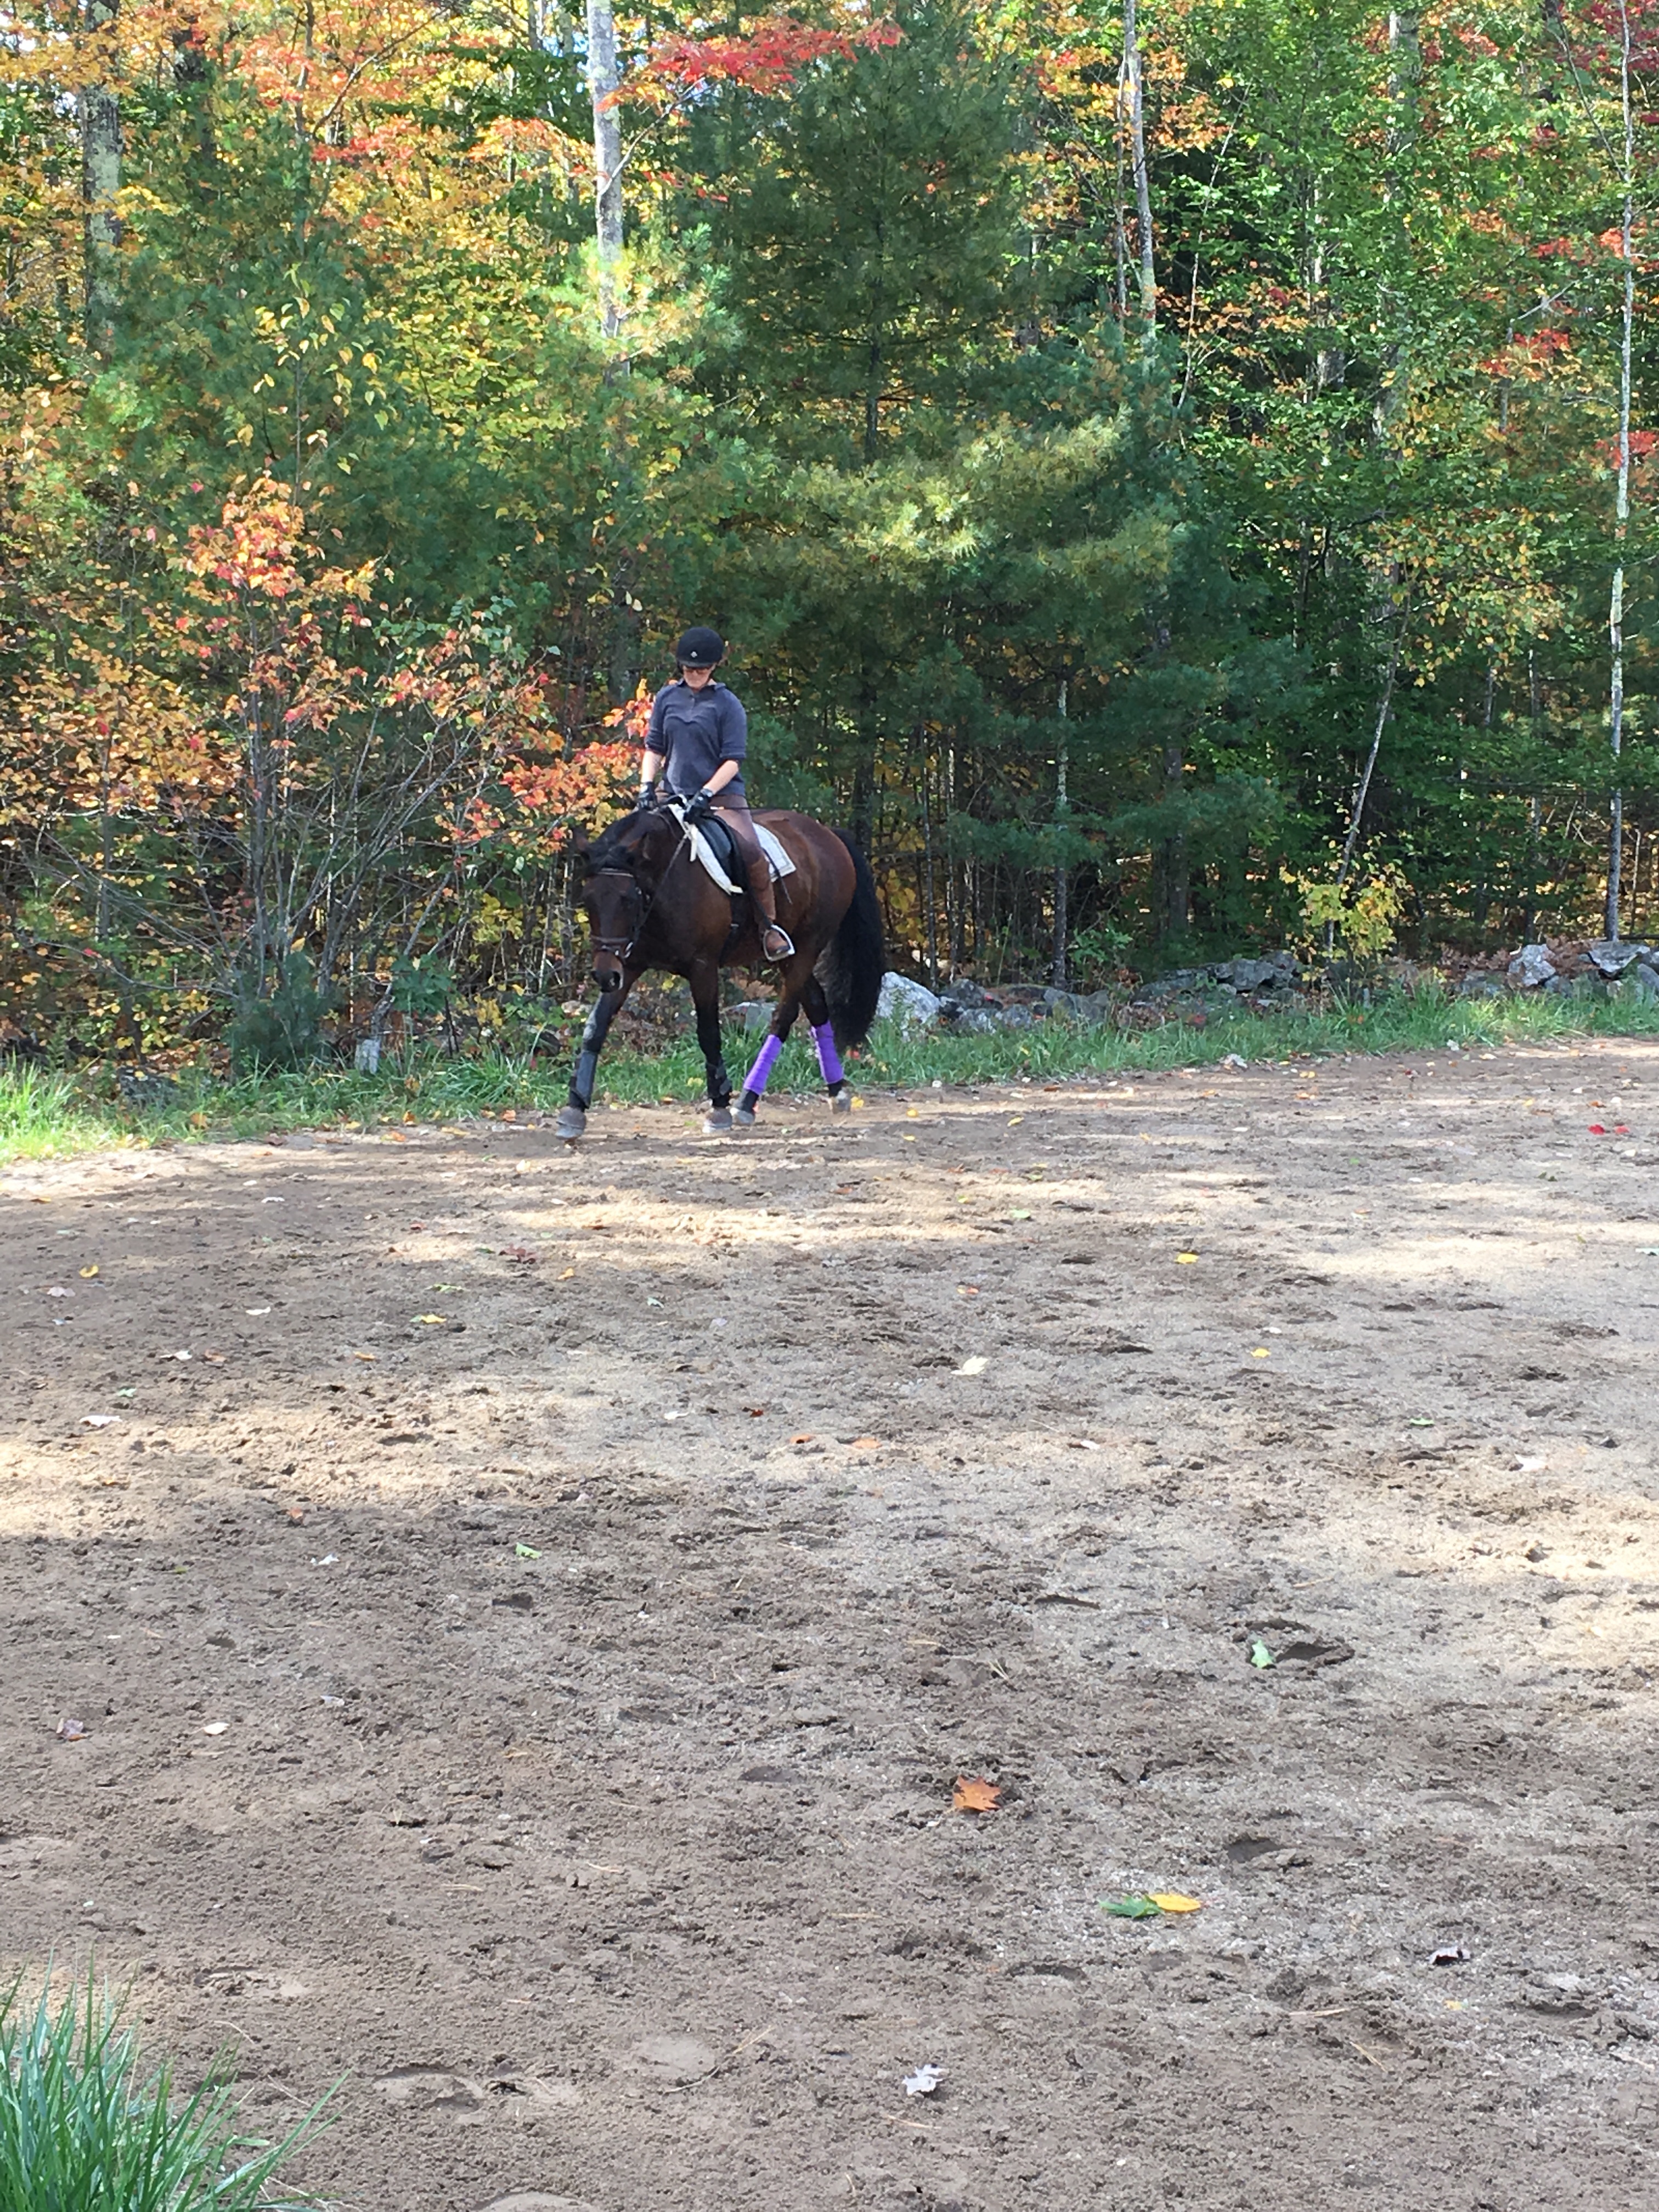
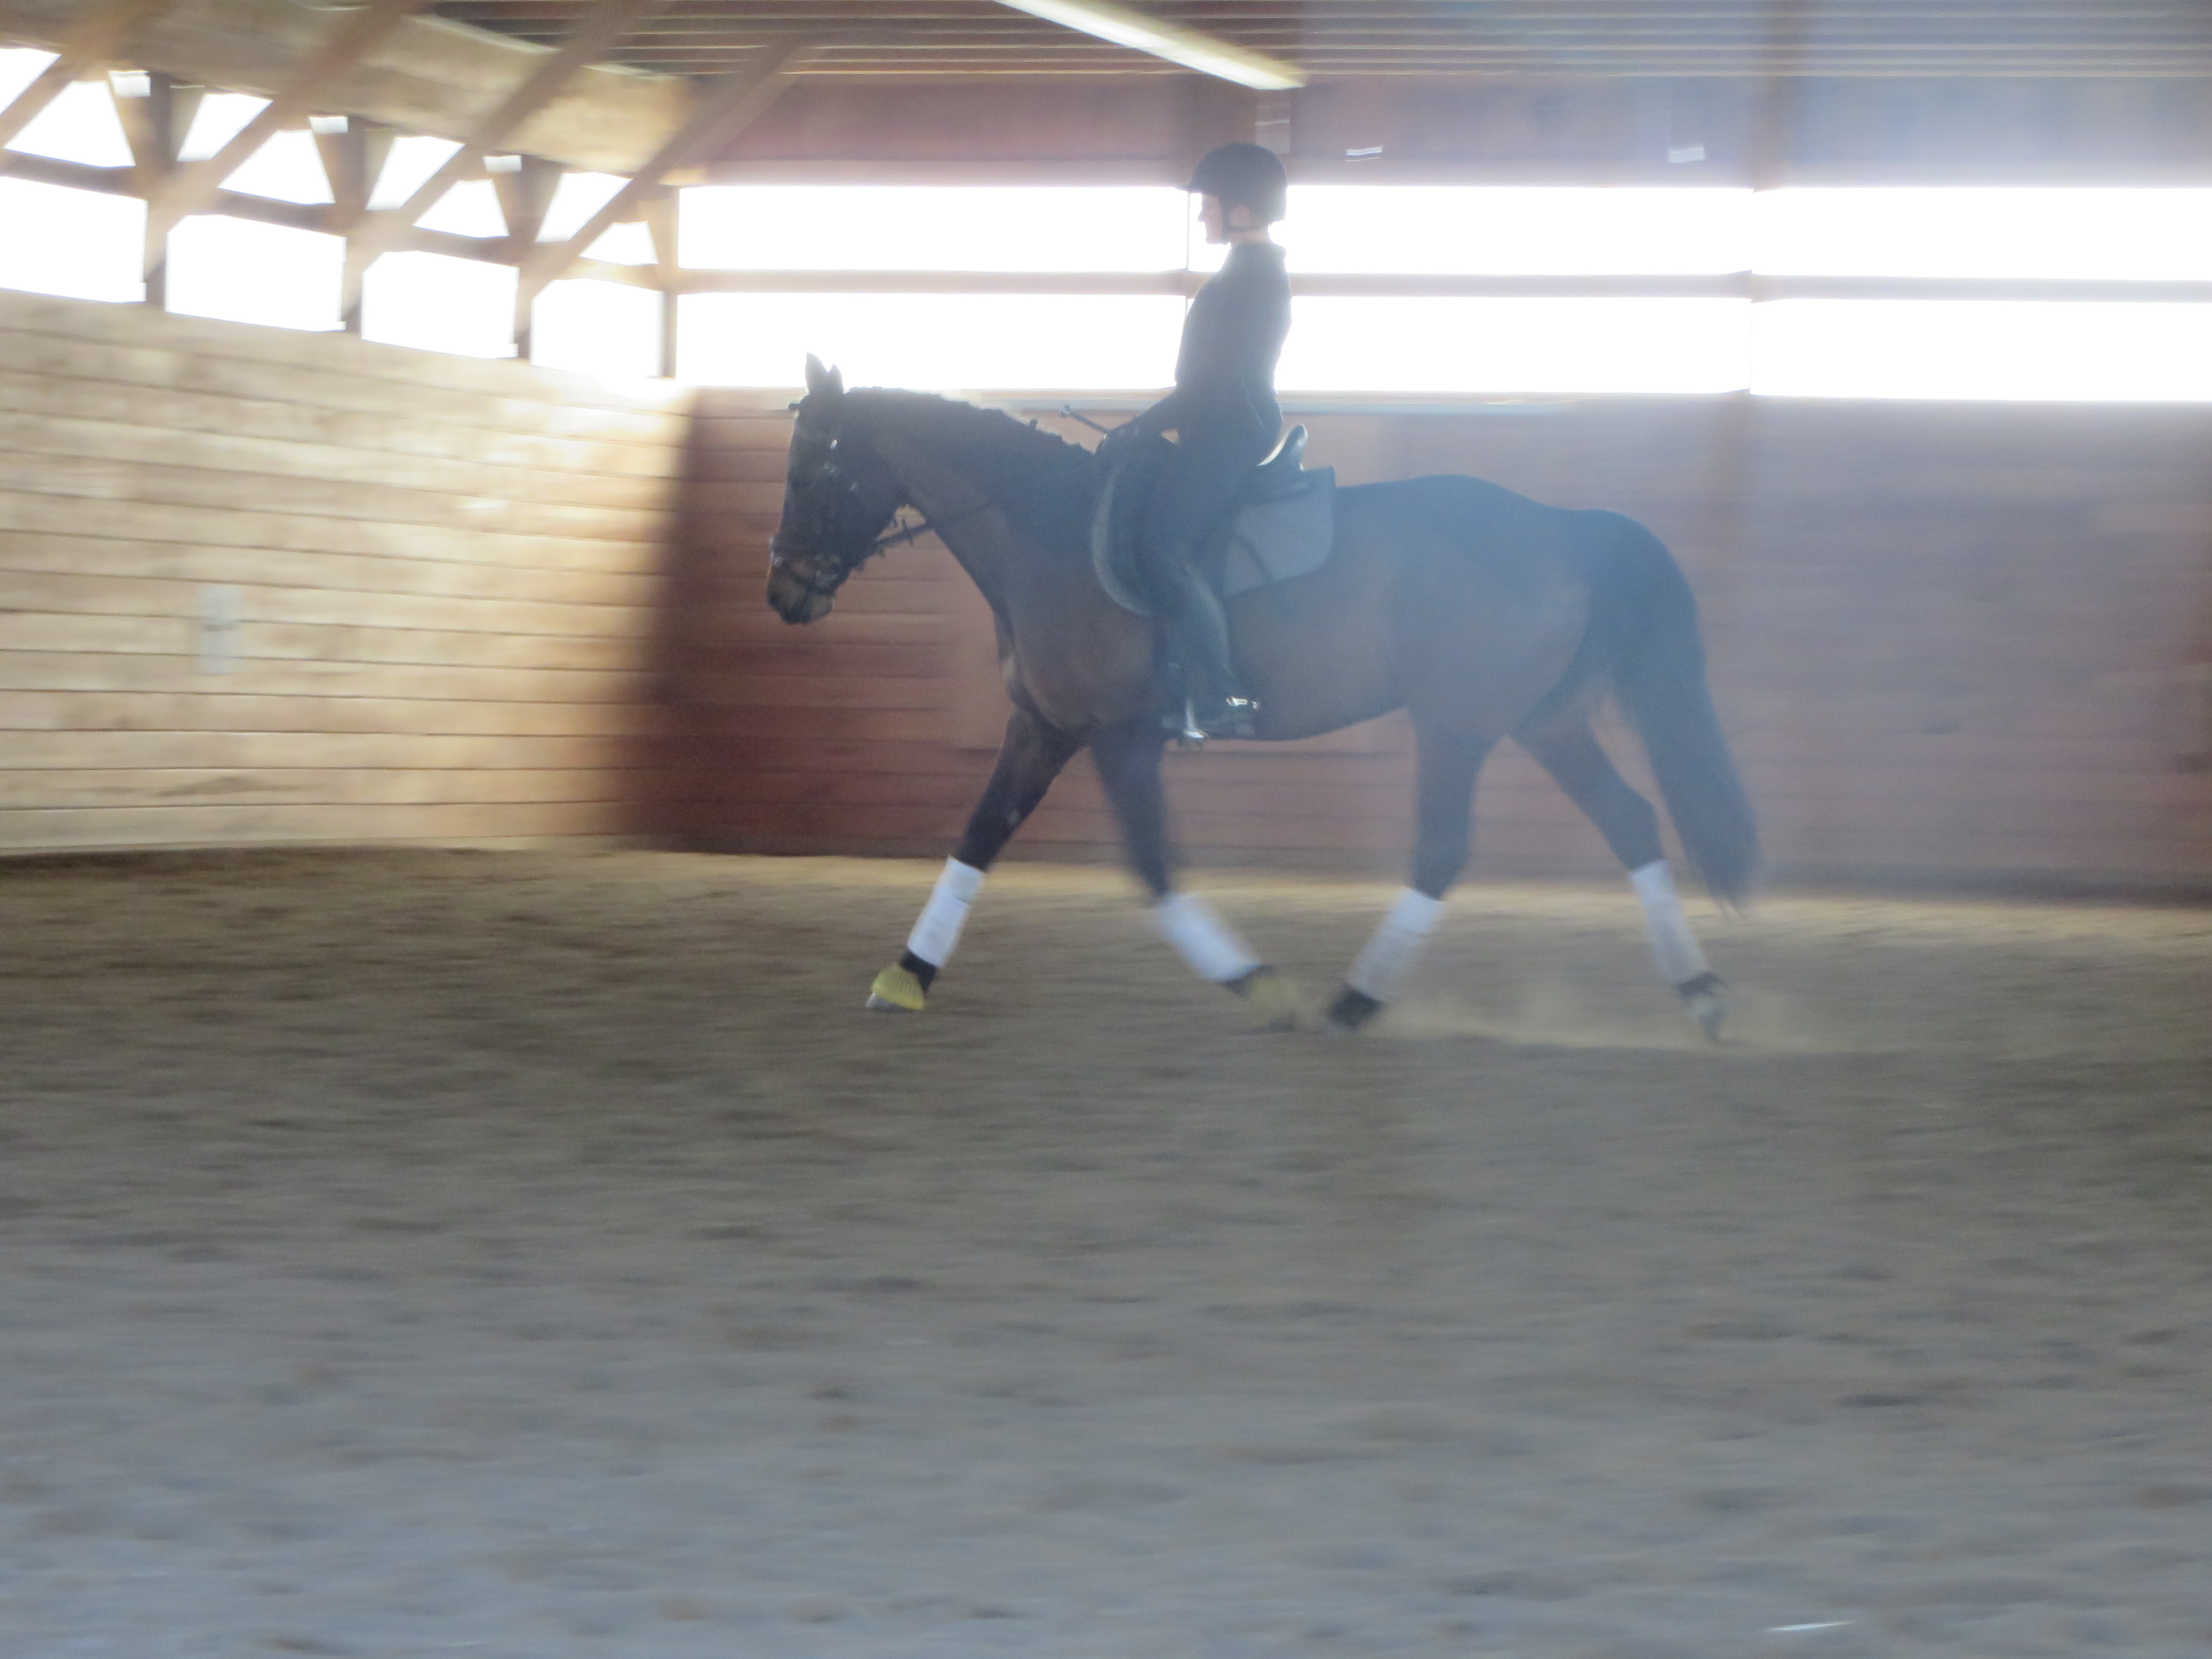
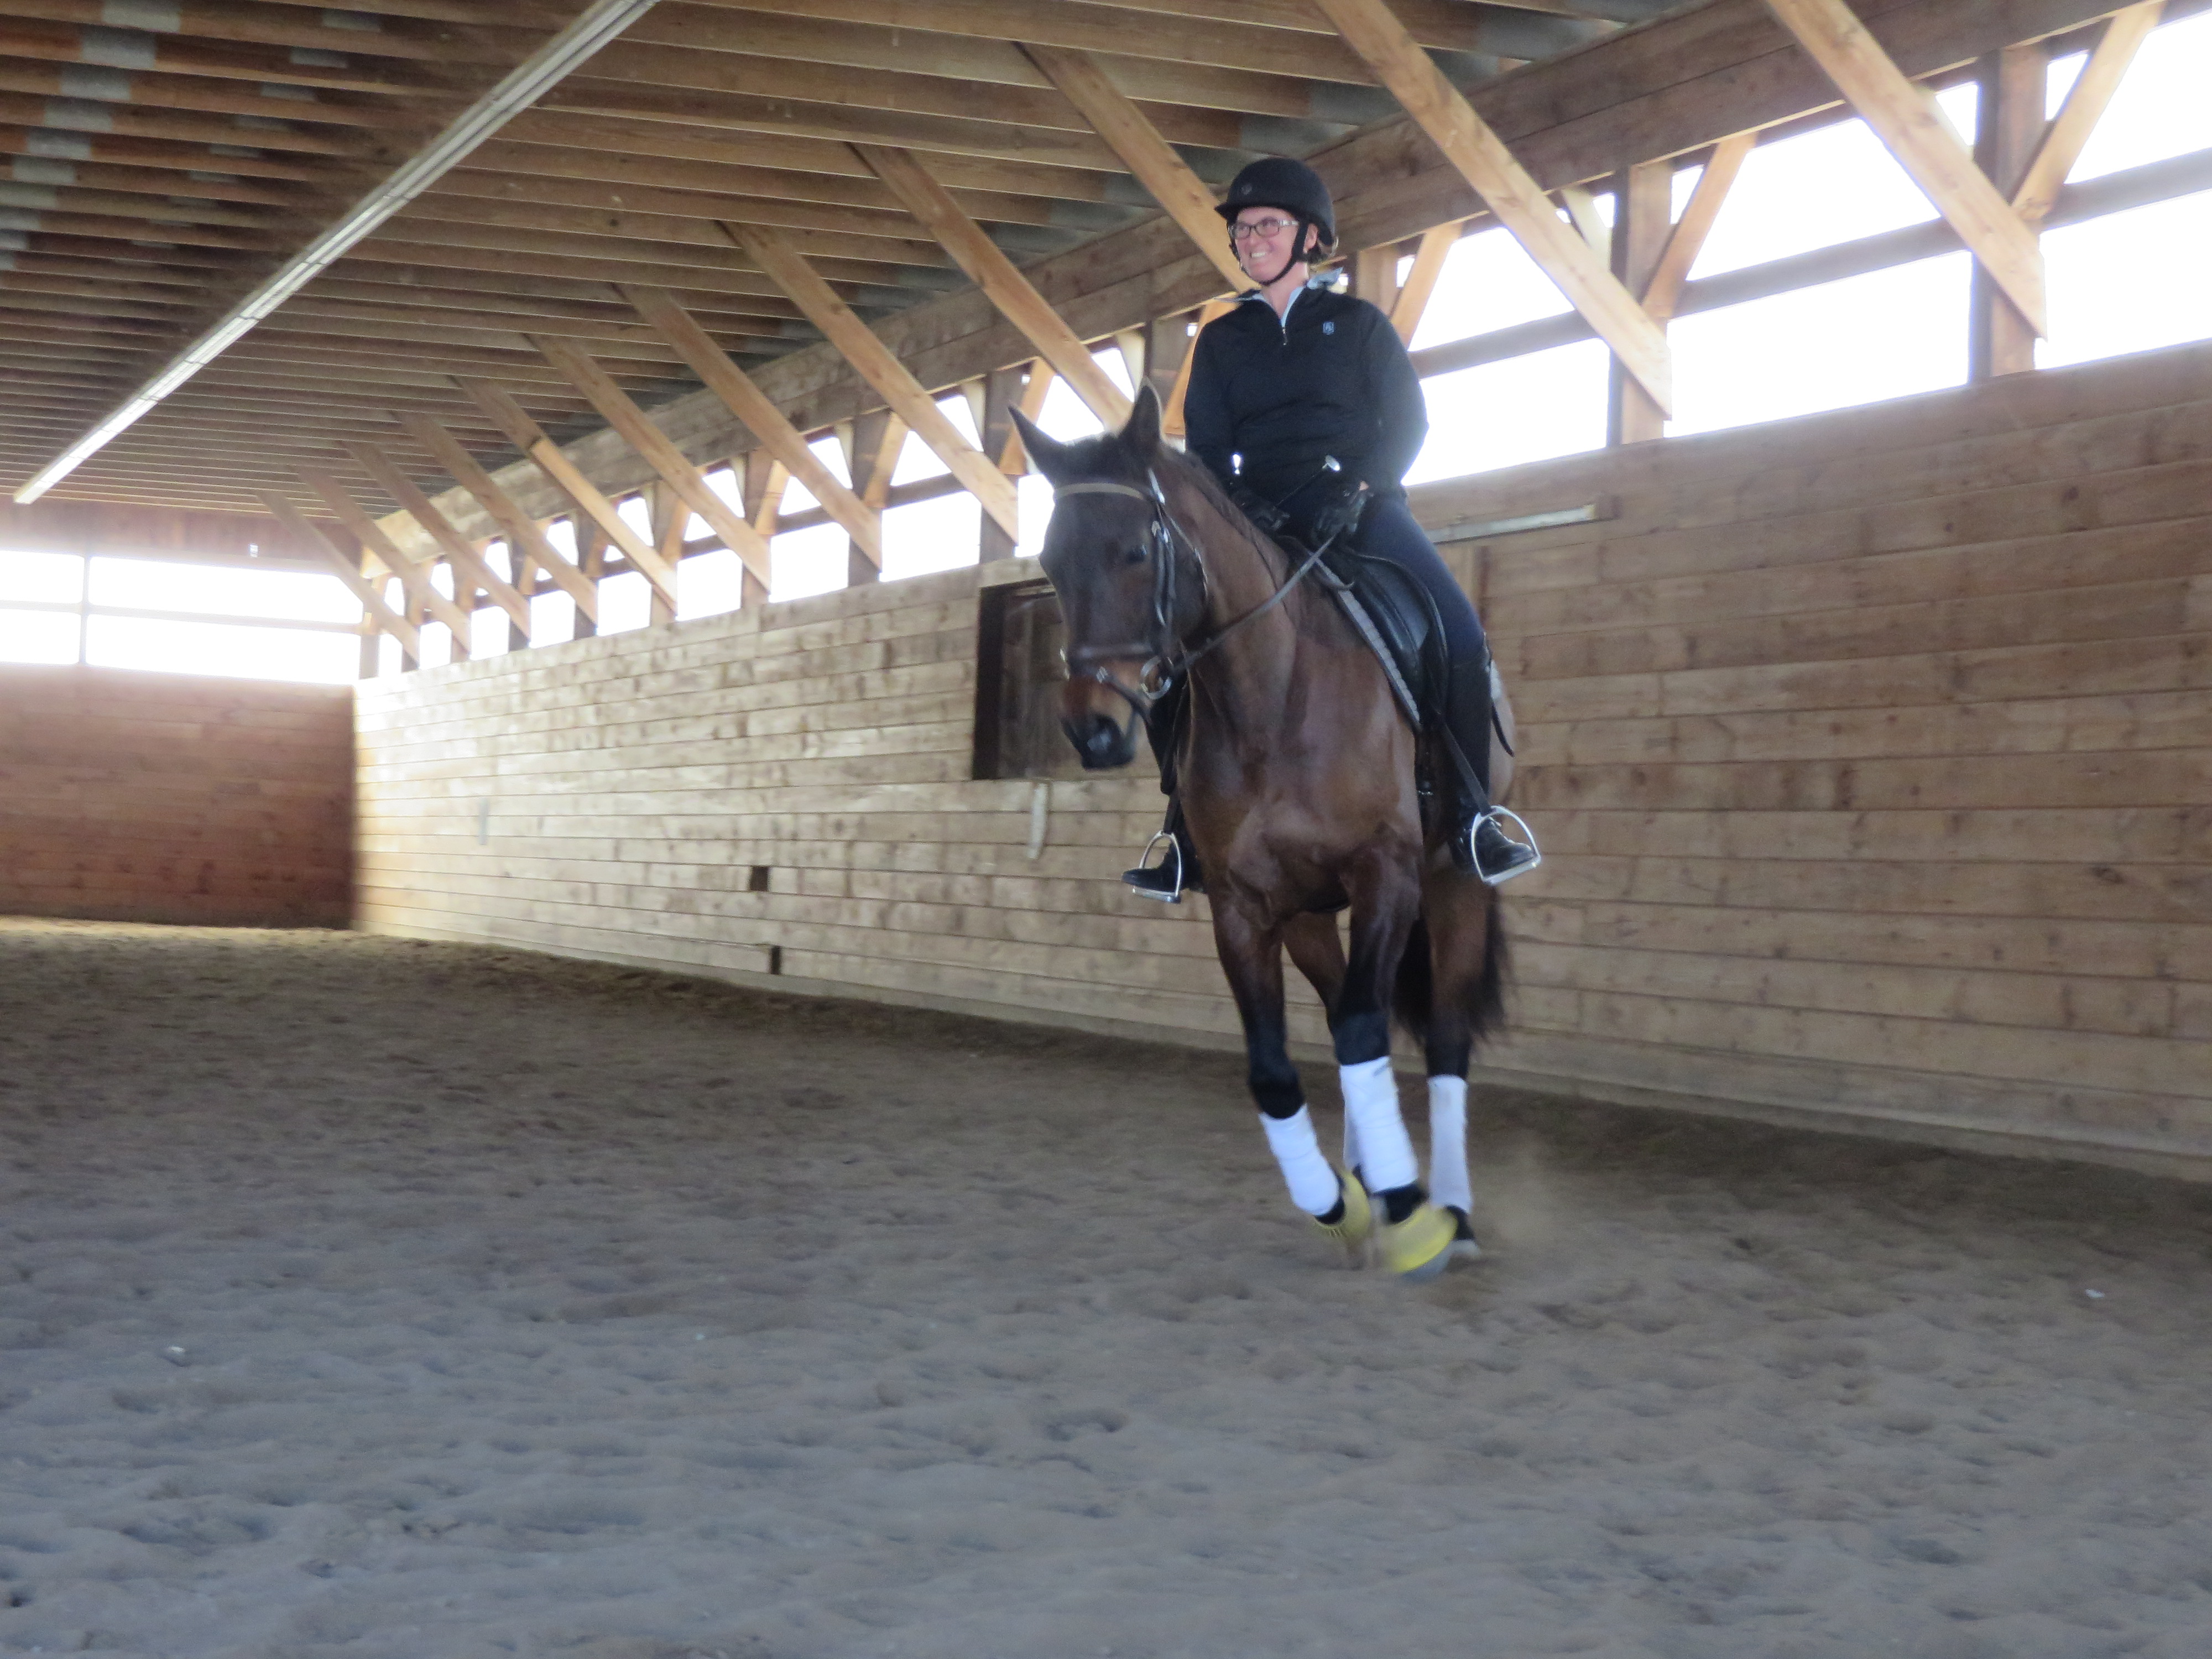
And in terms of my initial and main motivation—to take Izzy off farm for a positive outing—this clinic was a great success. She trailered on her own like a veteran, and upon arrival did nothing sassier than a few nervous whinnies. There were so many firsts for her—first time being ridden off farm, first time being ridden in a group, first time being ridden in an indoor, first time seeing mirrors—and I think in any other setting I would have been even more nervous than she was. But by the time we had finished an hour and a half of ground work each day, getting on board for the second half of each set was basically a non-event. Izzy came home from the clinic more confident and more mature than she went into it—which means the experience was a success, even if I still need more practice on the timing with my flag or position of my body when opening the forehand.

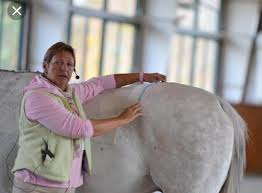
Kip Fladland grew up in Montana and worked on several cattle ranches before meeting legendary horseman Buck Brannaman. Inspired by Brannaman’s teachings, Fladland began working for him in 1996 and traveled with him for five years. Since 2004, he has conducted his own clinics across the country as well as started/re-started thousands of horses for clients. I found Fladland to be patient, firm, clear and consistent—exactly the type of temperament necessary for success with horses, or let’s be honest, people in general. To learn more, visit his website: https://www.kipfladlandhorsemanship.com/

As always, gracious thanks to our clinic organizers, Karen Bishop and Leslie Ann McGowan of Linden Woods Farm. Thank you for continuing to bring top caliber clinicians to our area and for welcoming the local community to your lovely facility so that we all can expand our education.

The Soul of the Horse

On an unseasonably warm day in mid-October, I hauled JEF Anna Rose to beautiful Linden Woods Farm in Durham, N.H., for one final educational outing of the season—a clinic with Jeremy Steinberg. Anna and I rode with Jeremy earlier this summer, and the experience was both positive and helpful. But this fall, most of my arena sets with Anna had left me frustrated. We have a decade-long partnership, but yet it feels as if we are always dealing with the same fundamental issue, namely, generating positive forward energy. This fall, every ride was a struggle, and I found myself losing enthusiasm for doing much in the arena with her at all.  I think she felt exactly the same way.

As I attempted to get the earpiece sorted out at the start of my ride, I told Jeremy a bit of what I had been experiencing with her: The lackluster response to any forward driving aid. The blocked right jaw. The dull and non-adjustable feeling in the contact, because without energy and thrust from the hindquarters, there wasn’t anything to actually adjust. I told him that I didn’t feel like very much of a horse trainer, that Anna didn’t even feel like a Training Level horse (never mind a Third Level horse) and that I really hated having to ride so aggressively for such a minimal response. He nodded along with my comments, listening thoughtfully before he replied.

“Remove your emotion from this—it is not you. Some horses are this way. It is just the soul of this horse,” Jeremy said kindly.

I am sure I subconsciously chose an all dark outfit for a reason….

As I blinked away unexpected tears, Jeremy proceeded to tell me about several horses from his past, horses who like Anna had many wonderful qualities—temperament, genetics, beauty— but who didn’t have much ‘get up and go’, who lacked the inner fire that would allow them to easily climb the ladder in dressage.

The thing of it is, to the external viewer, it looks as if these horses should be able to do the work. The viewer concludes it is the rider who is simply not doing enough, or perhaps not riding well enough, to get the horse to perform to his full potential.

 Jeremy recalled a time when he was working with one of these horses under the tutelage of his mentor. His mentor kept offering feedback but nothing seemed to be improving the horse’s performance. Not wanting to be disrespectful but also becoming increasingly frustrated, Jeremy finally asked the mentor to get on and feel for himself.

“And then he understood it!” Jeremy explained triumphantly. Even the mentor couldn’t get the horse to perform.

At the clinic that day, we spent the entire ride simply focused on sending Anna forward. It was not pretty, and it was not fun. Jeremy advised that I establish in my own mind a ‘minimum tempo’, and if she dropped below that pace even a whisker, I was to firmly, forcefully, apply all of my driving aids. Hard. Even if we ended up in a gallop (which admittedly still took a few solid kicks with the spur and a strong whack with the wand). The emphasis was all on the upward transition.

Even Anna’s “gallop” is really just a somewhat faster canter.

In the moments where the energy was better, I tried to stay quiet and still while maintaining a steady contact, even if only for one stride. The perpetual issues I experience with Anna’s poll and jaw stem from her stalled engine; get the engine moving again, and the connection issues usually take care of themselves.

A slightly better moment in trot.

“Leave your brain out of the ring—be instinctive,” Jeremy offered by way of explaining the reaction time required. “When she dies in the tempo, then she must go, even if it is up to the gallop.”

For forty-five minutes or so, this is what we did. Me, kicking and using the dressage whip assertively, until I felt as if I were back on a cross country course desperately trying to make time. Anna, offering a few strides of a positive gait. The inevitable slow down. And repeat. Over and over and over.

I think this is one of those nicer moments.

Eventually, when Anna did offer a few consistent strides in minimum tempo, we added in a little shoulder in or a ten meter circle. Inevitably, I had to ride out of the movement with assertive aids yet again. There were a few nicer moments, but mostly it felt like one of us was working a whole lot harder than the other. And also, as if I had taken this exact lesson so very many times before.

While I rode, I kept hearing Jeremy’s voice on repeat: Some horses are just this way. It is the soul of this horse.

After our lesson, I stayed to watch a few more riders. In particular I wanted to see Leslie Ann McGowan, Linden Wood’s resident trainer, schooling the warmblood gelding Belfast, because this horse just makes me smile. I first saw this talented duo at a clinic with Jan Ebeling in 2017; the gelding was perhaps 6 years old then, new to Leslie Ann and quite green, yet everything he did looked easy. Effortless. Joyful. Now showing at the FEI levels, Belfast and Leslie Ann spent the day’s set working on canter pirouettes. Even when the pressure increased and the work became a little more demanding, the horse never quit or backed down.

The difference between his effort and Anna’s hit me like a fist. The soul of this horse was dancing. He was happy being an elite dressage horse. She is not.

Anna and I in silhouette.

I bought Anna from her breeder as a green broke 6-year-old who had never even been cantered under saddle. The breeder described the mare’s personality by saying she “was pretty content to just watch”. Over the years, I have repeatedly been reminded of her breeder’s insight whenever I have challenged Anna to increase her performance level. Anna has always done whatever it is I have asked of her. But I have often had to ask with emphasis.

As a team, we have done and seen and accomplished a lot. She took me around my first (and only) Groton House Horse Trials and to two double clean cross country trips at the Fitch’s Corner Area I Eventing championships. She spent three months with me at Denny Emerson’s Tamarack Hill Farm, where we solidified our partnership over fences and hacked in the Vermont countryside. She received my first (and only) high score of the day at a dressage competition (back at Training Level) and she has earned scores over 60% all the way to Third Level Test 3. This fall, she and I completed the Ranger 100 Mile Challenge, tackling those miles in bite sized pieces along the trails in our backyard.

Anna with her Ranger 100 Mile Challenge Medal.

When I started concentrating on dressage with her, I had hoped that maybe she would make it to FEI. Perhaps that was too lofty of a goal; I knew she would never be a high scorer there but I hoped to finally have a chance to canter down centerline in tails, on a horse I trained myself. A few years ago, I could imagine riding Anna to what would be a pinnacle in my equestrian career.

                But more recently, I have downgraded my goals for her—from FEI to Fourth. From Fourth to really solid Third. Most recently, I hoped to collect the last two scores I need for the USDF Bronze Bar in the Third Level Musical Freestyle. We spent a whole season chasing them. The closest we came was still two points too low.

                It would mean so much to me to finish that long-term project with this horse, and then call it a day for her dressage career. But not if the cost is having to ride Anna so hard that she is completely miserable, and all the joy has left her. Not at the cost of her soul.

                When we got home from the clinic, I put up her dressage saddle and haven’t taken it off the rack since. Instead, we have hit the trails, and I have let her mane grow long and coat thick and fuzzy. Anna will stay home this winter and once the weather turns, for the first time since the age of 6, she will have a few months off to just be a horse.

                It is a fine line we tread sometimes, as stewards of these magnificent animals, to know when to push them through resistance in their training and when they have given us enough. It is equally difficult to come so close to your destination and then choose to turn back. But ultimately riding requires a partnership; two hearts working together as a team.

                I do not know what is next for Anna and I. But whatever comes, I must honor the soul of this special horse, and not force her to be someone she is not.

Functional Conformation: a Clinic with Judy Wardrope

I learned most of my essential equine conformation concepts through the progressive curriculum of the United States Pony Club, and have added to it over the years through judge’s forums, clinics, magazine articles and books. As a result, I felt that I had a pretty good handle on concepts ranging from using basic terminology to assessing plumb lines to identifying where deviations originate. I believed that I had a solid understanding of equine conformation.

And then I attended a clinic with Judy Wardrope.

Judy Wardrope, in a press photo, uses a soft tape measure to help define the lines she bases her functional conformation analysis upon.

Wardrope is a lifelong equestrian, breeder, researcher and author who has spent over thirty years studying pedigree and performance, and analyzing what she calls the “functional aspects of equine conformation.” What she has learned will upend what you thought you knew about what is important in the structure of an equine athlete, probably for the better.

                Wardrope has written extensively for magazines published around the world, as well as produced ten books, and it was through one of her articles that I first became aware of her work. I was thrilled when Debbie Place, owner of the beautiful Peppergrass Farm in Dixmont, Maine, invited Wardrope for a two day clinic in November 2019.

                Wardrope’s overarching message is that if we think about our horse’s workload in mechanical terms (i.e., what does he actually have to be able to do physically to be successful), and if we understand how structurally (un)suitable our horse is for his job, we can appropriately adjust our expectations to match the biomechanics of the horse. Doing so not only protects the horse’s physical well-being, but ensures that they will be happier in their work.

                Wardrope is understandably protective of her materials and content, and I don’t want to infringe in any way upon her proprietary ideas through this blog. Instead of providing a deeply detailed discussion of her presentation, I will instead touch upon the highlights of Wardrope’s conformational assessment system, and how it contrasts with some of what we are traditionally taught.

                A functional conformation analysis looks at seven specific areas of the horse (the lumbosacral gap, the rear triangle, stifle placement, the pillar of support, the humerus, the elbow placement, and the base of the neck), and then considers the overall package that these pieces present.

Hind End: Key Concepts

                When analyzing functional conformation, start at the hindquarters and work your way forward. Wardrope compares the hindquarters to the engine of a car; it is where the power comes from, and what propels it forward. The lumbo-sacral joint (LS) serves to transmit that power to the front end, much like a car’s transmission. A conformationally correct hindquarter is of little use if the horse’s LS placement does not allow its power to transfer forward.

My pony mare Anna is somewhat naturally lacking in impulsion, despite her LS placement being more or less within the parameters outlined by Wardrope.

                The LS joint is an important one in the horse’s spine. It is located just in front of the high point of the croup, and marks a point of change in the vertebra. In front of the LS, the horse’s spine is more flexible, lifting up and down as well as bending left and right. Behind the LS, the vertebrae are less mobile. A horse with good LS placement can compensate for other deficiencies far better than a horse with poor LS placement.  Poor LS placement leads to negative physical effects on the animal, including incorrect muscling and the formation of a “hunter’s bump.” An equine athlete’s LS gap is ideally not more than 1.5” behind an imaginary line connecting hip to hip.

                The “rear triangle” is likely a familiar concept to students of conformation; the triangle is formed by drawing a line from the top of the point of hip to the point of buttock to the visible protrusion of the tip of the stifle. The hip to buttock side reveals the position of a horse’s ilium, while the buttock to stifle line shows his femur. The shape of a horse’s triangle (which can range from equilateral to quite sloping) has a direct effect on his ability to both sit (collect) and extend (lengthen or reach forward). Depending on your sport, the “ideal” triangle varies, but I was always taught that a sport horse’s triangle should trend more towards equilateral.

My rising 3 year old Morgan, Nori, is a little dirty and hairy in this photo but you can clearly see her rear triangle in this photo.

                Wardrope presented several photos of elite horses from popular disciplines, and analyzed their rear triangle. She quickly showed that upper level dressage and endurance athletes tended to be shorter on the ilium side compared to their femur, while elite jumpers tended to be more equal along both lines. Eventers split the difference, but those successful at upper levels had one other variable in common; the placement of their stifles was oriented towards jumping.

                Stifle placement? What?

                I will admit that in the past, I have perhaps not paid sufficient attention to this important joint, the physiological equivalent of the human knee. But after Wardrope’s presentation, I am certainly viewing the placement of the equine stifle in a new, appreciative way.

                Watch your horse walk, focusing on the protrusion of the stifle. What is its range of motion? Does your horse move with long, swinging strides (low stifle) or a short, quick step (higher stifle)? Additionally, consider whether the stifle joint bumps into the horse’s barrel as he moves. Stifles that point outwards readily clear the ribcage and maximize the horse’s range of motion. Stifles that point straight ahead often limit the reach of the hind leg, as the joint actually hits the horse’s belly in movement.

The Paper Boy, aka Snapper, took me through my Pony Club C3. He was a Saddlebred cross of some sort, and always a fun choice for “analyze your mount’s conformation” as he was an assembly of spare parts. But he could surely jump!

                Again, ideal stifle placement is somewhat dictated by discipline. Wardrope has worked extensively with the racing industry, and she categorizes stifle placements by running type: sprinter, miler, and distance. Ideal stifle placement for performance horses is split among these three groups, with dressage aligning with milers and all jumping disciplines and endurance favoring the distance placement. If you want to know more about these…you will need to buy one of Wardrope’s books!

Front End: Key Concepts

If the hind end is the engine and the LS the transmission, then the front end of the horse is his suspension and steering. Preserving overall soundness and promoting longevity in a horse’s career is all about lightening the forehand.           

Consider again the name of Wardrope’s system: functional conformation, meaning that the horse’s structure has a function to perform. Therefore, it is perhaps no surprise that the most important conformational qualities in the front end of the horse all relate to their ability to be light on the forehand. Horses that can carry themselves towards level balance tend to stay sounder, longer, but not all horses are conformationally suited to do so.            

                One of Wardrope’s most important components in front end analysis is the pillar of support. This is an imaginary line that basically bisects the forelimb when the horse stands square. It allows us to see how much of the horse is out ahead of the skeletal support structure. Imagine a house with a porch overhang. A short overhang can be held up by the house itself, but the longer and wider the overhang, the more likely it is to sag without additional support. If the front limbs of the horse are part of his basic frame, they are only able to support so much mass suspended out ahead of them before the basic structures break down. In particular, look how far the pillar of support lands in front of the withers (more forward=lighter forehand), and how close it is to the horse’s elbow where it bisects the humerus (closer to elbow=heavier forehand). Ideally, the pillar ends in the rear quarter of the hoof.

I will admit that this image is borrowed and I have lost the reference…please reach out if you can help me give credit!

                Other indicators for the lightness of the forehand include the relationship of the base of neck to point of shoulder. The higher the base of neck, the lighter the forehand. If the point of shoulder is also high, even better. The longer and lower the point of shoulder (which is the external representation of the length and angle of the humerus), the heavier the horse is on his forehand.

                The elbow joint is another one that I have never paid much attention to previously in conformational analysis. But if a horse’s elbows are too close to their body, the joint will hit the ribcage and the horse must compensate. Movement defects such as short strides or choppy gaits, and behavioral signs like girthiness, resistance to lateral work or refusing fences, can all be the result of tight elbows.

In Conclusion    

                No horse is conformationally perfect, yet most are asked to do some sort of athletic work. Horses with deficiencies in key areas must compensate in others. We see evidence of this compensation in everything from windpuffs to under saddle resistance. Wardrope emphasized that most of the time, when horses have a performance issue, it is physically based.

                “We need to listen and see if we can help the horse to overcome the issue, or change the horse’s job to suit their build,” says Wardrope.

                Day two of this clinic featured demo horses, which we analyzed in hand and then watched perform under saddle. Wardrope offered various stretches and exercises which, if used routinely, can help horses to overcome some of their conformational deficiencies. While each horse’s maximum performance level will ultimately be limited by their underlying structure, practicing these basic exercises (which included elbow stretches, backing the horse up, and working over poles) can help a horse to compensate for common areas of structural weakness.

Izzy Goes to School: a clinic with Tik Maynard

So keeping up my record as “world’s slowest blogger”, I wanted to give everyone an update on Izzy’s first official off-farm outing, which happened way back in May. Better late than never, I suppose!

DRF Isabela, better known as Izzy to her friends, just turned three at the end of May. Last year, she learned the basics of longeing, went on short trail walks ponied off her friend Marquesa, and practiced wearing a bridle and surcingle. She had the winter off, and for this year, my goals were to build on this foundation by solidifying her longeing skills, introducing a saddle, working on long lining, and maybe, if all went well, getting on and doing a few short walk abouts by the time school started in the fall.

img_1301
Izzy ponying with Marquesa summer of 2017

So this spring, when I started the process of getting her back into a routine of being regularly handled, I was quite surprised to find that she had gone rather feral. Leading her had become like trying to walk a dragon.  She wasn’t being mean or naughty per se, just overly joyful. It was as though she had learned to leap and buck over the winter and wanted to show off her new skills.

The problems for me were several. 1) Most of the time, I work with Izzy alone, and I didn’t want to get hurt. 2) My arena is only partially fenced, and I wasn’t confident I could hold onto her. 3) Winter hung on a LONG time this year, and the ice and snow didn’t officially clear out of my partially fenced ring until the very end of April, meaning that even if #1 and 2 weren’t issues, I didn’t have great footing to work with.

img_2526
My ring in late April, featuring a newly purchased round pen (the acquisition of which was motivated by Izzy’s joyful behavior).

All of which left me SERIOUSLY QUESTIONING my mid-March decision to sign up for an in-hand clinic to be held at the very beginning of May with eventer and natural horsemanship trainer Tik Maynard. I much enjoyed Tik’s presentation at the Area I Annual Meeting in January, and when I saw that Fox Hill Equestrians in Barnstead, N.H., would be hosting him, I was immediately interested. Tik is based in Florida, and so opportunities to work with him for a northerly based equestrian are not likely to happen often, and Fox Hill is an easy twenty minutes up the road (as in, I turn right out of my driveway and then right onto the street with the farm, more or less). It seemed like the perfect first ‘off the farm’ outing for my youngster.

Tik was offering a lecture on horsemanship theory each morning, followed by private and small group in hand sessions and jumping lessons in the afternoon. I decided the sensible plan was to audit day one through at least the morning session, then bring Izzy for day two.

Despite her joie de vivre, I went ahead with my plan to bring her to the clinic, and I am so grateful that I stuck with it, as we both learned a great deal.

Lecture Summary: Day One

The horsemanship lecture focused on the theme of how horses learn best and gave an overview of Tik’s training philosophy. One of the main components is that humans must learn to think like a horse; when one can do that, it is easier to set up questions which horses are willing to answer.

Horses have evolved to quickly evaluate which stimuli are worthy of response, and which can safely be ignored. Only those animals which have correctly and efficiently solved this riddle survive, and we must respect that our domestic animals retain these wild traits.

img_1345
Here is Izzy, demonstrating that she is not all that concerned about crinkly tarps. This is her friend Devyn, who has given us a great deal of assistance as a second set of hands!

To this end, horses pick up on visual cues and details that we miss, and they may react to them in unanticipated ways. We all have been guilty of responding to these behaviors defensively or angrily, but the truth is that getting emotional in this situation doesn’t do much to improve the relationship or communication between you and the horse.

The things which motivate horses to do a certain behavior, including ignoring an unpleasant or unfamiliar stimulus, are not the same things which motivate humans. Horses seek safety, food, comfort and play, in that order. Smart trainers use these motivators in their work.

Because horses seek comfort, creating situations which increase a horse’s comfort when they provide the desired behavior automatically reinforce that outcome.  A common example of this in practice is the use of the rider’s leg; the pressure is slightly uncomfortable, but when the horse goes forward and the pressure goes away, the horse’s comfort level increases. Praise itself doesn’t mean much to a horse, but the release of pressure does.

img_2715
Izzy learned to wear a saddle this June.

Horses are scared or nervous of things which act predatory; this includes anything which comes running towards them and things which are going fast, being loud, or behaving erratically. They prefer to be approached slowly, which might not be the way we enter the paddock when our minds are preoccupied with catching a horse for a lesson—explaining why a normally cooperative horse might refuse to be caught.

Tik encouraged us to think in a positive frame of mind when asking the horse to do something. For example, think “Let’s do this” instead of “Stop doing that”.

One of our goals is to encourage our horses to play. To this end, ground work is like creating a series of puzzles for the horses to solve through trial and error. Just as with humans, horses respond to these types of mental challenge differently. “There are those which already know the answers, those which try to solve the puzzle, and those which wait to be told the answer,” said Tik. “Problem solving gets inspired when they are young.”

img_2759
Hey, can I help you with the weedwhacking?

Solvable puzzles introduce to the horse a little bit of pressure; some pressure is needed for growth and learning, but finding the right amount is key. Too little and no learning occurs, too much and the horse may become so anxious they can’t learn at all. Because horses seek comfort, they are going to look for the release of pressure, whether that pressure is physical or mental. “Pressure motivates but the release of pressure teaches,” said Tik.

Day One Ground Work Sessions

With these thoughts in mind, we moved into the hands on portion of the morning. My friend Hilary brought her bay Thoroughbred, Tom, and Tik took the line from her. “When I first work with a horse, I want to know how interested in me he is,” said Tik. “Does he like me?”

img_2646
Hilary and Tom

Tik approached Tom at a slight angle, reaching a hand out and waiting for the horse to touch him first. Then he began to rub Tom’s head, neck and rump, which the horse seemed to enjoy. “Some right from the get go want to play and run, and some want to snuggle,” said Tik. “You need to play to their strengths but address their weaknesses.”

Tom wanted to be a little too much in the handler’s space, so Tik spent a few moments working on teaching Tom to back up from a soft pressure. He showed us how to use the rope as a cue in three levels of intensity: first, you flick it with your wrist; if there is no response, you then flick it with your elbow, and finally with your shoulder. Every cue with the rope starts with body language.  “You may need to go through all three levels, but stop when you get the result you want,” said Tik. “When the horse is learning, go through the levels slowly and in sequence. Only once the horse knows how to do something is it OK to skip a level or two in your signals, otherwise you will desensitize the horse. Try to get BIG without getting MAD.”

img_2650
Tik works with one of the group horses.

When Tom gave the right response, Tik angled his body slightly away, shifted his weight onto one leg, and exhaled. They took a break. The pressure was released.

“There are three parts to this that the handler must understand,” said Tik. “There is your body language and intention. There is the handling of pressure changes. And then there is the timing of the release.”

For ground work, Tik prefers a rope halter, a heavy, dense, long rope, and a sturdy stick similar to Parelli’s Carrot Stick.  Depending on the situation, Tik might choose a rope that is 12’, 22’ or even 45’ long.

img_2647
Practicing waiting while not being in each others’ space. 

Tik emphasized that consistency is key. Handlers should always start at level one in terms of pressure, and add to that baseline as needed. The only exception is in the case of dangerous behavior. “When the horse is checking out mentally, you need to get their attention back on you through the use of an exercise which you have established in a quiet time,” said Tik. “There are three goals I have for any training session: the human is safe at the end, the horse is safe at the end, and the horse is more relaxed at the end than at the beginning.”

The next set was a group lesson with five horses working in hand at once. The animals were at different stages of training as well as mental focus, which gave Tik the opportunity to speak to a variety of exercises and possible outcomes. But he started with having the horses get comfortable with their handlers standing about six feet away from them, with slack in the lead rope.  “On the ground, you sometimes want the horse’s eyes and ears towards the handler but sometimes you want to direct them and their attention elsewhere,” said Tik.

One young handler and her sweet steady eddie type schoolmaster worked on learning to give from pressure on the nose. “For a lesson horse or a kid’s horse, you need to think about how sensitive you really want that animal to be,” said Tik.

img_2648
My friend Sarah works on sending her Thoroughbred, NASA, over the tarp. He is for sale, by the way!

Several horses in this group played with a tarp that had been laid out in the arena. “There are a few different ways you can ask the horse to cross the tarp,” said Tik. “It is like asking a riddle. You can lead them over, send them over, draw them over or back them over, if you have it secured down.”

Turk, an elegant bay Thoroughbred gelding, tended to speed up once in motion on the circle and needed to slow down and refocus on his handler; Tik helped her to cross his front feet and back feet over each other. “At first, it is about moving the whole horse forward, backwards, and then on a circle,” said Tik. “After this is established then we start to move the front half relative to the back.”

Horses can be responsible for four things: to maintain their speed and gait, to maintain their direction, to be looking where they are going, and to act like a partner. As trainers, we should not be doing these jobs for the horse. “But horses must be taught how to do these things,” said Tik.

Izzy’s Session

Other than going for short trailer rides around the block last summer, Izzy has not left our farm since her arrival on a bitterly cold morning in March of 2017. I am not sure who was more nervous for the outing—Izzy or me! Two of my students, Julia and Nikki, tagged along for moral support, education and extra hands if needed.

IzzyVideo1_Moment.jpg
Izzy is enjoying a “release” moment after getting a riddle right. Note Tik’s unevenly weighted feet and relaxed arms.

I don’t think anyone else brought an animal as young as Izzy; I held her in the barn aisle while Tik wrapped up his morning lecture on day two, and although she danced and jigged a bit while waiting her turn, I felt she was really trying to be good. That said, I had no idea what to expect from her when we got into the ring. I think Tik fairly quickly assessed that her brain and energy needed to be redirected, and so he came back a little early from his post-lecture break to get started.

“Do you mind if I work with her for a few minutes?” he asked. I was so relieved! Yes, please!

The first thing he did was swapped out my long line for the sturdier rope line he had been using on other horses.  He then let Izzy move out onto the end of the rope, where she leaped and ran and displayed the athleticism which I hope will be used for good things in the future. He wasn’t expecting her to be totally focused on him all the time; in fact, that day he said that he would be happy if she was with him 30% of the time.

Izzy Video 4_Moment.jpg
Izzy is actively backing away from Tik in this video grab. 

“I am looking for the moment where she wants to stay still and relax,” said Tik. “I am not punishing her at all for her loss of attention or focus. Instead, I give her something else to do.”

It was truly amazing to watch Tik work with Izzy, who he had just met, in such a respectful yet constructive manner. She had moments of simply moving around him at the end of the line, and other moments of youthful behavior. He could halt her and turn her. They went and checked out the mirror together. As she started to visibly relax and become more mentally calm, Tik led her to the tarp and a wooden bridge which had been used in previous sessions. She inquisitively just walked right up to and over both objects. I was not surprised that she handled them so well, as this has been her typical response to something new, but it was lovely to see that she had the same attitude in a new place once the zoomies were behind her.

Izzy Video 2_Moment.jpg
Once Izzy became more relaxed in her environment, Tik was able to enjoy some snuggle time with her. She is clearly miserable.

Tik wrapped up his work with Izzy by playing with some halt, walk, halt, back up transitions, teaching her to cue into his body language. He tipped his shoulders forward to encourage her to walk, squared them over his hips for the halt, and inclined them slightly backwards to cue her to back up.

After this, I took over for a few moments, practicing the same in hand transitions, and finally ending with her just hanging out all the way at the end of the long lead, while I turned my back to her and stood weighted more on one leg. I’m told she did lots of yawning, but of course I wasn’t allowed to peek!

Izzy 1
I’m trying so hard to not look at her while audience members asked Tik questions about our session.

“The more emotional something is for the horse to learn, the longer the break they get,” said Tik.

While he described his work with Izzy as being a “typical three-year-old session”, he also acknowledged that she was a pretty self-confident animal, as was evidenced by her overall response to the new situation and stimuli. “Horses like this which are clever and smart and brave are great but also a challenge,” said Tik. “You must find ways to help them learn and stay interested.”

Coming to this clinic, as mentally stressful as it was for me to do it, was absolutely the right choice to make at this stage of her training. Izzy was like a changed woman after interacting with Tik, and both his feedback and watching how he used his body language to interact with her helped to give me the confidence to do what I had sort of suspected she needed me to do—get a longer line and really send her forward when she wanted to act up. So long as your response to her is fair—I am sending you away to work a little bit not because I’m mad but because we have a job to do—she responds positively, and rather quickly settles down.

IMG_2839.JPG
Izzy has learned the basics of long lining this summer. This project was definitely not do-able until after our clinic! Thanks Devyn for the photo.

I have continued to play with some of these techniques this summer, but I will admit that I have much more to learn. It was a fascinating opportunity to do something totally different with one of the horses, and I am pleased that it was such a positive experience!


Jochen Schleese: Understanding Better Saddle Fit

Proper saddle fit is a topic which has garnered much attention as equestrians have gained a better understanding of the intersection between tack and performance.  Jochen Schleese, of Saddlefit4Life, is a saddle maker who is inspired to educate riders, owners and trainers on the basic concepts of better saddle fit.  He gave a lecture and demonstration on the subject at the University of New Hampshire Equine Program in September of 2017, and the following is a brief summary of his critical points.

Several trends in modern equestrian sport have influenced the needs we must address in the design and selection of saddles.  First, most riders are female, and the structure of their pelvis is different than that of a male.  Female hip sockets face more forward, a shorter tail bone brings the balance point of the pelvis further forward and the seat bones are wider.  However, saddle design traditionally has been oriented towards what will suit a male pelvis; when women try to ride in saddles which do not allow them to naturally sit in a comfortable, supported position, they at a minimum feel like they ‘fight the tack’, or in the long term, can suffer health complications including pain in their back, hips and knees.  And of course, a rider out of balance will negatively affect the horse as well.

img_1488
Jochen discusses the sweat marks and muscling of demo horse Santa Fe ISF, after he was warmed up in his usual tack.

Secondly, the shape of horses has changed, with modern breeds trending towards being more “sporty”.  As trainers, we want to encourage the horse to lift their topline up underneath the weight of the saddle and rider.  But as the horse lacks collar bones, and their entire trunk is hanging from their shoulder muscles, the sheer act of saddling and sitting on a horse causes the topline to be pushed down.  Just as one size shoe does not fit all wearers, one size saddle does not suit all shapes of horse, and as the horse develops muscle, even what once fit well may need adjustments.  If we want to have any chance of engaging the topline correctly, we must set the horse up to be able to lift.

Horses are remarkably tolerant, and most will try to do what is asked of them even if their tack is ill fitting.  But we will see the physical effects of poor fit in myriad ways—subtle cues, such as a wrinkle in the nose, pinned ears, and wide eyes are a good place to start.  More significantly, we can see severe impacts such as the development of subluxations, sacroiliac issues (like hunter’s bump), swayback, scoliosis, muscle wasting and more.

img_1500
Here, Jochen shows how the human pelvis is meant to be centered over the topline musculature.

A well fitted saddle will help prevent these issues, but it must be appropriate for the physique of the horse in question. And we must be cognizant that the shape of the horse will change over time.

It is critical that the position and shape of the saddle do not interfere with the cap of cartilage which is located over the top of the shoulder blade. Equally important is that the saddle cannot sit on the horse’s spine.  Most horsemen know this, but at the same time, may not be able to accurately assess the true width of the spine; just because the channel is clear doesn’t mean that the panels are as well.  Sometimes it is necessary to map out the areas on the horse’s back which can carry weight versus those spots where it simply can’t.

img_1494
Santa at the beginning of the “marking up” process.  You can see the bold “X” of two “no pressure” zones.

Schleese explained that there are fourteen reflex points in and around the saddle area which cause a negative reaction if they are being pinched from a saddle.  Think of a reflex point having sensitivity akin to hitting your funny bone; the response to pressure is involuntary.  Some of these points are more sensitive than others; Schleese used the analogies of “lemon”, “grape” or “egg” pressure to help the audience understand the tolerable amount of force on a given area.  Clearly, a lemon will absorb more pressure than an egg before it breaks.

If these areas are being pinched, riders will likely experience resistance in their warm up for at least twenty minutes; this is the amount of time it takes for the nerves to go numb.

img_1481
These tree points show a design which is common even in modern saddles; they can apply too much pressure to the sensitive region below the withers and near the shoulder cap.

Schleese emphasized that there are nine critical points to check when assessing saddle fit for the horse:

  • Saddle length: The shoulder and loin areas must be non-weight bearing.  In addition, the tree must have the same angle as the shoulder of the horse.  It is critical to correctly identify the end of the shoulder (usually in line with the end of the mane/front of the withers) and ensure that the saddle is not impeding it. This last point was emphasized repeatedly.
  • Balance: The saddle’s balance point should be parallel to the ground when it is correctly placed on the horse’s back. It is the distribution of a rider’s weight, rather than the actual amount of weight, which is critical.  An asymmetrical rider can almost double their impact on the horse.
  • No Rotation/Shifting/Twisting:  The saddle should not shift to the right or left when viewed from behind.  The tree points must be behind the shoulder blades.
  • Wither clearance: You are looking for at least two to three fingers clearance above the withers, but should also look for two to three fingers on the sides to allow for lateral work.  Note here that conformation matters; the saddle will be closer to a high withered horse and farther away from one with mutton withers.  There should be no pressure at all four inches below the withers when the saddle is placed on the horse.  Schleese says you should be able to take a BIC pen, place it under the D-ring, and then slide it down without resistance.  Otherwise, when you add a pad and the weight of a rider, the pinch which the horse feels will replicate the bite of a stallion.
  • Spinal Clearance: This relates to the width of the gullet—you are looking for 3-5 fingers here, enough to ensure that the saddle isn’t interfering with the spinous processes or the musculature of the horse’s back.
  • Billet Alignment: The billets should hang perpendicular to the ground, and the girth should be centered, not tipped forward or backwards. The girth will always position itself at the narrowest point of the rib cage, behind the elbow.
  • Horizontal Panel: The panels should touch evenly on the horse’s back, all the way down their length.  Avoid “bridging” or rocking, which distributes the pressure unevenly, causing the horse to hollow their back.
  • Tree angle: The tree angle should be parallel to the shoulder angle when the saddle is positioned properly.
  • Tree width: The tree must be wide enough to allow for shoulder rotation, especially when jumping, but not so wide that the saddle rocks or sits on the withers.  Most owners are familiar with the concept of narrow, medium or wide trees, but not that the angles of these trees can vary.  This explains why a medium width tree in one saddle might not fit the same as one made by a different manufacturer.

img_1485
Note the angle of the tree points.

There are two styles of saddle fitting: static fitting is done while the horse is still, while dynamic fitting considers how the horse moves as part of the fitting process.  “You must bring your horsemanship and common sense with you,” says Schleese.

Dynamic fitting can give the saddle expert more information.  Schleese likes to watch the horse move on the longe line at the walk with no tack; he watches the horse’s eyes, ears, and mouth, as well as the manner in which they carry their topline.  In particular, he notes the tail carriage, which is essentially an elongation of the spine.  How the horse carries their tail is a reflection of the way in which they have been trained.  Most horses carry their tails to the left (and interestingly, their manes fall right).

“When the tail goes to the left, they will track up more easily on the left side,” says Schleese.

Schleese next will watch the horse with a rider on board, wearing their saddle as positioned by the rider; he notes that dressage riders tend to set it too far back while jumping riders tend to set too far forward.  When mounted, the horse should still track up evenly and the loins should remain soft and supple.  Within eight circles, the horse should begin to salivate and chew the bit.

While it is normal for the saddle to shift slightly away from the direction of the horse’s bend, it should not move dramatically.  Often, issues are more subtle.  For example, a saddle which is jamming into the horse’s back on the right side of their spine will cause their tail to swing left.

img_1458
Jochen began his three hour presentation with a Powerpoint supported lecture. I promise the students in the background were more interested than this photo might indicate!  🙂

Schleese’s mission is to educate as many equestrians as possible on the essential elements of saddle fit.  It is clearly a complex process which requires practice to master, but by reviewing the basics, any horse owner should be able to do a basic evaluation on their own saddle to determine if expert guidance is required.

Using Work in Hand to Gymnastically Develop the Horse: an Introduction to Straightness Training

Lately, my interest in broadening my understanding of various kinds of ground and in hand work has been growing, and I am enjoying learning about ways in which this work could be beneficial to both my training process and developing the relationship with my horses.

In mid February, I had the opportunity to visit Narnia Stables in Ashford, Conn., the home base for trainer Meg Brauch, who was offering a Straightness Training (ST) clinic with lecture and demo. The clinic’s title was “Using Work in Hand to Gymnastically Develop the Horse”, and photos promoting the event showed many happy horses in various stages of training. I was intrigued and roped my friend Sally into making the two and a half hour drive down for the afternoon start time.

MegandPaladin
Meg Brauch working with Paladin. Meg was kind enough to permit me to “borrow” photos from her Facebook for use with this blog.

Straightness Training is a system developed by Dutch equestrian Marijke de Jong. After one short afternoon session, I am far from qualified to fully discuss the system or its philosophies in any great length, but I did take away that it is inspired by the work of classical horsemen like Gueriniere, Baucher, and those of the Iberian peninsula, and that it is intended as a systematic and progressive system that focuses on developing a horse using humane methods.

Introduction to ST

Meg provided a basic overview of the ST system, where I recognized some clear areas of overlap with other, better-known-to me, training philosophies. First off, most of the unmounted work is done in a cavesson. I was quite impressed with the design of Meg’s cavesson.  In my experience, finding correctly fitting cavessons is a real challenge; they usually do not conform well to the muzzle or sit evenly around the bones of the skull.  The cavessons Meg uses are Baroque inspired and have a piece of padded chain over the nose; I am sure that some people will find this too harsh, and I am sure in the wrong hands it would be.  But in truth, the shape of the noseband better conformed to the muzzle than most of the off the rack cavessons out there, and the weight of the noseband overall was much less than a regular cavesson. It had a greater degree of adjustability as well; one of the horses Meg used for demonstration later in the afternoon was an Anglo-Trakhener, heavy on the Thoroughbred blood, and his refined face seemed fit well in the cavesson. This style also has an option to fairly easily add a bit, which is a useful feature.

Cavesson.jpg
There is a good view of the cavesson here as Meg appears to be asking this horse for LFS.

The ST system is based on its “five pillars”: groundwork, longeing, work in hand, riding and liberty work. The first two steps are done in a cavesson with a single line attached, and in these stages, the goal is to teach the horse how to carry themselves. The work in hand, which we were there to watch specifically, is done in a cavesson with a set of reins clipped to either side, as on a bridle. As horses become more advanced, a curb bit can be clipped to the cavesson along with a set of reins, and the horse is introduced to the concept of a double bridle.

Horses which are trained in the ST system will be introduced to many under saddle concepts prior to actually being backed; the exercises are meant to help develop the horse’s balance as well as to gymnastically work and develop the muscles.  For a youngster, ST can help the horse to understand the rein aids and develop lightness. In the end, the horse should become confident, relaxed and supple in their work. Due to the mental and physical demands, ST should not be started before the horse’s third year. Lightness was a pervasive theme, both in the application of the aids and the weight of the horse in the hand.

For the handler, ST teaches a better feel for their mount’s natural asymmetry and body position in the lateral exercises, and also helps to improve their sense of timing. Meg promised that this improved “feel” transfers over to the ridden work.

Understanding Asymmetry

Now, to really understand the importance of lateral work, you have to also appreciate that horses are naturally asymmetrical. Horses are narrower in the shoulders than the hips, and like humans, are “sided”, meaning one set of limbs tends to be in charge. In our usual handling practices, horsemen do little to improve the situation (when was the last time you led/untacked/mounted from the right or “off” side?).

ST teaches about “eight dimensions of asymmetry”. For me, there was nothing new here, but I really liked the way the concepts were organized. Meg presented the dimensions of asymmetry as follows:

  • Lateral bending (issues here are usually the easiest to correct)
  • Horizontal imbalance (horse naturally carries more weight on forehand)
  • Front legs (Handedness, as in, which leg does your horse prefer to lead with)
  • Hind Legs (the carrying hind leg is more flexible, and the pushing hind leg tends to be straighter, stronger and less flexible)
  • Front/back ratio (the wedge shape of the horse which I referred to earlier)
  • Diagonal (one diagonal pair will be dominant, and usually the pushing hind is diagonal to the dominant front)
  • Vertical (leaning in on an angle on corners)
  • Topline (we want the horse to stretch here and be longer and rounded).

In general, a right bended horse tends to be left forelimb dominant and usually has a pushing right hind. Their concave side is their right side.  Reverse all of these for a horse which is left bended (which seems to be less common overall).

To improve the horse first requires awareness of the asymmetry on the part of the trainer. All beings are asymmetrical, but through thoughtful and steady work, improvement is always possible.

liberty
Meg working at liberty.

Use of the Aids in ST

The pillars of ST work which are done on the ground require the use of the handler’s body language and voice, but several other aids are also important. The first is mental focus—Meg used the expression “inner picture, inner feeling”, which basically means that before a trainer begins any exercise with their horse, they should have a sense of what it is they are trying to accomplish. Related to this is the concept of “energetic aids”, which basically is saying that the handler should be centered, grounded and present, with their full attention on the horse and the task at hand. Finally, for several pillars, artificial aids like a long whip (for driving, slowing or reinforcing) or rein (used similarly to the riding reins, with inside/outside and direct/indirect cues offered) are also included. A direct rein influences the horse’s poll while an indirect rein influences the shoulders, almost like having a lasso around the horse’s neck.

The demonstration section of this clinic was focusing on the work in hand, a pillar which comes after a horse already has a basic understanding of the ground work done with a cavesson on a single line, attached to the nose. Basic circle work and an introduction to the lateral movements should be established through ground work before progressing to work in hand, which is done with a set of reins clipped to either side of the cavesson, as on a bridle. During the ground work phase, the handler works on the inside of the horse.  But during the in hand phase, the handler will transition to the outside of the horse.

The whip becomes a tool of refined communication, based primarily by its position.  It can be used to activate the hind end, or when held in front of the chest, indicates a half halt. Held at the girth, it asks for more bend or forward intention. Pointed towards the opposite hip, it becomes an advanced aid to increase the angle of the haunches in. When kept down by the handler’s side, the whip is in neutral.

Progression of Exercises

In each stage of progression through the pillars, a series of specific exercises is introduced in order. During each exercise, the horse is encouraged to maintain “LFS”—lateral bend, a forward and downward tendency, while stepping under their center of mass with the hind leg.

  • Standstill: Meg says many folks new to ST work tend to gloss over this exercise, because it seems too easy or basic. But mastering the stand still, in which the horse halts with front feet square, head and neck lowered, while willingly flexing left and right, provides an important foundation. It also gives the horse a first introduction of the cavesson and its pressure, and helps to teach them to center their mass away from their dominant fore limb.
  • Circle: Usually done only in the walk, the circle is used to help establish LFS. “We don’t tend to do these in trot or canter, because it is hard to go from the circle to a straight line and keep the horse well balanced,” says Meg.
  • LFS on Straight Line, progressing to Shoulder In
  • Haunches In
  • Renvers
  • Half Pass
  • Pirouette
  • Trot
  • Canter

Carolyn
I had to include this photo of my friend Carolyn, who seems to be practicing that pesky standstill!

Training Theory

When it comes down to it, what I witnessed at this clinic was the application of highly effective classical and operant training techniques. This is really at the root of most good animal training, whether you are talking about riding horses or training dogs or teaching some exotic zoo animal to engage in a medical exam. ST work is about applying the 3 R’s—Release, Reward, Relax. When the horse makes a move towards doing the thing you want, the handler offers a “bingo cue” (some sort of consistent sound), they release the pressure, and then immediately reward the horse with verbal or physical praise or a treat. There is then a short break to allow the horse to process what he just learned.

It is the timing and dosing of the pressure and release process which is most people’s downfall.  Basically, handlers need to AVOID pressure which is held too much, too long, too often, too suddenly or too steadily, and EMBRACE release which is early, often, quickly administered, long and soon.  Release more than you take. Through this process, the horse learns to carry the posture on his own.

There are three phases of the training process.  The first phase is teaching the horse.  In this phase, we are trying to help the horse begin to understand the exercise, and to develop the new neural pathways which will allow it to be performed. At this stage, the movement may lack gymnastic quality, or be in slow motion, similar to how we might learn a new dance step.  In the optimizing phase, the trainer focuses on improving the quality of the movement and encourages the horse to work towards self-carriage in the body and mind.  Finally, in the improvising phase, the exercise can now be used for a purpose or in a goal-oriented way.

Another way to look at the training and learning process is to understand that in doing any activity, there is the comfort zone (doing what you know and is familiar), the stretch zone (where you are trying something new that is out of your comfort zone but still attainable) and the stress zone (where what you are trying to teach is too much, too soon). Growth occurs in the stretch zone, but not every day can be a stretch day. And when we live in the stress zone… no training occurs.

Demonstration

Meg demonstrated the in hand techniques with two of her own horses.  The first horse was a 6 year old Hanoverian gelding who has had a “slow start” in his training progress due to various injuries. She demonstrated that she held each rein through the thumb and forefinger, so the overall contact was quite light.  The outside rein should cross the neck in front of the withers, but not be more than half way up the neck. The goal is to work towards holding the reins closer to the withers than the head, so that the horse is ultimately coming forward from the hindquarters and into the rein (similar to riding).  However, when the trainer loses quality, they should move their hold closer to the cavesson until the necessary elements improve. The handler’s body should be positioned off of the girth; Meg explained that it is really easy to get out in front of the horse’s shoulder.

Renfrew
Meg and her horse Renfrew.

This particular horse usually struggles with the stand still, but today demonstrated the position with his feet even and square. Meg emphasized that under saddle, the horse must learn to wait to move until the rider’s cue, and this practice starts here. She encouraged the horse to stretch forward and down using gentle pressure on the front of the cavesson, and then flexed him to the left and right with pressure on the sides.

After a few moments in the stand still, Meg moved on to doing small circles, 8-10 meters in diameter, to encourage the bending of the horse, while still asking for the forward and downward tendency.  When she asked for transitions to the halt, the effort is made mostly from the voice.  The ultimate goal is to use little to no pressure on the reins in the halt, as the horse will usually tend to come up in the neck and lean into this pressure.

Because changing the bend while in motion is fairly difficult, Meg halted her horse and changed the reins over to the opposite side to work in the other direction.

She then proceeded to demonstrate the shoulder in (be sure to not draw the horse’s nose further in than their point of shoulder) and haunches in (the horse is taught to bend around the whip, which provides the cue).

Next, Meg brought in her 19 year old schoolmaster, Paladin, an Anglo-Trakehner. He came to her due to intermittent front end lameness which had ended his competitive career; through ST work to straighten his body, redevelop movement patterns and correct asymmetrical muscling, the lameness has all but resolved.

Meg worked through all of the same initial movements with Paladin, but then also showed us work in trot and canter.  She explained that the classical masters would sometimes introduce half steps in hand before introducing the trot in order to develop balance and strength; in the faster gaits, it is best to do very short bursts to prevent the horse from losing balance. No matter the gait of the horse, the handler should always remain walking, not jogging, to keep up.

Teaching these progressive exercises in the walk and trot with a youngster can help them to understand what is wanted before trying to do the movements with a rider on board. The movements may also be done in the canter, but this requires more collection than a young horse will have; it is better to introduce the canter under saddle first and allow the horse to develop more strength before teaching these exercises in that gait.

Take Aways

When I signed up for this clinic, I was not expecting a full immersion into an organized training system. I am almost always initially skeptical of programs which promote a particular prescripted philosophy, special equipment (ex: buy this halter/video series/magic stick for just 99.95) or come with too many impassioned disciples who all function at only a very basic level. So before I “drink the Kool-Aid”, I like to try to learn a little more.

Straightness Training (http://straightnesstraining.com/) is a pretty comprehensive program.  Its founder, Marijke de Jong, has created an ambitious and heavily trademarked/registered system of instruction, coaching, certification and support. Under the “FAQ’s” page on her website are some interesting threads on integrating ST work with “other types of riding” as well as what the difference is between classical riding and Straightness Training. Here, deJong compares the different schools of classical dressage training (German, Spanish, etc.) to the branches of a tree; while the specific approaches and techniques taught in these different schools may vary, they all have the same roots. deJong’s work is drawing off much of the in hand training approaches used by classical masters. She seems to have studied this subject far more deeply than I have ever attempted to, and it is beyond the scope of this blog for me to do any analysis on the connections here.

I think we as horsemen are all enthralled with the idea of having a horse which responds to our aids with lightness and sensitivity and to have the kind of relationship with our horse that is seemingly effortless and harmonious. Certainly in Meg’s demonstration she showed that with time and care, her work on the ground has allowed each of her horses to respond to quiet and soft aids as they worked through their lateral movements.  Despite being distracted by outside stimuli and twenty auditors, both horses chose ultimately to focus on Meg, with a minimum of fuss and no force.

I think my major, most important take away from this clinic was a reminder that we must all reward more often and for less effort. It is so easy, especially in dressage or equitation work, to drill ourselves and our horses. In doing so, we fail to recognize the “try”, the little effort the animal or student puts forward to improve, because we are too focused on shaping the response to be what we want in a final performance. But in order to get to that evolved, confident and smooth answer, there are many small, incremental steps of growth and improvement. If we as teachers and trainers do not reward these steps, the progress and growth we specifically seek can be deterred.


Area I USEA Annual Meeting: Tik Maynard

I had the occasion to attend the US Eventing Association (USEA) Area I Annual Meeting out in Holyoke, MA on January 7, 2018.  I try to make it every year to attend the event organizer’s meeting, and getting to stay to hear the guest lecture each year is an added bonus.  I was quite enthused to learn that Canadian event rider Tik Maynard had been asked to speak at this year’s meeting. Recently, I read a piece Tik wrote for Practical Horseman about the ground work training he had used with his Retired Racehorse Project mount, Remarkable 54.  I found the article well written and thoughtful, and had a sense from it that Tik was an educated, thinking horseman.  In his presentation, which he called, “7 Big Picture Ideas to Get Along Better with your Horse”, he did not disappoint.

My overall impression of Tik as a horseman only improved upon hearing his introduction—the son of a show jumper and a dressage rider, he attended college in his native British Columbia before embarking on a quest for absolutely top of the line horsemanship education by spending nearly two years apprenticing with riders such as Ingrid Klimke, Johann Hinneman, Anne Kursinski and David and Karen O’Connor.  The work was hard and sometimes he didn’t measure up—in fact, he was asked to leave Hinneman’s barn for “not being good enough”.  He worked hard to spend time with some of the best in different disciplines, even though eventing became his main passion.  At the O’Connors, he had his first exposure to natural horsemanship, which completely changed the way in which Tik approached horse training.

img_2339
Tik Maynard at the Area I Meeting.

This experience inspired him to do a working student position in Texas with a western rider who specializes in training cow horses using natural horsemanship techniques.  I may be getting the exact timeline wrong here, but you get the general idea.  In working at this facility, Tik says that he didn’t learn so much about riding— he learned a lot about horses. He became more interested in the behavioral side of horses—how they think, how they respond, and how they process training.

Through his practical education, Tik developed the perspective that all trainers have a philosophy which is the result of the unique combination of their personal training in technique and theory combined with their own instinct or horse sense.  Each trainer’s philosophy will be unique to them, which he thinks is a good thing.  It is sort of his premise that a student becomes a sum total of their teachers, and every experience has something to teach us, even if what we learn is what doesn’t work well. It is only once a trainer has a solid foundation and philosophy of their own that they can begin to use their imagination to, in Tik’s words, “do something better than it has ever been done before.”

img_2341

Tik’s personal philosophy would seem to prioritize a horse which is engaged in the learning process.  He talks about “The Look”, the moment when the horse looks at the trainer with both eyes and ears focused, seemingly saying, “What are we doing today?” He emphasizes a difference between communication and control in training.  And though he was told that there was no way that he would be able to combine natural horsemanship training with developing competition horses at the highest level, he has not allowed such negativity to dissuade him from his path.

In his presentation for the Area I Meeting, Tik highlighted seven concepts which he has found to be important in working with his horses in training.

  • Taming versus training. Tik argues that there are horses being ridden and shown which are barely tame, never mind trained.  For example, when the horse is showing even a slight fear reaction to certain stimuli, or grossly overacts to a small stimulus, these can both be signs that the horse is not fully ok with what is going on.  “It is like you have this horse simmering with energy just below the surface,” says Tik. “The horse reacts to the sound of a twig snapping, but that is not the cause of the horse’s tension.” Tik gave as an example of one of his horses, Carollina, who needed to be taught to really think forward.


“There are lots of ways to communicate with horses, but they only have two main ways to show how they feel—either more anxiety or more relaxation,” says Tik.  “Too often people learn to compete before they learn how to ride, and before they learn how a horse thinks.”


  • Start with something you can Your goal may be huge (compete at Rolex) but to get there you must learn all the skills which come before. When training, start with the skills that your horse can do well—even if they are quite basic—and build from there.  Tik used the example of teaching a horse to handle a bank.  Start with:  can my horse look at the bank?  Get closer to the bank?  Look across the bank and realize that there is someplace to go?  “You must be patient,” says Tik.  “For example, almost all water problems with horses are the result of someone pushing too hard with the horse’s first experience.”


When working with a horse which has lost confidence, it is important to take a step back and do many small things successfully before revisiting the thing which is hard.  “People often get into trouble because they skip steps,” says Tik. “There is still an attitude out there that you ‘have to win’.  You need to know that what you get into is something you can get out of.  Do not have a battle.  Back up to something you can do, and then repeat it.”

img_1345
Becoming exposed to unfamiliar stimuli should be like a game.


  • Make your session with your horse like a song. When working with a horse, your training session should contain moments at different levels of intensity. The warm up is gradual, and then you may progress to a new skill or lesson which is higher intensity, before the energy gradually comes down towards the end of the session.  “All moments are not created equal,” says Tik.

Horses can only learn when they are relaxed.  Tik says if there is a scale of tension, a horse must be under a level three in order to learn.  “You need to be polite, and do little polite things to help the horse be more invested in you,” says Tik.  “If you touch the neck on one side, touch the horse on the opposite side at the same time.  Approach a crosstied horse with the same care as a hard to catch horse.”

Tik tries to end each training session by dismounting in the area where he rode, facing away from the barn. He then loosens the girth and might remove the bridle, and waits there until the horse lets go and takes a deep breath.

“Rule number one is the person is safe at the end,” says Tik.  “Rule number two is the horse is safe.  Rule number three is that the horse is more relaxed at the end of the ride than at the beginning.”

img_0964
Learning to cross tie is one important basic skill which all horses should be taught.

  • Make your horse’s world neutral.

There are stimuli which will attract your horse (positives) and those which will repel them (negatives). The trainer needs to shift the horse’s energy towards where they want it to go to. As an example, Tik spoke about acclimatizing his OTTB, Remarkable, to the coliseum in preparation for their freestyle performance at the Retired Racehorse Project. The ring was full of banners, which worried the horse.  So Tik led the horse towards the banner, and had an assistant feed Remarkable a small treat from the opposite side of each banner until the horse began to relax.


Trainers need to make themselves be more interesting than anything else going on.  This means that the lesson being taught must be more interesting; trainers must learn when and how to be big with their actions (body, waving a flag) and when to be more subtle.  Which leads really well into Big Picture Idea #5….


  • Stop at the top of the bell curve.

As a horse progresses through their training, they will get better with a new skill and then often start to get worse—this is a sign that they are bored, frustrated or similar.  Tik reminded the audience that “repetition is the mildest form of punishment”, so a better approach is to get to the top of the exercise and then stop, even if the horse gets there quickly.  Continuing to repeat the exercise once the horse has already gotten the point of it for the day will mean that they are likely to end their lesson at an energy level higher than a 3 (see Big Picture Idea # 3).


  • Be a problem solver. Think.

Be creative. Seek help. Think laterally. “The more you do it, the better you get,” says Tik.
“Almost everything we do with horses is about communication or motivation.”

Tik says that the best trainers learn to think like a horse, and they also are aware of how they want the horse to be responding to them.  “Dressage horses think about the rider the whole time, but for jumping horses we maybe only want them focusing on the rider during the turns,” says Tik. “Then they need to focus on the jump.  So the horse needs to learn how to smoothly shift their focus.”

from-solstice-079
Lee says, “There is definitely something OVER THERE.”

  • What are the Olympics of Everything?

Tik joked with the audience, “what if there were an Olympics for cross ties, for leading, for being caught, etc?” His point is that no matter what kind of interaction we have with the horse, we can always work to make it better.  It is upon these smaller steps which big goals are achieved. “Have your end goal in mind but always stay in the present,” says Tik (seems relevant to so much in life, no?).

In listening to Tik’s presentation, as well as his responses to audience questions, I was struck by his calm demeanor.  He seems humble and authentic.  He did announce that he is working on a book with Trafalgar Square, scheduled for release in June 2018—I suspect that this text will be one to add to the library.


Notes and Observations:  Carl Hester at the NEDA Fall Symposium 2017

The northeast dressage community was electrified by the announcement that British dressage superstar Carl Hester would headline the 2017 New England Dressage Association (NEDA) Fall Symposium, held October 14-15, 2017 at the picturesque Equestrian Center at Pineland Farms in New Gloucester, ME.

PinelandKurLeeNewCar 092
Abby Hardy riding Geoffrey and a previous symposium held at Pineland.

Hester’s influence on the sport of dressage in the UK has been pronounced, and includes leading the team to medals at the World Equestrian Games, Olympics and European Championships.  In fact, at the Rio Olympics in 2016, Hester not only rode (Nip/Tuck) but was the trainer of the other three members of the team:  Charlotte Dujardin and Valegro (who Hester co-owns), Fiona Bigwood and Atterupgaards Orthilia and Spencer Wilton and Super Nova II.

The recent success of the British team is refreshing, as it comes after years of harsh criticism of previous Dutch and German champions, many of whom were proponents of hyperflexion/rollkur.  These horses were criticized for being too tense, incorrect in their movement and otherwise not truly demonstrating the throughness, obedience and correctness necessary at the world class Grand Prix level.  By contrast, Hester is a clear proponent of adherence to classical training methods; he has an eye for a horse, frequently selecting his mounts as youngsters and training them through the levels himself.  His horses, and their riders, fairly dance through their performances.

union-jack-1027898_960_720.jpg

Hester spoke to a sold out house; I was only able to attend on day one, but even just spending just one day auditing was enough to grasp clear themes which emerged through demonstrations which began with a four year old and progressed all the way through to Grand Prix.

Here are my top eight take aways from this symposium.

  • Try to keep horses as naturally as possible.

Hester was originally an event rider, and so maybe this is why he still believes in actually turning horses out.  “If you want to keep your horses sound and happy and easy to ride—leave them out,” said Hester.  He notes that youngsters which are not turned out enough often end up being overworked because they are so high that it takes a long time to establish the necessary suppleness and relaxation.  As horses move up the levels and need more energy for their work, they might need to be kept in more.  But even Hester’s most elite horses enjoy time in turnout daily.

To this point, Hester also believes in regular out of the ring hacking for dressage horses, both for mental health and to develop fitness.  Young horses may only work for 20-30 minutes per session but should be warmed up by moving around outside of the ring.  “Horses must be fit, and if you are just riding them for twenty minutes they will not be fit enough,” said Hester.

img_2122-1
My own youngster, Izzy, clearly believes in the importance of sleeping and resting.  Especially when housekeeping has arrived to clean the paddock.

  •  Temperament, a good walk and a good canter are most important.

“I have been proven wrong many times by a horse with not the best movement but excellent temperament,” said Hester.

It is important for a dressage prospect to have as close to a perfect walk and canter as possible, because these gaits are much harder to improve than the trot.  However, a youngster with an unclear walk may simply need more strength. Horses with huge walks and a big overstep can be hard to collect. Riding zigzags up and down hills can help to improve the walk.

  • Less is more.

“All training goes like this,” said Hester, drawing a line in the air with his finger that resembled a rollercoaster.  Sometimes a horse will hit a phase of their training where they get more difficult, and this is not always a sign that the horse is being stubborn.  “Give them a break—a few weeks off,” said Hester.  “They can be tired or muscle sore.”

Hester repeated this theme in numerous ways during the day.  “Your horse isn’t born reading the dictionary—you must teach them the dictionary,” he said in regards to training youngsters.

“If the horse is not on the bit, do not force them,” said Hester. “The horse needs to work out where to put themselves.”  He reiterated this in several sessions.  “Do NOT be obsessed with the horse being ‘on the bit’,” said Hester.  “They will come onto the bit with correct work.”

During the work itself, horses need breaks when they become fatigued; a break can sometimes be as basic as taking a short diagonal while allowing the horse to lower their neck. “The rider must listen and feel for this request from the horse,” said Hester.

Make sure you finish a training session with work the horse finds easy.  Put the “meat” of your training towards the beginning or middle of your work.

img_1966
Hearing Hester’s words came at a perfect time for me, as work and school demands kept me from having as much time available for serious training.  Instead, I used the fall to focus on stretching, hacking, cavaletti work and strength building with my top horse, Anna.

  • Increase demands GRADUALLY 

Training must be systematic.  Youngsters should start by working on long straight lines and large circles.  They need to learn to turn from the outside aids of the rider, and be encouraged to reach through their topline in a long outline. A four-year-old might work just twenty to thirty minutes, four times per week, stretching in the walk, trot and canter, slowly building to the development of the ability to bend and straighten.  Once this foundation has been set, as a five-year-old the horse should work on smoother transitions, better balance, and increased lateral suppleness, using leg yield.

It takes time for horses to figure out what you want when you teach them something new.  On the first day, introduce the horse to the new skill; on day two review, then give them day three off.  On days four and five, repeat the lessons of days one and two.  Then go hacking on the weekend.

It. Takes. Time.

img_0724

  • TRANSITIONS 

Hester is obsessed with transitions.  He said he does “lots” of transitions per session—hundreds of them.  Big ones.  Small ones.  Between gaits, within gaits.

The trot to canter transition engages the inside hind, while canter to trot teaches the horse to come more forward into the rider’s hand and use their back more.  Canter-walk-canter will work towards getting the horse to truly sit behind and come off of their forehand.  “Listen for the sound of the front feet,” said Hester of this transition.  “You shouldn’t hear them.  These kinds of exercises build the strength to do the next level of collection.”

At the FEI levels, horses must be able to go from the trot or canter directly to the halt.  This starts by teaching a young horse to ride cleanly from trot-walk-halt.  Gradually, make the duration of the walk smaller until it goes away.  “Your piaffe-passage lives in the trot-halt transitions,” said Hester.  Hester recommends using a ground person to verify that each hind leg is squarely under the horse.  “This is how you ensure that each leg aid is activating the hind leg on that side,” said Hester.

For horses which come behind the leg, Hester recommends bringing them back as soon as they start to go forward, rather than waiting for them to slow down.  “You must take the leg off in between asks,” said Hester.  “Telling someone to ride forward when they don’t have the balance will not work.”

If you make it to Grand Prix, the transitions are the hardest part, especially from piaffe to passage and back.  “Good collection makes good extension,” said Hester.  At the lower levels, and for horses without a natural lengthening, asking for bigger strides on the circle can help to improve the gaits.

Jan Ebeling April 2017 038
Anna is a great example of a horse without much natural lengthening to her stride.  I have been trying to add “hundreds” of transitions to her work, ala Hester,  to try to develop more reach in her step.

  • Know your craft. Really, really know it.

Hester emphasized that all riders should understand the fundamentals of biomechanics and conditioning in the horse.  Riders should also choose a horse which suits their personality.

Self-carriage in the horse begins with teaching the horse to carry their own head and neck in the free walk on a long rein.  The rider should use their arms in a rowing fashion, pushing the neck down and forward.  Keeping the reins moving and looking for lightness in the hand is most important.

When tracking right, most horses bring their nose and haunches to the inside.  The rider must use more outside (left) rein to help keep the horse’s nose in front of their chest. When the horse tracks left, the rider can ask for more inside flexion to help stretch the chronically shortened right side. “When the nose and hips are to the right, the middle of the horse is out,” said Hester. “You need to bring the middle of the horse in.”

Hester made reference to an often misattributed quote of his student Dujardin, which goes something like “short reins win medals”.  “Short reins allow you to ride forward to the hand,” said Hester.  “Long reins will cause you to take back.  During the warm up, some horses will be very strong in the hand and some very light.  Do not mistake lightness for contact.”  The use of a driving rein position can be helpful for horses which curl in the neck in response to the rider’s hand.

Hester said that there is no hard and fast rule as to when introduce the double bridle.  “If the horse is not sure at first, I might hack out in it,” said Hester.  “But if the horse doesn’t go well to the snaffle then they won’t go to the bit in the double.  The horse must be in self carriage in the double bridle for it to work.”

Do not rely on your reins to create the shoulder in, rely on your legs.

To ride an accurate half pass, “put your destination in between your horse’s ears.”  Keep the rider’s weight on the inside seat bone.

Flying changes should be cued with a squeeze of the rider’s heel, not by drawing the entire leg back, especially on a dull horse.

Leg yield in canter can help to free up the horse within the gait; half pass in canter increases collection. In both movements, the horse’s shoulders should be leading slightly.

The half-halt is a forward aid.  “The half halt needs to feel like the horse is happy to go forward, not happy to stop,” said Hester.

Hester does not often use dressage whips.  “If you are going to ride with a whip, then the horse should not be best friends with it,” said Hester.  “But they also shouldn’t fear it.  The use of the whip should create a medium trot step instantly.”

“You ride for thirty to sixty minutes—do it right.”

Jan Ebeling April 2017 007

  • Be positive.

Training your horse should be like playing a game.  Make the work playful.  Reward often.  “Every time they give the correct reaction, offer a touch on the neck or a small pat with the inside rein,” said Hester.

The rider’s goal should be to put positive tension into their work, and afterwards stretch the horse and take a break.  “With the stretch, the horse shows relaxation,” said Hester.

To this end, rising trot can be a valuable tool.  “Rising trot is not just for amateurs and young horses,” said Hester.  “It can be helpful whenever you are asking the horse for more.  It can be used in the half pass, extended trot, etc.”

Always, always remember that horses are authentic.  “If the horse is difficult because he is stiff, he doesn’t do it to annoy you,” said Hester.  “He does it because he’s stiff, so you need to give him some time and work through it in a systematic way.”

anna-at-verne-2016-106
Sometimes your horse makes it very clear that they did not appreciate the way in which you asked for the flying change!

  • Dressage is not just about the movements.

Hester said that his older horses may work as much as two-three hours per day to develop the fitness necessary for elite dressage.  “But you are not just schooling the Grand Prix,” said Hester.  “You can’t do that. They must get fit through stretching, hacking and loosening.”

The hardest part of dressage, according to Hester, is attending to the care and health of your horse, and keeping them sound.  “It’s not what you invest in the horse, it is what you invest in training,” said Hester.  “Buy what you can afford; they might be two years old, but you can start here and train them.”

Hester said that it can be hard to stay inspired when working on your own.  “Everyone needs to find someone to work with,” said Hester.

anna-at-verne-2016-042
While I have taken inspiration from many coaches, it is Verne Batchelder’s assistance which has proven to be the most helpful with Anna.  

Final Thoughts

The content of this symposium was refreshing in its emphasis on correct, classical training and the emergence of the clear, horse friendly system that has led to Hester’s success.  There are no tricks or shortcuts, just a clever adherence to finding the joy in each individual horse, using their strengths to develop their weaknesses.  The horses chosen for demonstration were exceptional examples of the quality of work at each level.

img_2335

This won’t be a popular opinion—but for me, what was NOT refreshing about this symposium was all of the hoopla and rigmarole around it. Ex:  Tickets will go on sale at midnight, to NEDA members only.  Doors will open at 7:30 AM (symposium does not begin until 9:15). You will get a nametag to affix to your chair, no saving seats.  Dressage has a reputation for divas, for excessive wealth, for elitism.  This symposium did NOTHING to eliminate that perception; if anything, it enhanced it.  I don’t know how much came from Hester himself (for example, it is his request that no photographs are taken, out of respect for the training process and privacy of the riders) and how much came from NEDA.  Some of the demo horses came from Florida, Ohio and Maryland, for goodness sake. Of the over one hundred rider applicants, we couldn’t find animals from our membership’s base?  Where were the Irish horses, the OTTBs, the “native ponies”?  It is great to see these methods work well with the genetically blessed horses which were selected (again, I don’t know if Hester had final say and this was his design).  But I would suspect that most of the NEDA membership is not riding horses of this caliber, and it would have been inspirational to see even a modest transformation in a “normal” horse during the course of this symposium.  By the end of the day, I had had my fill of the “fussiness” of dressage.

With that being said, I am appreciative of the hard work and organization which went into the planning of this educational event, a process two years in the making.  We are lucky to have access to this caliber of education in the northeast and I am grateful for the hours of effort from the volunteers which put this together.

Hester closed day one with the following summary.  “Dressage is the art of putting a crooked person on a crooked animal and expecting them to be straight and then move to self-carriage,” said Hester.  “Self-carriage is having the horse balanced on all four legs.”


Anna and the Adventures of the Double Bridle

The 2017 season marked Anna’s debut at Third Level; while we certainly didn’t make anyone nervous, as my former coach used to say, we also didn’t get arrested by the Dressage Police, so it would seem that enough of our movements were recognizable at the level that they allowed us to go on our way.

Making the jump from Second to Third level is a significant step forward in the horse’s training.  The purpose of Third Level (as is stated at the top of the test) is as follows: “To confirm that the horse demonstrates correct basics, and having begun to develop an uphill balance at Second Level, now demonstrates increased engagement, especially in the extended gaits.  Transitions between collected, medium and extended gaits should be well defined and performed with engagement.  The horse should be reliably on the bit and show a greater degree of straightness, bending, suppleness, throughness, balance and self-carriage than at Second Level.”

Oh gee, is that all?

img_1448

But in all honesty, what I have found when the average dressage rider is debating moving up to Third Level is that they are worried about two things.  1) Will my horse do a flying change?  2) Can I ride in a double?

The double bridle, also known as the full bridle, is a somewhat controversial piece of equipment.  Third Level is the first time its use is permitted under USEF rules.  As its name implies, it has two bits—a snaffle, known as the “bridoon,” and a curb, also called a “Weymouth.” The bits serve different purposes.  The snaffle helps to achieve lateral and longitudinal flexion, as well as encourages elevation in the frame.  It is also used to help position the neck left or right, and encourages the horse to open the frame when necessary.  The curb’s role is to increase longitudinal flexion, helping to “close” the frame by bringing the head more towards vertical.  The correct use of a double bridle requires that the horse is classically trained; the rider’s hands should initiate but not force the horse’s head and neck into the correct position.

img_1313
Anna’s double.  The curb is pretty flat, with minimal port, and used to belong to my Hanoverian, Worldly.

It is the use of the curb which makes the double bridle both so helpful and also potentially so harmful.  For centuries, the curb was used alone and often one handed, by knights and soldiers needing immediate control and submission from their mounts. The double bridle was not commonly used until the close of the 1700’s, likely due to the influence of French masters Pluvinel and de la Guerniere. Each horseman taught that the curb bit could be used to enable the rider to achieve a higher level of communication with the horse, not simply domination. By employing two sets of reins, the rider could use the snaffle and curb bits separately or in combination, which allowed a greater degree of refined control for military maneuvers.

The curb must be carefully chosen and fit to the horse; when used appropriately, it can allow extremely refined communication between horse and rider.  It is a leverage bit and applies pressure to the poll and chin groove, as well as to the bars, tongue and the neck; any force applied to its rein will be magnified on the horse.

img_1314
A close up of Anna’s current bits.  Talk to me in a year and we shall see what she is wearing!

The strength of the curb depends on several factors.  The overall length of the cheek of the bit is important, but so is the length of cheek above the mouthpiece versus below it.  This ratio effects the way the leverage is applied to the horse.  The tightness and fit of the curb chain is also significant, with the ideal being that when the curb chain is engaged, the lower shank is brought to 45 degrees relative to the bars of the mouth. It may require some adjustment in the curb chain tension to find just the right setting. Ideally, two fingers fit between the curb chain and the chin. Finally, the shape of the mouth piece itself influences the severity of the curb.  The unique size and shape of the horse’s tongue, bars and palate all must be considered.  Usually, the length of the shank is about the same as the width of the mouthpiece; the curb should be a minimum of 5 mm wider at each side of the mouth to avoid the lips being squeezed between the shanks.  But a too wide curb will cause muddled signals to the horse.

Anna Third Level Debut 027
What I like in this photo, from our Third Level debut, is that she is soft in the jaw, properly using the muscles of her upper neck and is slightly in front of the vertical with her forehead.  I think we are about to ride a volte here, and she needs to be better supple on the right side and more engaged with elevation in the shoulders.  I also have NO contact to speak of on the curb rein.  It is an ongoing process!

de la Guerniere said, “The mouthpiece has to be chosen based on the inner construction of the horse’s mouth, the levers in relation to his neck and the curb chain based on the sensitivity of his chin.”

Of course, as with any bit, its severity is directly related to the skill of the user.  For example, while one might assume that a shorter shanked curb is less severe, its effects are felt more quickly and so it is not ideal for someone with unsteady hands.

ThirdLevelTackShack
Anna at a show in July– here you can see that I have too much contact on the curb, and the adjustment has brought the bit almost to horizontal.  This isn’t right either!  Good thing Anna is tolerant.  What I like in this photo though is that she is well engaged, reaching over her back, and is closer to level balance.  When you are not genetically blessed with uphill carriage, it takes quite a bit of weightlifting to get there.  This lovely photo is from MKM Equine.

I soon found that fitting the bits correctly, including consideration of the placement of the noseband, is almost an art form.  I still don’t think I have the adjustment just right, as will be seen in some of the photos here.

img_1359-1
Anna after a summer ride in which she did some of her first tempi changes! Thank you to the double for our more refined control!

I have ridden in doubles before, but it was only over the course of this season that I realized how little I really understood about the bridle, its use, and its effects.  The horse is only ready to begin using a double when they have developed a degree of collection and self-carriage.  When the hindquarter is properly engaged, the horse is then better able to lift their withers and base of the neck.  The curb uses even pressure to cause the horse to yield with relaxation in their lower jaw.

I was really on the fence about whether or not Anna was ready to start working in the double, because of our ongoing connection issues.  But after a session with my dear friend Jen Verharen in March, I felt sufficiently confident to at least start asking her to hack around in the double and get used to carrying two bits in her mouth.  Anna’s first ride in the double was only remarkable in that it was utterly unremarkable.  “Ho hum,” she seemed to say.  Just another day at the office.

img_0568
After her first ride in the double.  Please do not judge me for the extremely disorganized cheekpieces.  I promise that they got sorted out for the next ride! And it was raining that day– this isn’t all sweat.  🙂

I began riding Anna in her double once per week, usually on days when I was mostly doing stretching work.  Even before I started to take a greater feel through the curb rein, I noticed an improvement in the shape of her topline and neck, which I attribute (perhaps falsely) to the style of her bridoon.  Anna’s usual snaffle is a medium thickness KK loose ring with a lozenge; the bridoon on her double is a thin single jointed loose ring.  I wonder if the simplicity of the bridoon is more comfortable for her; of course, I haven’t actually gotten around to swapping out her regular snaffle to determine this! Perhaps this is a project for the winter season.

Gradually, I began to take more feel on the curb rein and introduced Anna to gentle pressure from the leverage bit.  I found that it was important to make sure that she was sufficiently loosened first, and already reaching through her back, before I took this additional contact.  When I attended a clinic with Jan Ebeling in April, I brought the double with me, but I didn’t feel confident enough yet to actually bring it out in such a public venue.

So when I took Anna down centerline for the first time at Third Level in June, I had had no direct coaching with her in the double.  However, I felt that its use sufficiently improved Anna’s outline and way of going such that it justified its use.  In reviewing the photos, I can tell that the curb helped to improve her elevation in the trot work, but I was not fully utilizing its benefits to help her in the canter. I knew I was still being too tentative.

Anna Third Level Debut 026
In this photo from Anna’s Third Level debut, you can see that I am not really using the curb rein.

Thankfully, I was able to work with Verne Batchelder over five sessions in July, August and September, which helped us to make excellent progress and gave me better insight into the use of the double during this horse’s training.  Verne encouraged me to ride Anna in the double more frequently, citing its positive effects on achieving a more correct shape through her topline and especially in her neck.  “Do not go into battle without your gear,” he laughed, as he also encouraged me to picture Anna working more towards Third Level Test 3 than Test 1.

Most of our sessions focused on positioning Anna’s neck such that she was unable to use it to block the flow of energy.  Usually this involved taking her nose slightly past the degree of flexion in her neck, waiting for her to relax, then gently straightening her by using my outside elbow.  Verne emphasizes the need to be able to swivel the horse’s head and neck at the poll; this helps to develop the muscles of the upper neck to the degree where it actually draws up and refines the area around the throatlatch.

img_2250
So I keep struggling with the adjustment of the curb chain; here you can see that the shank of Anna’s curb tends to align too much with her lips.  It should be closer to 45 degrees in relation to her bars.

Anna has quite a good walk, and really is capable of achieving scores of “8” or higher on these movements, and so we played with some walk exercises which also would help to further improve her connection. We did a series of half turns in the walk, all the while asking her to take a rounder outline through her topline and neck, more towards an FEI level of carriage, for short periods.  These turns were larger than competition sized, and we worked towards shorter, quicker steps.  This technique should help to develop greater activity in the half pass. Afterwards, we returned to forward riding on lines and larger circles.

img_2097-1
Anna is at her winter headquarters at High Knoll Equestrian Center this year. 

Flying changes are actually quite easy for Anna, and these are also an opportunity for higher scores in the show ring.  Verne worked with us on riding changes with greater elevation of the forehand, so that they could become bigger and more expressive.  He encouraged a gentle lift of the inside snaffle rein during the change to coincide with the leg cue; this will lay the foundation for a prompter response to a subtle aid in tempi changes later on.

Finally, we spent some time working on developing Anna’s medium trot.  The medium gaits are defined by their uphill tendency, which is of course the result of better engagement, self-carriage and true collection.  The horse should lift their shoulders and withers, not just flick the front feet. If the rider only thinks about power, most often the horse will do a lengthening and instead fall to their forehand.  In the double, Verne reminded me to keep my elbows bent and to focus on riding Anna’s shoulders up.  We increased the thrust for a few steps at a time, using these as building blocks to develop strength and carrying power.

Verne feels that the double bridle is a valuable training tool for a horse like Anna, who lacks natural elevation.  “The double bridle helps with elevation of the shoulder and neck in horses which are not naturally elevated,” says Verne.  “The withers follow the reins, but the rider cannot just lift the hand.  They must keep an active half halt and the connection into their elbow.”  I learned too that it is extremely important to keep a steady feel on the snaffle, not pulling just holding, whenever Anna was pushing towards a higher degree of balance and throughness.

img_1858
Doing some stretching work in the snaffle.

I always like to give Anna a little down time as I transition back to full time work in the fall, so in September we hung the double up for a few months and focused on stretching in the snaffle and hacking on the trails.  Even without the influence of the curb, it is clear that the work we have done in the double has helped to improve the shape and correctness of Anna’s topline.

img_1608
And when we go out hacking, it is usually in a mechanical hackamore, which is what she is wearing here, though I guess it is hard to tell!

There has been some debate in recent years regarding whether the double bridle should remain mandatory equipment at the FEI levels; when showing nationally, American riders can choose to ride FEI tests in a snaffle alone.  There seems to be some belief that those who can do Grand Prix in a snaffle are better riders.  But in the right hands, the double bridle should be regarded as “an instrument of finest understanding between horse and rider” (Rottermann, Eurodressage 11/3/14). A correctly trained horse will probably do well no matter which type of bridle they are wearing.

As far as Anna and I go, we of course need to continue to improve the quality of our communication.  I am sure there are some riders and trainers who will judge me for choosing to work this horse in a double bridle before every bit and piece of Third Level work was fully confirmed.  But truthfully, it seems like it was the right choice for this horse, and using this tool tactfully has helped to further her training and improved her strength and suppleness.

img_2253
Happy Holidays from Annapony and I! 

Sources

Edwards, E. Hartley.  Saddlery. London: JA Allen and Co, Ltd.  1987.

Politz, Gerhard.  “History of Bits, Evolution of the Double Bridle”. Posted 7/17/2008 (www.equisearch.com/articles/double_bridle_071708)

Rottermann, Silke. “The Double Bridle: An Instrument of Understanding”. Posted 11/3/2014. (www.euroressage.com/equestrian/2014/11/03/double-bridle-instrument-understanding)


Bernie Traurig: a Solution to Every Problem

Clinicians that have trained and competed at the elite levels in multiple disciplines, have a depth of knowledge and experience that is the accumulated wisdom from countless types of horse and mentors.  Bernie Traurig, founder of www.equestriancoach.com, is just such a clinician, and he has made it his mission to give back to equestrian sport by improving access to top notch instruction, exercises and lessons.

Traurig recently gave a three day jumping clinic at Ridgeway Stables in Dover, NH, where he engaged auditors, riders and even his ring crew with tips, theory, questions and feedback.  Regardless of the level of horse or rider, Traurig’s advice and instruction centered on the importance of correct basics, equine responsiveness to appropriately applied aids, selecting the best equipment for the job and of course, always thinking like a horseman.

Here are five of the recurring themes Traurig emphasized throughout sessions which ranged from 2’9” to 3’6”.

#1: Basic Bitting is Best

Traurig believes that the best bit for each horse is the one which will offer the rider sufficient control and effectiveness in the aids in the mildest way possible.  “I don’t care what bit you have in the horse’s mouth, so long as it isn’t abrasive and works for the horse,” said Traurig.  “School in the mildest bit suitable for the horse and rider.  The horse has to accept pressure in a comfortable way.”

In fact, Traurig travels with a ‘bit bag’ and made frequent adjustments throughout the weekend to many horses’ equipment.  Every change was made on an experimental basis, with a willingness to adjust again if the change wasn’t working.

“I like to start with a single jointed bit and see how the horse responds,” Traurig said.  “If the horse has an extremely low palate, they may need a double joint.  I don’t like when [riders] just go to the gadget.  People tend to go wrong with gadgets and sharp or thin bits.”

While Traurig is not opposed to the use of leverage bits when they are required, he thinks there is a real art in finding what level of pressure a horse is happiest with on their bars.  “Stick with classical bits,” said Traurig.  “Tack rooms and tack stores should have walls and walls of Bert de Nemethy bits, not walls and walls of whatever the latest bitting fad is.”

img_1077

#2 Constantly Improve Responsiveness

Regardless of experience level, each group’s warm up began with a period of establishing an energetic and active walk.  “This is the first step in putting the horse on the aids,” said Traurig. “Your horse must always march forward from your leg, with their nose reaching forward.  The rider must have a soft contact, not loose reins.  There are two ways to walk—totally off the contact or on a correct rein.  When going between them, you do not want to disturb the walk or the movements of the neck.”

Traurig reminded riders that their leg must always be on the horse’s “go” button, and that the horse’s response to forward is most important. “Never increase the pressure from your leg unless you want a response, whether asking the horse to move forward or sideways,” said Traurig.  “Otherwise, your leg should hang passively.”

In their warm up, most groups performed a variation of an exercise which helped to improve the horse’s responsiveness to both their rein and leg aids.  At the trot, Traurig had them perform a “shoulder yield”, guiding the front of the horse towards the rail with an opening outside rein away from the neck and an indirect inside rein at the neck.   Both hands were taken out to the side, in the direction to which the shoulders should move.  “Use very little leg,” coached Traurig.  “This is mostly a rein cue.  You are looking to displace the shoulders. ”

The more riders practiced the rein yield, the more subtle their aids became.  “Eventually the horse responds so well that you don’t see the aids, and you can use a subtle opening rein to shift the horse’s line without slowing them down,” said Traurig.  “This is excellent for a hunter class.”

Traurig reminded riders that the inside rein shapes the horse’s neck.  “Inside leg to outside rein is good but there is no shape in the neck,” said Traurig.  “Every book you read says indirect rein goes to the opposite hip.  But Littauer says that this depends on the effect desired.  When used toward the outside hip the indirect rein affects the whole body, but when used towards the other hand it only affects the head and neck.  The rein aids and the leg aids must be blended together.  You have two legs and two hands.  They all have to work together.”

img_1071

Riders next performed a leg yield away from the rail, then back to the rail, first in the walk and then the trot.  “Sitting trot works best for this,” saidTraurig.  “If you feel you can’t use your leg, then drop your stirrups.”

Traurig reminded riders that how their mount responded to the aids on the flat would translate into the jumping.  “You have to know if you see a forward distance that your horse will react,” said Traurig.  “The horse has to be in front of the leg.  If your horse ignores the aids, it’s okay to be a bit firmer once in a while.”

#3 Constantly Improve Position

“You should fix your position flaws not because of ‘good equitation’ but for correct basics,” said Traurig.

Traurig gave riders well balanced feedback, quick to offer praise even when some elements of an exercise went wrong.  In particular, he helped the riders to learn to feel when their positions were hindering their ride.

“The goal in the walk is to have elastic arms, allowing the horse to accept a soft feel and reach long over their backs,” said Traurig.  Several riders struggled at first to find the right balance between holding the reins too much or not enough, and Traurig helped them to find the middle ground.

In the warm up work, riders were told to stretch out at the two point in the trot, creating a 30 degree angle in the hip. Many riders felt their lower legs slide back when they transitioned into two point.  “When the leg goes back too far, you have to exaggerate holding it too far forward for at least thirty days,” said Traurig.  “Then it will be normal.”

img_1076

Traurig helped riders to become more aware of their release style.  “A crest release on a hunter is fine, and the long crest release is fashionable, but it has a longer recovery time when you need to correct the line,” said Traurig.  “The automatic release allows more refined use of the rein aids in the air.  Riders can start using an opening rein to take their horse out to the rail before they even land.”

Even experienced riders can benefit from position checks.   On day two, Traurig challenged the most advanced riders to warm up without their irons in the counter canter.  He then had them raise their outside arm above their head, then drop the arm to hang behind their knee, all while maintaining the counter canter.  After returning to sitting trot, the riders were told to use their inside hand to grab the pommel to really pull their seat down.  Finally, they were asked to post without their irons for ten feet, then hold two point for ten feet, continuing this around the arena.

“When I was on the Team, we were each longed at least once per week,” said Traurig.  “Longeing is the best way to develop increased independence in the seat, and daily longeing will help make anyone a better rider.”

img_1061

#4 Perfect Practice Makes Perfect

A lot of becoming an effective rider is about knowing what to do and when, in just the right amount.  To achieve this end requires hours of practice; but as we all know, only correct practice will build the long term responses we want in horse and rider.

One young horse became hot and excited when approaching the fences.  “Repetition of schooling exercises which decrease anxiety and the aggressive approach to the jump are in order,” said Traurig.  “It is tedious, but necessary.”

For this horse, Traurig prescribed trotting jumps with plenty of halts after fences, with an emphasis on a gradual rather than abrupt transition.  “Take a few strides,” said Traurig. “As you practice it more, you can expect the halt to become more prompt.”

Once the horse jumped more quietly, he was allowed to canter a few fences, followed by a halt.  Eventually this would build to cantering into a line and trotting out.  “Be a horseman,” said Traurig.  “Always quit when the horse has been good, especially when they are young and green and have done well.”

Another experienced horse had a habit of stopping at new fences.  Traurig told the rider that she must carry a crop that is “worthy of a correction”.  “Do not change how you ride at a show,” said Traurig.  “Do not be intimidated by the crowd.  If the horse stops, you must give the correction.  Ride your horse absolutely quiet unless they stop.  Then you make the correction.  And then you ride like they are the best horse in the world.  You cannot ride a stopper aggressively.”

img_1066

#5 Details Matter

To be a truly excellent horseman, the rider must always pay attention to the smallest elements of precision, whether it is in terms of care, tack adjustment, or ridden performance.

Traurig’s sharp eye missed no detail and gave all participants a sense of the type of attention required.  For one example, he reminded everyone that spurs must be worn on the spur rest, or else it is not possible for the rider to apply their leg without using the spur.

img_1082

In another correction, Traurig told riders that they must be precise with the timing for the flying change.  “Do not do the change on a curved line,” coached Traurig.  “Hold them straight.  There are three fundamentals to riding a good change.  First, you need impulsion which you can balance, straightness produced by holding the line with an opening rein on the outside, and the correct timing and intensity of the leg aid, which is determined by who you are riding.  If the horse is hot or sensitive, you may have to stay in half seat to help them stay quiet.

If a horse has not yet learned the flying change, and especially when there is little room on the recovery side of a fence, riders should plan to trot at the corner no matter what.  “It is better to do this than to allow the horse to start swapping in front without changing behind,” said Traurig.

Knowing what is expected for your specific jumping discipline also falls in this category.  “For example, if there is a bending line on your hunter course, most of them are smooth so both holding the counter canter or doing a change is acceptable,” said Traurig.  “In lower level equitation, the same is true, but in higher levels you must either land on your new lead or do the flying change.”

img_1069

Even knowing how to ride a line well comes down to details.  “See your jump first, then look beyond it,” said Traurig.  “Approach management is key.  For example, knowing where to come to on the in of your bending line to effect the distance is a skill.  The trick is to hold your line on the landing so as to not put you on a half stride.”

Traurig told riders that for any line which requires a turn, the best technique is to look for the approach to the second fence first, then back up the line to where you have to make the turn from.  “Whenever you don’t see [a distance], stay out further and shorten the stride a little to buy some time,” said Traurig.

Finally, Traurig reminded riders that every horse has their own “right” canter, a speed at which they jump the best out of.  “You can jump any course in the world with good track control and the ability to adjust the length of stride,” said Traurig.

Final Take Aways

Traurig is an attentive and enthusiastic educator, passionate about communicating with all present the fundamental basics which underlay any successful equestrian performance.  Blending a commitment to correct basics with his precise ability to customize exercises and tools to suit each unique pair, Traurig is a master at giving riders the information they need to know, right when they need to hear it.

Traurig’s final piece of advice?  “The most important part of your body when you ride is your brain,” said Traurig.

This blog was previously posted on Horse Network.  Thanks for sharing!